selenium webdriver或Appium+testng+ant+jenkins的整合方法
自動化測試的執行貌似離不開 jenkins,好吧,其實我覺得真心沒有必要那麼依賴,但是現實如此,我們就庸俗一下吧,這次我們就看看如何整合
1、指令碼搞定沒有問題
2、testng、reportng搞定沒問題,不要問我怎麼弄
3、ant搞定(https://ant.apache.org/bindownload.cgi),並配置好環境變數,自行去google
4、jenkins去官網下載windows版本(https://jenkins.io/download/),一路next即可安裝
接下來,我們說一下整合執行的邏輯: jenkins>ant(build.xml)>指令碼,其中的核心就是build.xml的編寫
build.xml內容如下,裡面的路徑需要根據實際情況編寫
<?xml version="1.0" encoding="UTF-8"?> <project name="Demo" default="run" basedir="."> <echo message="import lib" /> <path id="run.classpath"> <fileset dir="${basedir}/lib"> <include name="**/*.jar" /> </fileset> </path> <taskdef name="testng" classname="org.testng.TestNGAntTask" classpathref="run.classpath" /> <target name="clean"> <delete dir="build"/> </target> <target name="compile" depends="clean"> <echo message="mkdir"/> <mkdir dir="${basedir}/src/com/xiaoqiang/po/build/classes"/> <javac srcdir="src" destdir="${basedir}/src/com/xiaoqiang/po/build/classes" debug="on" encoding="UTF-8" includeantruntime="false"> <classpath refid="run.classpath"/> </javac> </target> <path id="runpath"> <path refid="run.classpath"/> <pathelement location="${basedir}/src/com/xiaoqiang/po/build/classes"/> </path> <target name="run" depends="compile"> <echo message="Compile dir is: ${basedir}" /> <testng classpathref="runpath" outputDir="test-output" haltOnfailure = "true" useDefaultListeners = "false" listeners="org.uncommons.reportng.HTMLReporter,org.testng.reporters.FailedReporter" > <xmlfileset dir="${basedir}/src/com/xiaoqiang/po" includes="testng_all.xml"/> <jvmarg value="-ea" /> <sysproperty key="org.uncommons.reportng.title" value="appium by java 小強測試品牌"/> </testng> </target> </project>
5、啟動jenkins服務,瀏覽器訪問http://localhost:8080稍等一會就可以看到頁面(如果是最新版的jenkins需要有一個安裝過程,都是簡單的英文,不難,不會的童鞋自行google)
6、 系統管理 >外掛管理,安裝AntPlugin 外掛、 TestNG Results Plugin 外掛、 HTML Publisher plugin 外掛(需要 翻 牆 安裝,否則失敗率較高)
7、 系統管理 ->指令碼命令列,輸入如下命令,並執行(修改策略,可以讓外部的js、css等執行顯示,避免白頁的出現):
System.setProperty("hudson.model.DirectoryBrowserSupport.CSP","sandbox; default-src 'self';")
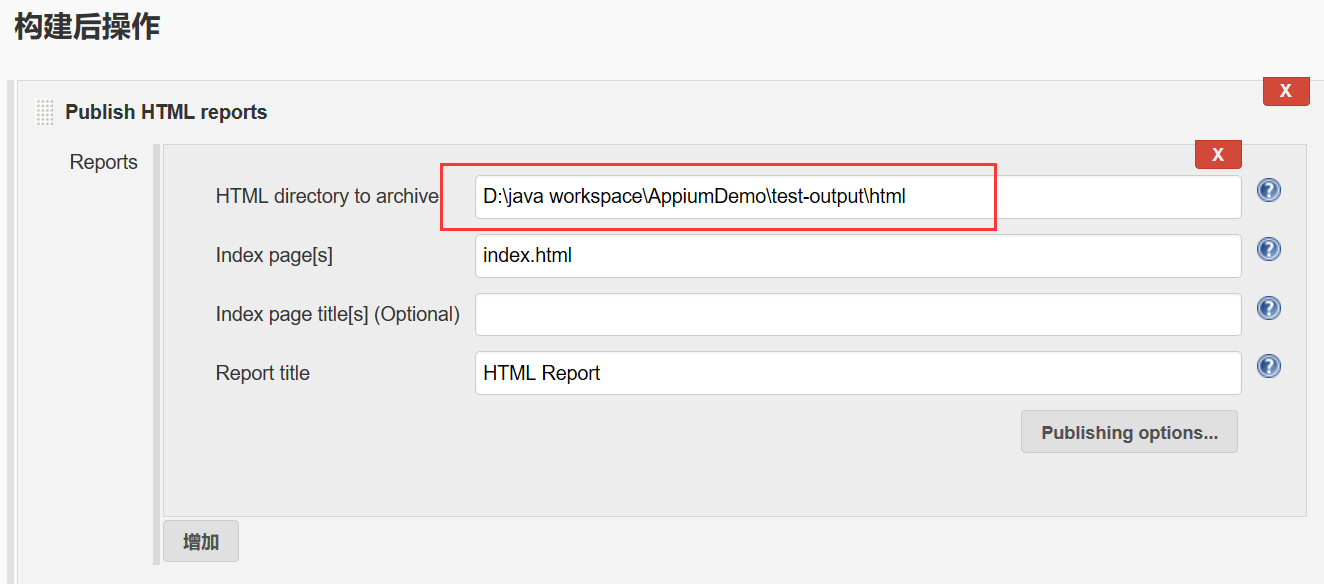
8、新建一個自由風格的job


9、執行檢視報告

來自 “ ITPUB部落格 ” ,連結:http://blog.itpub.net/69942496/viewspace-2653451/,如需轉載,請註明出處,否則將追究法律責任。
相關文章
- from selenium import webdriverImportWeb
- selenium webdriver如何新增cookieWebCookie
- selenium3 webdriver啟動火狐、chrome、edge、Safari瀏覽器的方法WebChrome瀏覽器
- selenium-webdriver的二次封裝(十)Web封裝
- Java Selenium WebDriver 控制瀏覽器(三)JavaWeb瀏覽器
- Selenium的WebDriver API元素定位中的XPath和CSSWebAPICSS
- [python][selenium][web自動化]webdriver的元素定位方式PythonWeb
- 新手入門Java自動化測試的利器:Selenium WebDriverJavaWeb
- 入門:前端自動化測試karma,Backstopjs,Selenium-webdriver,Mocha前端JSWeb
- python selenium webdriver多執行緒啟動多個瀏覽器PythonWeb執行緒瀏覽器
- 一行js程式碼識別Selenium+Webdriver及其應對方案JSWeb
- 【python爬蟲實戰】使用Selenium webdriver採集山東招考資料Python爬蟲Web
- 網路爬蟲之使用pyppeteer替代selenium完美繞過webdriver檢測爬蟲Web
- Selenium,Selenium使用方法(三)
- Selenium,Selenium使用方法(二)
- Selenium,Selenium使用方法(一)
- Python Selenium操作Cookie的方法PythonCookie
- Selenium switch_to方法
- Selenium ActionChains、TouchAction方法AI
- python中selenium常用的api方法PythonAPI
- python 呼叫 webdriverPythonWeb
- Selenium用法詳解 -- Selenium3 常用方法
- Selenium Web元素定位方法Web
- python+selenium方法大全Python
- Jenkins 執行 selenium 自動化測試指令碼,呼叫 webdriver 時報錯:[Errno 8] Exec format error:Jenkins指令碼WebORMError
- 請教下 webdriver.Chrome () 中的.Chrome () 怎麼跳轉到 chrome 資料夾下的 webdriverWebChrome
- Selenium系列教程- 04常用的元素定位方法
- WebDriver環境搭建使用Web
- python 爬蟲 Demo webdriverPython爬蟲Web
- Python之selenium:selenium庫的簡介、安裝、使用方法之詳細攻略Python
- webdriver最新版下載Web
- Selenium4+Python3系列(十三) - 與docker中的jenkins持續整合PythonDockerJenkins
- selenium+python設定爬蟲代理IP的方法Python爬蟲
- Selenium+Java自動化測試常用的方法Java
- Selenium系列教程-05 findElements 方法詳解
- selenium4 selenium_handless的使用
- Selenium系列教程-10 如何執行JavaScript方法JavaScript
- pip安裝selenium超時解決方法