一、簡介
可以實現對本地檔案的 增、刪、改、重新命名等操作的監控,通過登入遠端檔案監控系統,獲取一段時間內本地檔案的變化情況。
系統功能圖如下:

流程圖如下:

二、本地檔案監控程式的實現(C++)
呼叫 windows api 監控本地檔案操作,將對應的檔案操作上傳到遠端資料庫端。
#include <Windows.h>
#include <string>
#include <iostream>
#include <iomanip>
#include <tchar.h>
#include <winsock.h>
#include "include/mysql.h"
#include <ctime>
#include <thread>
#pragma comment(lib,"lib/libmysql.lib")
#pragma comment(lib,"lib/mysqlclient.lib")
using namespace std;
/*
通過CreateFile函式開啟監控目錄,獲取監控目錄的控制程式碼
API函式ReadDirecotryChangesW,實現檔案監控操作
*/
//字串替換(全部)
string replace(string& base, string src, string dst)
{
int pos = 0, srclen = src.size(), dstlen = dst.size();
while ((pos = base.find(src, pos)) != string::npos)
{
base.replace(pos, srclen, dst);
pos += dstlen;
}
return base;
}
//void DirectoryMonitoring();
void DirectoryMonitoring(const TCHAR * disk,MYSQL &mysql)
{
//cout << __FUNCTION__ << " is called." << endl; //__FUNCTION__,當前被呼叫的函式名
string sql;
///mysql下面
DWORD cbBytes; //Double Word Windows.h中
char file_Name[MAX_PATH]; //設定檔名
char file_Name2[MAX_PATH]; //設定檔案重新命名後的名字
char notify[1024];
int count = 0; //檔案操作次數
TCHAR *dir =(TCHAR *) _T(disk); //_T 確保編碼的相容性,磁碟名
//呼叫CreateFile(Win Api)來獲得指向一個物理硬碟的控制程式碼,CreateFile函式開啟監控目錄,獲取監控目錄的控制程式碼。
HANDLE dirHandle = CreateFile(dir, GENERIC_READ | GENERIC_WRITE | FILE_LIST_DIRECTORY, //訪問模式對裝置可以讀寫資料
FILE_SHARE_READ | FILE_SHARE_WRITE, //共享模式可讀可寫
NULL, //檔案的安全特性,無
OPEN_EXISTING, //檔案必須已經存在,若不存在函式返回失敗
FILE_FLAG_BACKUP_SEMANTICS, //檔案屬性
NULL); //用於複製檔案控制程式碼
if (dirHandle == INVALID_HANDLE_VALUE) //是否成功
{
cout << "error" + GetLastError() << endl;
}
memset(notify, 0, strlen(notify)); //給notify賦值為0,即清空陣列
FILE_NOTIFY_INFORMATION *pnotify = (FILE_NOTIFY_INFORMATION*)notify; //結構體FILE_NOTIFY_INFORMATION,儲存檔案操作資訊其action屬性
cout << "正在監視檔案" << endl;
while (true)
{
if (ReadDirectoryChangesW(dirHandle, ¬ify, 1024, true, //對目錄進行監視的控制程式碼;一個指向FILE_NOTIFY_INFORMATION結構體的緩衝區,其中可以將獲取的資料結果將其返回;lpBuffer的緩衝區的大小值,以位元組為單位;是否監視子目錄.
FILE_NOTIFY_CHANGE_FILE_NAME |
FILE_NOTIFY_CHANGE_DIR_NAME
| FILE_NOTIFY_CHANGE_SIZE, //對檔案過濾的方式和標準
&cbBytes, NULL, NULL)) //將接收的位元組數轉入lpBuffer引數
{
//寬位元組轉換為多位元組
if (pnotify->FileName)
{
memset(file_Name, 0, strlen(file_Name));
WideCharToMultiByte(CP_ACP, 0, pnotify->FileName, pnotify->FileNameLength / 2, file_Name, 99, NULL, NULL);
}
//重新命名的檔名
if (pnotify->NextEntryOffset != 0 && (pnotify->FileNameLength > 0 && pnotify->FileNameLength < MAX_PATH))
{
PFILE_NOTIFY_INFORMATION p = (PFILE_NOTIFY_INFORMATION)((char*)pnotify + pnotify->NextEntryOffset);
memset(file_Name2, 0, sizeof(file_Name2));
WideCharToMultiByte(CP_ACP, 0, p->FileName, p->FileNameLength / 2, file_Name2, 99, NULL, NULL);
}
string str=file_Name;
str = replace(str, "\\", "/");
str = dir+str;
string str2=file_Name2;
str2 = replace(str2, "\\", "/");
str2 = dir+str2;
string link = "-->";
//設定型別過濾器,監聽檔案建立、更改、刪除、重新命名等
switch (pnotify->Action)
{
case FILE_ACTION_ADDED: //新增檔案
count++;
cout << count << setw(5) << "File Add:" << setw(5) << file_Name << endl;
sql = "begin;";
mysql_query(&mysql, sql.c_str());
sql = "insert into file_info(action,name)\
values (\"File Added\",\""+str+"\");";
if (mysql_query(&mysql, sql.c_str()))
{
cout << "line: " << __LINE__ << ";" << mysql_error(&mysql) << mysql_errno(&mysql) << endl;
}
sql = "commit;";
mysql_query(&mysql, sql.c_str());
break;
case FILE_ACTION_MODIFIED: //修改檔案
cout << "File Modified:" << setw(5) << file_Name << endl;
sql = "begin;";
mysql_query(&mysql, sql.c_str());
sql = "insert into file_info(action,name)\
values (\"File Modified\",\"" + str + "\");";
if (mysql_query(&mysql, sql.c_str()))
{
cout << "line: " << __LINE__ << ";" << mysql_error(&mysql) << mysql_errno(&mysql) << endl;
}
sql = "commit;";
mysql_query(&mysql, sql.c_str());
break;
case FILE_ACTION_REMOVED: //刪除檔案
count++;
cout << count << setw(5) << "File Removed:" << setw(5) << file_Name << endl;
sql = "begin;";
mysql_query(&mysql, sql.c_str());
sql = "insert into file_info(action,name)\
values (\"File Deleted\",\"" + str + "\");";
if (mysql_query(&mysql, sql.c_str()))
{
cout << "line: " << __LINE__ << ";" << mysql_error(&mysql) << mysql_errno(&mysql) << endl;
}
sql = "commit;";
mysql_query(&mysql, sql.c_str());
break;
case FILE_ACTION_RENAMED_OLD_NAME: //重新命名
cout << "File Renamed:" << setw(5) << file_Name << "->" << file_Name2 << endl;
sql = "begin;";
mysql_query(&mysql, sql.c_str());
sql = "insert into file_info(action,name)\
values (\"File Renamed\",\"" + str+link+str2 + "\");";
if (mysql_query(&mysql, sql.c_str()))
{
cout << "line: " << __LINE__ << ";" << mysql_error(&mysql) << mysql_errno(&mysql) << endl;
}
sql = "commit;";
mysql_query(&mysql, sql.c_str());
break;
default:
cout << "未知命令" << endl;
}
}
}
CloseHandle(dirHandle);
}
int _tmain(int argc, _TCHAR* argv[])
{
const TCHAR * disk1 = _T("C://");
const TCHAR * disk2 = _T("D://");
const TCHAR * disk3 = _T("E://");
MYSQL mysql;
mysql_init(&mysql);
// 連線遠端資料庫
if (NULL == mysql_real_connect(&mysql, "database_host", "username", "password", "mysql", 3306, NULL, 0))
{
cout << __LINE__ << mysql_error(&mysql) << mysql_errno(&mysql) << endl;
throw - 1;
}
//進入資料庫hr_1
string sql = "use hr_1;";
if (mysql_query(&mysql, sql.c_str()))
{
cout << "line: " << __LINE__ << ";" << mysql_error(&mysql) << mysql_errno(&mysql) << endl;
throw - 1;
}
mysql_query(&mysql, "SET NAMES GBK"); //資料庫編碼格式
thread t1(DirectoryMonitoring, disk1,ref(mysql));
thread t2(DirectoryMonitoring, disk2,ref(mysql));
thread t3(DirectoryMonitoring, disk3,ref(mysql));
t1.join();
t2.join();
t3.join();
return 0;
}
三、後端的實現(Java)
後端框架:SpringBoot 依賴:mybatis、lombok
檔案資訊類:
package com.example.file_monitor;
import lombok.Data;
import lombok.NoArgsConstructor;

/*
檔案資訊實體物件
 */
@Data
@NoArgsConstructor
public class FileInfo {
    private int id;
    private String action;
    private String name;
    private String time;

    public FileInfo(int id,String action,String name,String time){
        this.id=id;
        this.action=action;
        this.name=name;
        this.time=time;
    }
}
資料庫操作介面:
import org.apache.ibatis.annotations.Mapper;
import org.apache.ibatis.annotations.Param;
import org.apache.ibatis.annotations.Select;

import java.util.List;

/*
資料庫操作介面
 */
@Mapper
public interface FileMapper {
    //獲取檔案監控資訊列表
    @Select("SELECT * FROM file_info")
    List<FileInfo> findAllFile();

    //分頁獲取
    @Select("SELECT * FROM file_info LIMIT #{start},#{end}")
    List<FileInfo> findFile(@Param("start") int start,@Param("end") int end);

    //刪除
    @Delete("DELETE FROM file_info WHERE id= #{id}")
    int deleteFile(@Param("id") int id);

    //統計各種操作
    @Select("SELECT COUNT(*) FROM file_info WHERE action= #{a}")
    int getCount(@Param("a") String action);
}
控制類
package com.example.file_monitor;

import org.springframework.beans.factory.annotation.Autowired;
import org.springframework.web.bind.annotation.*;

import java.util.ArrayList;
import java.util.List;

@RestController
@RequestMapping(value = "api")
public class FileController {

    @Autowired
    private FileMapper fileMapper;

    @Autowired
    private ApiJson apiJson;

    //分頁
    @GetMapping("/data")
    public ApiJson getFileList(@RequestParam("curr") int page,@RequestParam("nums") int limit){
        int start=(page-1)*limit;
        int end= limit;
        List<FileInfo> data=fileMapper.findFile(start,end);
        apiJson.setCode(0);
        apiJson.setCount(100);
        apiJson.setMsg("test");
        apiJson.setData(data);
        return apiJson;
    }

    //統計
    @GetMapping("/count")
    public List<Integer> getCount(){
        int mod=fileMapper.getCount("File Modified");
        int add=fileMapper.getCount("File Added");
        int dele=fileMapper.getCount("File Deleted");
        int reName=fileMapper.getCount("File Renamed");
        List<Integer> res=new ArrayList<Integer>();
        res.add(mod);
        res.add(add);
        res.add(dele);
        res.add(reName);
        return res;
    }

    //刪除
    @CrossOrigin
    @GetMapping("/delete")
    public int delFile(@RequestParam("id") int id){
        return fileMapper.deleteFile(id);
    }

    //獲取所有資訊
    @CrossOrigin
    @GetMapping("/all")
    public  List<FileInfo> getAllFileInfo(){
        return fileMapper.findAllFile();
    }
}
若前端使用 layui 框架,需要 json 格式的資料,所以利用該類生成 json 資料
package com.example.file_monitor;

import lombok.Data;
import lombok.NoArgsConstructor;
import org.springframework.stereotype.Component;

import java.util.List;

@Data
@NoArgsConstructor
@Component
public class ApiJson {
    private int code;
    private String msg;
    private int count;
    private List<FileInfo> data;

    public ApiJson(int code,String msg,int count,List<FileInfo> data){
        this.code=code;
        this.msg=msg;
        this.count=count;
        this.data=data;
    }

}
四、前端實現(layui)
藉助 ajax 與後端進行資料交換
例如:
    function sendAjaxGet() {
        $.ajax({
            type: "GET",
            url: "/api/count",
            success: function(data){
                Chart(data[0],data[1],data[2],data[3]);
            },
            error: function (message) {

            }
        });
    }
    sendAjaxGet();
藉助 layui table 實現表格的生成 layui 表格
藉助 Echarts 實現統計圖的生成 echarts
詳情見 github 專案:(還沒上傳)

五、前端實現(Vue)
5.1 簡介
之前使用的是 layui 搭建前端,最近在學 Vue,所以打算利用 Vue 前後端分離重寫一下前端。
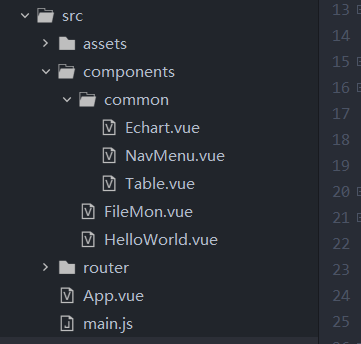
目錄結構:
5.2 FileMon.vue
FileMon 中劃分為三大部分:頭部(導航欄NavMenu)、側邊欄(圖Echart)、main (表格)。
<template>
  <el-container>
    <el-header>
      <NavMenu></NavMenu>
    </el-header>

    <el-container>
      <el-aside width="500px">
        <Echart ref="ac_e"></Echart>
      </el-aside>
      <el-container>
        <el-main>
          <Table ref="ac_t" @exchange="exchange()"></Table>
        </el-main>
      </el-container>
    </el-container>

  </el-container>
</template>

<script>
  import NavMenu from './common/NavMenu.vue'
  import Table from './common/Table.vue'
  import Echart from './common/Echart.vue'

  export default {
    name: 'FileMon',
    components:{ NavMenu,Table,Echart },
    methods: {
      exchange: function() {
        this.$refs.ac_e.$data.ac = this.$refs.ac_t.$data.ac
        this.$refs.ac_e.loads()
      }
    }
  }
</script>

<style>
</style>
5.3 NavMenu
<template>

  <el-menu
    :default-active="activeIndex2"
    class="el-menu-demo"
    mode="horizontal"
    background-color="#545c64"
    text-color="#fff"
    active-text-color="#ffd04b">

    <el-menu-item index="1"></el-menu-item>
    <div style="right: 650px;position: fixed; color: #EEEEEE;top: 4px;">
      <h2>遠端檔案監控系統</h2>
    </div>
  </el-menu>

</template>

<script>
  export default {
    name: 'NavMenu'
  }
</script>

<style>
</style>
5.4 表格
<template>
    <el-table
      height="500"
      :data="tableData.filter(data => !search || data.name.toLowerCase().includes(search.toLowerCase()))"
      style="width: 100%">
      <el-table-column
        label="ID"
        prop="id">
      </el-table-column>
      <el-table-column
        label="操作型別"
        prop="action">
      </el-table-column>
      <el-table-column
        label="檔名"
        prop="name">
      </el-table-column>
      <el-table-column
        label="日期"
        prop="time">
      </el-table-column>
      <el-table-column
        align="right">
        <template slot="header" slot-scope="scope">
          <el-input
            v-model="search"
            size="mini"
            placeholder="輸入關鍵字搜尋"/>
        </template>
        <template slot-scope="scope">
          <el-button
            size="mini"
            @click="handleEdit(scope.$index, scope.row)">Edit</el-button>
          <el-button
            size="mini"
            type="danger"
            @click="handleDelete(scope.$index, scope.row)">Delete</el-button>
        </template>
      </el-table-column>
    </el-table>
</template>

<script>
  export default {
    name: 'Table',
    data: function() {
      return {
        tableData: [],
        search: '',
        ac: [0,0,0,0]   //統計檔案各類運算元量,供繪製餅圖
      }
    },
    methods: {
      handleEdit(index, row) {
        console.log(index, row)
      },
      handleDelete(index, row) {
        this.$axios.get('delete?id='+row.id).then(resp =>{
          console.log(resp.data)
          if( resp.data != 0){
            this.$alert('刪除成功')
            this.loads()    //每次刪除後更新一下表格中的資料
          }
        })
      },
      loads(){
        this.$axios.get('/all').then(resp =>{
          if( resp){
            this.tableData = resp.data
            this.counts()     //每次更新表格資料後,統計各類運算元量
            this.$emit('exchange')
          }
        })
      },
      counts(){
        var i
        for( i in this.tableData){   //這個 for 迴圈 i 是列表tableData的索引
          if(this.tableData[i].action == 'File Added') {this.ac[0] = this.ac[0]+1}
          else if(this.tableData[i].action == 'File Deleted') {this.ac[1] = this.ac[1]+1}
          else if(this.tableData[i].action == 'File Modified') {this.ac[2] = this.ac[2]+1}
          else  {this.ac[3] = this.ac[3]+1}
        }
      }
    },
    mounted:function(){
      this.loads()
    }
  }
</script>

<style>
</style>
5.5 餅圖
<template>
      <div>
      <!--卡片檢視區域-->
      <el-card>
          <!-- 2、為ECharts準備一個具備大小(寬高)的Dom -->
          <div id="main" style="width: 600px;height:500px;"></div>
      </el-card>
      </div>
</template>
<script>
import * as echarts from 'echarts'   //引入 echarts

export default {
  name: 'Echart',
  data: function () {
      return {
        ac: [0,0,0,0]
      }
    },
  methods:{
    loads: function() {
      // 3、基於準備好的dom,初始化echarts例項
      var myChart = echarts.init(document.getElementById('main'))
      // 4、準備資料和配置項
      // 指定圖表的配置項和資料
      var option = {
              title: {
                  text: '檔案監控資訊',
                  left: 'center'
              },
              tooltip: {
                  trigger: 'item'
              },
              legend: {
                  orient: 'vertical',
                  left: 'left',
              },
              series: [
                  {
                      name: '訪問來源',
                      type: 'pie',
                      radius: '50%',
                      data: [
                          {value: this.ac[0], name: '新增檔案'},
                          {value: this.ac[1], name: '刪除檔案'},
                          {value: this.ac[2], name: '修改檔案'},
                          {value: this.ac[3], name: '重新命名'},
                      ],
                      emphasis: {
                          itemStyle: {
                              shadowBlur: 10,
                              shadowOffsetX: 0,
                              shadowColor: 'rgba(0, 0, 0, 0.5)'
                          }
                      }
                  }
              ]
      }
      // 5、展示資料
      // 使用剛指定的配置項和資料顯示圖表。
      myChart.setOption(option);
    }
  },
  mounted: function() {
    this.loads()
  }
}
</script>
5.6 FileMon--表格--餅圖 之間的關係
Table.vue 中的 loads 函式,每次執行時 counts() 函式更新 ac 變數的值,並定義觸發 exchange 事件。
      loads(){
        this.$axios.get('/all').then(resp =>{
          if( resp){
            this.tableData = resp.data
            this.counts()
            this.$emit('exchange')
          }
        })
      },
FileMon.vue 監聽 exchange 事件,觸發時執行 exchange 函式
    <el-container>
      <el-aside width="500px">
        <Echart ref="ac_e"></Echart>
      </el-aside>
      <el-container>
        <el-main>
          <Table ref="ac_t" @exchange="exchange()"></Table>
        </el-main>
      </el-container>
    </el-container>
exchange 函式 取 Echart.vue 中的 ac 變數 賦值為 Table.vue 中的 ac 變數,呼叫 Echart.vue 變數的 load 方法。
    methods: {
      exchange: function() {
        this.$refs.ac_e.$data.ac = this.$refs.ac_t.$data.ac
        this.$refs.ac_e.loads()
      }
    }
  }
5.7 main.js
// The Vue build version to load with the `import` command
// (runtime-only or standalone) has been set in webpack.base.conf with an alias.
import Vue from 'vue'
import App from './App'
import router from './router'
import axios from 'axios'   //引入axios

//設定代理
axios.defaults.baseURL = 'http://localhost:8443/api'
//註冊全域性
Vue.prototype.$axios = axios

import ElementUI from 'element-ui';
import 'element-ui/lib/theme-chalk/index.css';

Vue.config.productionTip = false
Vue.use(ElementUI);


/* eslint-disable no-new */
new Vue({
  el: '#app',
  router,
  components: { App },
  template: '<App/>'
})
5.8 路由
import Vue from 'vue'
import Router from 'vue-router'
import HelloWorld from '@/components/HelloWorld'
import FileMon from '@/components/FileMon'

Vue.use(Router)

export default new Router({
  routes: [
    {
      path: '/',
      name: 'HelloWorld',
      component: HelloWorld
    },
    {
      path: '/fm',
      name: 'FileMon',
      component: FileMon
    }
  ]
})