本文是IMX6ULL開發板spi OLED驅動學習筆記,方便後面檢視時快速的回顧,而不需要一點點的看影片
影片地址:
https://www.bilibili.com/video/BV1Yb4y1t7Uj?p=144&spm_id_from=pageDriver&vd_source=1d93d6a5e22d4b223c6c3ac4f5727eb8
影片選集:P141 - P150
1、將檔案上傳到虛擬機器共享目錄

2、make編譯出驅動

3、修改裝置樹
vim 100ask_imx6ull-14x14.dts

&ecspi1 {
pinctrl-names = "default";
pinctrl-0 = <&pinctrl_ecspi1>;
fsl,spi-num-chipselects = <2>;
cs-gpios = <&gpio4 26 GPIO_ACTIVE_LOW>, <&gpio4 24 GPIO_ACTIVE_LOW>;
status = "okay";
oled: oled {
compatible = "100ask,oled";
reg = <0>;
spi-max-frequency = <1000000>;
dc-gpios = <&gpio4 20 GPIO_ACTIVE_HIGH>;
};
```
編譯裝置樹:
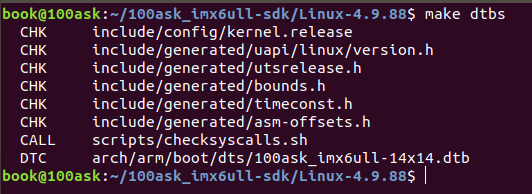
注意:必須退回到linux核心目錄裡編譯
將裝置樹檔案放到共享目錄:
`cp arch/arm/boot/dts/100ask_imx6ull-14x14.dts /home/book/nfs_rootfs/`
4、替換裝置樹
進入開發板,將裝置樹複製到/boot之後重啟
`mount -t nfs -o nolock,vers=3 192.168.5.11:/home/book/nfs_rootfs /mnt`

5、驗證裝置樹
進入裝置樹查詢oled
`cd /sys/firmware/devicetree/base`
`find -name "*oled*"`

進入oled目錄檢視:
`cd ./soc/aips-bus@02000000/spba-bus@02000000/ecspi@02008000/oled`

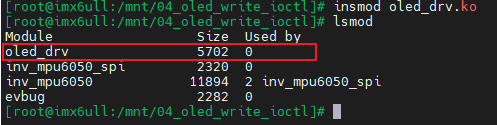
6、安裝驅動
·insmod oled_drv.ko·
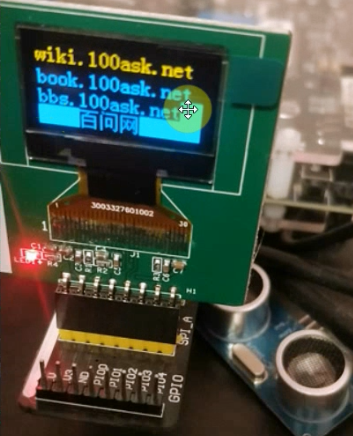
7、執行oled_test驗證
`./oled_test /dev/myoled`

> 本文由部落格一文多發平臺 [OpenWrite](https://openwrite.cn?from=article_bottom) 釋出!