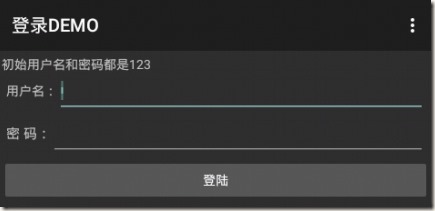
做應用型的APP肯定是要和網路互動的,那麼本節就來實戰一把Android訪問網路API,還是使用上節的DEMO:
一、準備API:
一般都採用Json作為資料交換格式,目前各種語言均能輸出Json串。
假如使用PHP輸出一段簡單的Json,可以這麼寫:
<?php
$arr = array ('users'=>array('mady','123'));
echo json_encode($arr);
?>
輸出的Json如下:
{"users":["mady","123"]}
也可以使用VS建立一個API直接序列化一個陣列,或者其他任何方式只要資料格式正確就沒問題。
二、實現網路API訪問:
首先訪問網路需要授權,也就是安裝時提醒打對勾的那部分:
開啟Bin/res/AndroidManifest.xml在根節點下面加入一個授權申請節點:
<uses-permission android:name="android.permission.INTERNET"/>
然後是訪問網路,這裡有一段從網上來的訪問類:
import org.apache.http.HttpEntity;
import org.apache.http.HttpResponse;
import org.apache.http.HttpStatus;
import org.apache.http.client.HttpClient;
import org.apache.http.client.methods.HttpPost;
import org.apache.http.impl.client.DefaultHttpClient;
import org.apache.http.util.EntityUtils;

public class HttpUtils
{
    /**
     * @param path    請求的伺服器URL地址
     * @param encode    編碼格式
     * @return    將伺服器端返回的資料轉換成String
     */
    public static String sendPostMessage(String path, String encode)
    {
        String result = "";
        HttpClient httpClient = new DefaultHttpClient();
        try
        {
            HttpPost httpPost = new HttpPost(path);
            HttpResponse httpResponse = httpClient.execute(httpPost);
            if(httpResponse.getStatusLine().getStatusCode() == HttpStatus.SC_OK)
            {
                HttpEntity httpEntity = httpResponse.getEntity();
                if(httpEntity != null)
                {
                    result = EntityUtils.toString(httpEntity, encode);
                }
            }
        }
        catch (Exception e)
        {
            e.printStackTrace();
        }
        finally
        {
            httpClient.getConnectionManager().shutdown();
        }

        return result;
    }
}
還有一段從網上來的Json解析類,使用Android自帶的解析庫:
import java.util.ArrayList;
import java.util.List;

import org.json.JSONArray;
import org.json.JSONObject;

public class JsonUtil
{
    /**
     * @param citiesString    從伺服器端得到的JSON字串資料
     * @return    解析JSON字串資料,放入List當中
     */
    public static List<String> parseCities(String citiesString)
    {
        List<String> cities = new ArrayList<String>();

        try
        {
            JSONObject jsonObject = new JSONObject(citiesString);
            JSONArray jsonArray = jsonObject.getJSONArray("users");
            for(int i = 0; i < jsonArray.length(); i++)
            {
                cities.add(jsonArray.getString(i));
            }
        }
        catch (Exception e)
        {
            e.printStackTrace();
        }

        return cities;
    }
}
最後需要注意的就是在Android中訪問網路必須是非同步方式,同步方式直接報錯,所以需要增加非同步訪問:
    public class MyAsyncTask extends AsyncTask<String, Void, List<String>>
    {
        @Override
        protected void onPreExecute()
        {
            super.onPreExecute();
        }
        @Override
        protected List<String> doInBackground(String... params)
        {
            List<String> cities = new ArrayList<String>();
            String citiesString = HttpUtils.sendPostMessage(params[0], "utf-8");
            cities = JsonUtil.parseCities(citiesString);
            return cities;
        }
        @Override
        protected void onPostExecute(List<String> result)
        {
            TextView lblInfo=(TextView)findViewById(R.id.form_title);
            EditText txt_login_name=(EditText)findViewById(R.id.txt_login_name);
            EditText txt_login_pass=(EditText)findViewById(R.id.txt_login_pwd);
            String loginName=txt_login_name.getText().toString().trim();
            String loginPass=txt_login_pass.getText().toString().trim();

            if(loginPass.equals(result.get(1))&&loginName.equals(result.get(0)))
            {
                lblInfo.setText("登入成功!");
            }
            else
            {
                lblInfo.setText("登入失敗!");
            }

            super.onPostExecute(result);
        }
    }
分為訪問前、訪問中、訪問後(估計是方便增加進度條),我們在訪問後增加處理程式碼即可,然後在上節的按鈕點選事件下呼叫:
    private final String CITY_PATH_JSON = "http://192.168.1.6:89/Login2.php";
    public void btn_click(View v)
    {
        new MyAsyncTask().execute(CITY_PATH_JSON);
    }
唯一需要的說明:訪問後的Result型別就是訪問中的返回值型別
唯二需要哦的說明:API必須架設在另外的機器上,而且必須使用IP訪問,因為localhost和127都被模擬器自己用了.
先看看登入的使用者名稱和密碼是什麼,訪問下API:
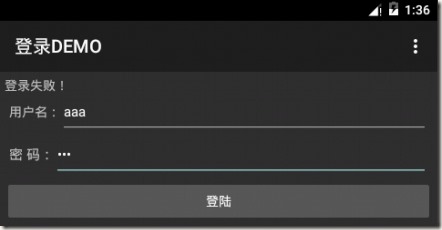
執行APP:
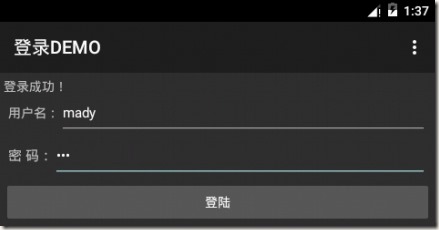
輸入正確的資訊:


