本例我們實現一次真正的網路互動,將資料POST到API,然後接收伺服器的返回值進行處理,同時引入自定義型別和傳說中阿里的FastJson。
實現思路如:
1. 在API端接收客戶POST的資料還原成物件,給每個屬性加個字尾後輸出;
2. 在客戶端輸入使用者名稱和密碼,用來和伺服器端返回的進行對比;
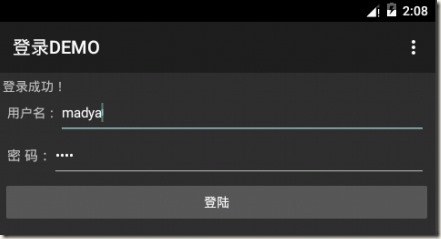
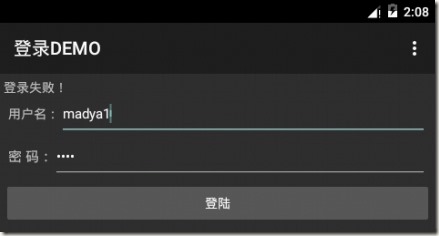
我們POST給伺服器的是name=mady&pwd=123,伺服器分別加了字尾為name=madya
&pwd=1231所以我們客戶端需要輸入madya和1231才能驗證成功。
具體操作展示如下:
一、準備API:
目前寫API使用ASP.NET WEB API2再合適不過了。在VS2013中建立一個API專案,先配置他支援JSON:
開啟專案中的WebApiConfig檔案,在Register方法中加入一個配置項:
config.Formatters.JsonFormatter.SupportedMediaTypes.Add(new MediaTypeHeaderValue("text/html"));
建立實體類如:
    public class UserInfo
    {
        public string name { get; set; }
        public string pwd { get; set; }
    }
開啟ValuesController修改程式碼如下:
        // POST api/values
        public UserInfo Post([FromBody]UserInfo value)
        {
            return new UserInfo { name = value.name + "a", pwd = value.pwd+"1" };
        }
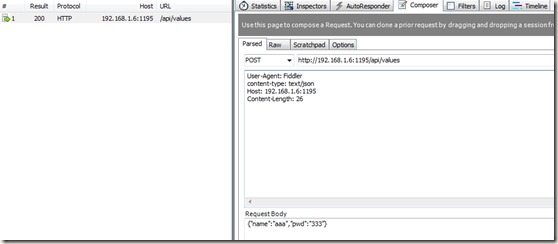
就可以開啟Fidder除錯了,直到成功為止:
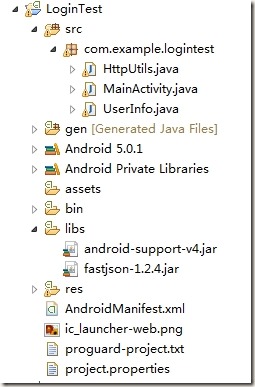
二、引入阿里的FastJson包
直接右鍵貼上進去即可:
這個包真心好使:
String json=JSON.toJSONString(user);     //序列化
UserInfo userInfo=JSON.parseObject(json,UserInfo.class);    //反序列化
就這2句話全部搞定。
我們繼續,先新建一個Java的實體類:
import java.io.Serializable;

public class UserInfo implements Serializable{
private String name;
private String pwd;

public String getPwd()
{
    return pwd;
}

public void setPwd(String pwd)
{
    this.pwd = pwd;
}

public String getName()
{
    return name;
}

public void setName(String name)
{
    this.name = name;
}

}
然後修改網路訪問類,上節那個太簡陋了(見附)。
然後修改非同步部分程式碼:
        protected String doInBackground(String... params)
        {
//            String citiesString ="{\"name\":\"mady\",\"pwd\":123}";
            UserInfo user=new UserInfo();
            user.setName("mady");
            user.setPwd("123");

            String str_json=JSON.toJSONString(user);
            return HttpUtils.sendPostMessage(params[0],str_json);
        }
和完成程式碼:
        protected void onPostExecute(String result)
        {
            TextView lblInfo=(TextView)findViewById(R.id.form_title);
            EditText txt_login_name=(EditText)findViewById(R.id.txt_login_name);
            EditText txt_login_pass=(EditText)findViewById(R.id.txt_login_pwd);
            String loginName=txt_login_name.getText().toString().trim();
            String loginPass=txt_login_pass.getText().toString().trim();

            UserInfo userInfo=JSON.parseObject(result,UserInfo.class);
            if(loginPass.equals(userInfo.getPwd())&&loginName.equals(userInfo.getName()))
            {
                lblInfo.setText("登入成功!");
            }
            else
            {
                lblInfo.setText("登入失敗!");
            }
          }
到此完工,沒有修改的就是沒有變化的。
附上新網路訪問類:
public class HttpUtils
{
    /**
     * @param path    請求的伺服器URL地址
     * @param encode    編碼格式
     * @return    將伺服器端返回的資料轉換成String
     */
    public static String sendPostMessage(String path,String jsonStr)
    {
        String result = "";
        HttpClient httpClient = new DefaultHttpClient();
        try
        {
            HttpPost httpPost = new HttpPost(path);
            httpPost.addHeader("content-type","text/json");

        httpPost.setEntity(new StringEntity(jsonStr));
            HttpResponse httpResponse = httpClient.execute(httpPost);

            if(httpResponse.getStatusLine().getStatusCode() == HttpStatus.SC_OK)
            {
//                Log.e("Json+++++2:", jsonStr);    log info for debug
                HttpEntity httpEntity = httpResponse.getEntity();
                if(httpEntity != null)
                {
                    result = EntityUtils.toString(httpEntity, "UTF-8");
                }
            }
        }
        catch (Exception e)
        {
            e.printStackTrace();
        }
        finally
        {
            httpClient.getConnectionManager().shutdown();
        }

        return result;
    }
}


