一、背景
最近和朋友一起想開發一個類似alibaba dubbo的功能的工具,其中就用到了基於Spring的可擴充套件Schema進行開發自定義配置標籤支援,通過上網查資料自己寫了一個demo.今天在這裡進行和大家分享,也記錄下方便以後複習備忘。
二、demo測試環境
1.JDK1.7
2.spring 4.2.5.RELEASE
3.基於Maven
4.開發工具Eclipse
三、專案介紹
1.實現步驟分析
[1].設計配置屬性並開發JavaBean.
[2].編寫xsd檔案.
[3].編寫NamespaceHandler和BeanDefinitionParser完成解析工作.
[4].編寫spring.handlers和spring.schemas串聯起所有部件.
[5].編寫名為application.xml的spring配置檔案
[6].Maven Java專案的pom.xml.
[7].編寫測試類進行測試.
2.實現程式碼
[1].設計配置屬性並開發JavaBean程式碼(基於BaseBean進行定義)
BaseBean.java
1 package com.hafiz.zhang.tag.bean;
2
3 public interface BaseBean {
4     public abstract void init() throws Exception;
5     public abstract void destory();
6 }
ApplicationBean.java
 1 package com.hafiz.zhang.tag.bean;
 2
 3 public class ApplicationBean implements BaseBean {
 4     private String id;
 5     private String name;
 6     private String version;
 7     private String description;
 8     public String getId() {
 9         return id;
10     }
11     public void setId(String id) {
12         this.id = id;
13     }
14     public String getVersion() {
15         return version;
16     }
17     public void setVersion(String version) {
18         this.version = version;
19     }
20     public String getName() {
21         return name;
22     }
23     public void setName(String name) {
24         this.name = name;
25     }
26     public String getDescription() {
27         return description;
28     }
29     public void setDescription(String description) {
30         this.description = description;
31     }
32
33     @Override
34     public String toString() {
35         return "ApplicationBean [id=" + id + ", name=" + name + ", version=" + version + ", description=" + description
36                 + "]";
37     }
38     @Override
39     public void init() throws Exception {
40         System.out.println("---------ApplicationBean init---------");
41     }
42
43     @Override
44     public void destory() {
45         System.out.println("---------ApplicationBean destory---------");
46     }
47
48 }
[2].編寫xsd檔案.
hafiz.xsd(為上一步設計好的配置項編寫XSD檔案,XSD是schema的定義檔案,配置的輸入和解析輸出都是以XSD為契約,本例中XSD如下:)
 1 <?xml version="1.0" encoding="UTF-8"?>
 2 <xsd:schema
 3     xmlns="http://www.hafiz.com/schema/hafiz"
 4     xmlns:xsd="http://www.w3.org/2001/XMLSchema"
 5     xmlns:beans="http://www.springframework.org/schema/beans"
 6     targetNamespace="http://www.hafiz.com/schema/hafiz"
 7     elementFormDefault="qualified"
 8     attributeFormDefault="unqualified">
 9     <xsd:import namespace="http://www.springframework.org/schema/beans"/>
10     <xsd:element name="application">
11         <xsd:complexType>
12             <xsd:complexContent>
13                 <xsd:extension base="beans:identifiedType">
14                     <xsd:attribute name="name" type="xsd:string"/>
15                     <xsd:attribute name="version" type="xsd:string"/>
16                     <xsd:attribute name="description" type="xsd:string"/>
17                 </xsd:extension>
18             </xsd:complexContent>
19         </xsd:complexType>
20     </xsd:element>
21 </xsd:schema>
注意:1.關於xsd:schema的各個屬性具體含義就不作過多解釋,可以參見http://www.w3school.com.cn/schema/schema_schema.asp.
2.<xsd:element name="application">對應著配置項節點的名稱,因此在應用中會用application作為節點名來引用這個配置.
3.<xsd:attribute name="name" type="xsd:string" />和<xsd:attribute name="version" type="xsd:string" />以及
<xsd:attribute name="description" type="xsd:string" />對應著配置項application的三個屬性名,因此在應用中可以配置name和version以及description三個屬性,都是string型別。
4.完成後需把xsd存放在classpath下,一般都放在META-INF目錄下(本例就放在這個目錄下)
[3].編寫NamespaceHandler和BeanDefinitionParser完成解析工作.
下面需要完成解析工作,會用到NamespaceHandler和BeanDefinitionParser這兩個概念。具體說來NamespaceHandler會根據schema和節點名找到某個BeanDefinitionParser,然後由BeanDefinitionParser完成具體的解析工作。因此需要分別完成NamespaceHandler和BeanDefinitionParser的實現類,Spring提供了預設實現類NamespaceHandlerSupport和BeanDefinitionParser,簡單的方式就是去繼承這兩個類。本例就是採取這種方式:
HafizNamespaceHandler.java
 1 package com.hafiz.zhang.tag.handlers;
 2
 3 import org.springframework.beans.factory.xml.NamespaceHandlerSupport;
 4
 5 import com.hafiz.zhang.tag.bean.ApplicationBean;
 6 import com.hafiz.zhang.tag.parser.ApplicationBeanDefinitionParser;
 7
 8 /**
 9  * @author hafiz.Zhang
10  * @Date 2016年5月17日 下午12:22:57
11  * @Description 定義自定義的名稱空間hafiz處理器
12  */
13 public class HafizNamespaceHandler extends NamespaceHandlerSupport {
14
15     @Override
16     public void init() {
17         //在這裡進行註冊自定義名稱空間
18         registerBeanDefinitionParser("application", new ApplicationBeanDefinitionParser(ApplicationBean.class));
19     }
20
21 }
注:其中registerBeanDefinitionParser("application", new ApplicationBeanDefinitionParser());就是用來把節點名和解析類聯絡起來,在配置中引用application配置項時,就會用ApplicationBeanDefinitionParser來解析配置。
ApplicationBeanDefinitionParser.java
 1 package com.hafiz.zhang.tag.parser;
 2
 3 import org.springframework.beans.factory.config.BeanDefinition;
 4 import org.springframework.beans.factory.support.RootBeanDefinition;
 5 import org.springframework.beans.factory.xml.BeanDefinitionParser;
 6 import org.springframework.beans.factory.xml.ParserContext;
 7 import org.springframework.util.StringUtils;
 8 import org.w3c.dom.Element;
 9
10 /**
11  * @author hafiz.Zhang
12  * @Date 2016年5月17日 下午12:27:12
13  * @Description 在這裡定義自定義名稱空間的bean解析器
14  */
15 public class ApplicationBeanDefinitionParser implements BeanDefinitionParser {
16
17     private Class<?> clazz;
18     public ApplicationBeanDefinitionParser(Class<?> clazz) {
19         this.clazz = clazz;
20     }
21     @Override
22     public BeanDefinition parse(Element element, ParserContext parserContext) {
23         RootBeanDefinition rbd = new RootBeanDefinition();
24         rbd.setBeanClass(clazz);
25         String id = element.getAttribute("id");
26         String name = element.getAttribute("name");
27         String version = element.getAttribute("version");
28         String desc = element.getAttribute("description");
29         if(StringUtils.hasText(id)) {
30             rbd.getPropertyValues().addPropertyValue("id", id);
31         }
32         if(StringUtils.hasText(name)) {
33             parserContext.getRegistry().registerBeanDefinition(name, rbd);//這句話非常重要,意思是基於名字進行把對應的bean載入到spring容器中
34             rbd.getPropertyValues().addPropertyValue("name", name);
35         }
36         if(StringUtils.hasText(version)) {
37             rbd.getPropertyValues().addPropertyValue("version", version);
38         }
39         if(StringUtils.hasText(desc)) {
40             rbd.getPropertyValues().addPropertyValue("description", desc);
41         }
42         rbd.setInitMethodName("init");
43         rbd.setDestroyMethodName("destory");
44         return rbd;
45     }
46
47 }
注:其中element.getAttribute就是用配置中取得屬性值,rbd.getPropertyValues().addPropertyValue就是把屬性值放到bean中。
[4].編寫spring.handlers和spring.schemas串聯起所有部件
上面幾個步驟走下來會發現開發好的handler與xsd還沒法讓spring容器感知到,就這樣放上去是沒法把前面做的工作納入體系中的,spring提供了spring.handlers和spring.schemas這兩個配置檔案來完成這項工作,這兩個檔案需要我們自己編寫並放入META-INF資料夾中,這兩個檔案的地址必須是META-INF/spring.handlers和META-INF/spring.schemas,spring會預設去載入它們,本例中spring.handlers如下所示:
1 http\://www.hafiz.com/schema/hafiz=com.hafiz.zhang.tag.handlers.HafizNamespaceHandler
以上表示當使用到名為"http://www.hafiz.com/schema/hafiz"的schema引用時,會通過com.hafiz.zhang.tag.handlers.HafizNamespaceHandler來完成解析.
spring.schemas如下所示:
1 http\://www.hafiz.com/schema/hafiz.xsd=META-INF/hafiz.xsd
以上就是載入xsd檔案。
注:以上兩個檔案中的"\"表示轉義。
[5].編寫名為application.xml的spring配置檔案
編寫application.xml檔案並放在classpath下,建議這樣做,但不是必須放在該位置。
 1 <?xml version="1.0" encoding="UTF-8"?>
 2 <beans xmlns="http://www.springframework.org/schema/beans"
 3     xmlns:xsi="http://www.w3.org/2001/XMLSchema-instance"
 4     xmlns:hafiz="http://www.hafiz.com/schema/hafiz"
 5     xsi:schemaLocation="
 6         http://www.springframework.org/schema/beans
 7         http://www.springframework.org/schema/beans/spring-beans-4.2.xsd
 8         http://www.hafiz.com/schema/hafiz
 9         http://www.hafiz.com/schema/hafiz.xsd">
10
11     <hafiz:application id="test_demo" name="appliationBean" version="1.1.0" description="這是我自動擴充spring的schema的測試demo"/>
12
13 </beans>
其中xmlns:hafiz="http://www.hafiz.com/schema/hafiz"是用來指定自定義schema,xsi:schemaLocation用來指定xsd檔案。
<hafiz:application id="test_demo" name="applicationBean" version="1.1.0" description="這是我自動擴充spring的schema的測試demo"/>是一個具體的自定義配置使用例項.
注:此處的hafiz不是不能改變的,只要使用和上面指定的“xmlns:標籤名”的標籤名一樣就可以(程式碼加粗標黑處)。
[6].Maven Java專案的pom.xml.
在該檔案中主要引入spring的依賴
 1 <project xmlns="http://maven.apache.org/POM/4.0.0" xmlns:xsi="http://www.w3.org/2001/XMLSchema-instance"
 2   xsi:schemaLocation="http://maven.apache.org/POM/4.0.0 http://maven.apache.org/xsd/maven-4.0.0.xsd">
 3   <modelVersion>4.0.0</modelVersion>
 4
 5   <groupId>com.hafiz.zhang</groupId>
 6   <artifactId>springTag</artifactId>
 7   <version>0.0.1-SNAPSHOT</version>
 8   <packaging>jar</packaging>
 9
10   <name>springTag</name>
11   <url>http://maven.apache.org</url>
12
13   <properties>
14     <project.build.sourceEncoding>UTF-8</project.build.sourceEncoding>
15     <spring.version>4.2.5.RELEASE</spring.version>
16   </properties>
17
18   <dependencies>
19     <dependency>
20       <groupId>junit</groupId>
21       <artifactId>junit</artifactId>
22       <version>3.8.1</version>
23       <scope>test</scope>
24     </dependency>
25     <!-- springframework start -->
26     <dependency>
27         <groupId>org.springframework</groupId>
28         <artifactId>spring-core</artifactId>
29         <version>${spring.version}</version>
30     </dependency>
31     <dependency>
32         <groupId>org.springframework</groupId>
33         <artifactId>spring-context-support</artifactId>
34         <version>${spring.version}</version>
35     </dependency>
36     <!-- springframe end -->
37   </dependencies>
38 </project>
[7].編寫測試類進行測試.
 1 package com.hafiz.zhang.test;
 2
 3 import org.springframework.context.ApplicationContext;
 4 import org.springframework.context.support.ClassPathXmlApplicationContext;
 5
 6 import com.hafiz.zhang.tag.bean.ApplicationBean;
 7
 8 /**
 9  * @author hafiz.Zhang
10  * @Date 2016年5月17日 下午2:01:37
11  * @Description 在此類中進行測試自定義擴充的schema
12  */
13 public class ApplicationTest
14 {
15     private static ApplicationContext ac;
16     public static void main( String[] args )
17     {
18         ac = new ClassPathXmlApplicationContext("application.xml");
19         ApplicationBean bean = (ApplicationBean)ac.getBean("appliationBean");
20         System.out.println( "配置檔案中的bean為:" );
21         System.out.println( "id = " + bean.getId() );
22         System.out.println( "name = " + bean.getName() );
23         System.out.println( "version = " + bean.getVersion() );
24         System.out.println( "description = " + bean.getDescription() );
25     }
26 }
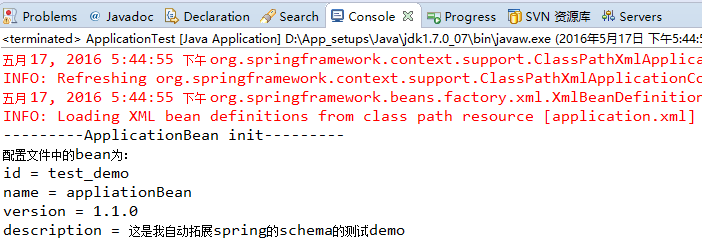
在控制檯會輸出:
附:專案結構圖

到此為止,spring的自定義標籤就已經實現了,歡迎大家進行交流學習~