本篇將要和朋友們分享的是幾個上傳檔案的例子和邏輯步奏及自定義個簡單的js上傳外掛我取名為shenniu.upfile-0.0.1.js;近來在討論組中很有幾個朋友諮詢上傳檔案的程式碼和怎麼下載上傳的檔案,所以寫了此篇文章,希望能為朋友們解答一些疑惑或能帶來幫助,也謝謝各位多多支援點贊。
以上是個人的看法,下面來正式分享今天的文章吧:
. 使用iis釋出儲存上傳檔案的資料夾
. 示例A - 普通表單上傳檔案,Request.Files獲取上傳檔案
. 示例B - 普通表單上傳檔案,HttpPostedFileBase獲取上傳檔案
. 示例C - ajax+FormData上傳檔案,Request.Files獲取上傳檔案
. 示例D - 自定義上傳外掛,Request.Files獲取上傳檔案並提交表單內容
下面一步一個腳印的來分享:
. 使用iis釋出儲存上傳檔案的資料夾
首先,因為我們上傳檔案後,需要檢視或者下載這個檔案,通常分為兩種形式;一種把上傳的檔案上傳到程式的根目錄中的某個資料夾中,這種就可以直接通過站點的虛擬路徑來訪問,這種其實也是使用了iis釋出的;第二種是通過程式上傳到伺服器的某個磁碟中,這種路徑通常就不在上傳程式站點的目錄下,因為想讓使用者通過其他的url地址訪問下載檔案,iis釋出只是其中一種;其實用iss釋出儲存上傳檔案的資料夾和釋出程式一樣差不多;
我們隨便找個某磁碟下面的資料夾當做儲存上傳檔案的資料夾,我這裡磁碟路徑是:D:\D\TTest這個TTest資料夾,然後放幾張測試的圖片,並複製這個路徑,在iis中建立一個站點物理路徑指向剛才的複製的路徑,埠我這裡是1010,我這裡沒有域名只有用本機的ip代替,這裡預設是localhost,配置好後,檢視高階設定如:

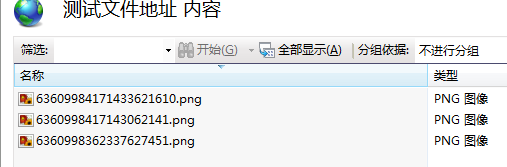
然後點選"測試檔案地址"這個站點-》內容檢視 能看到如圖的效果
然後,滑鼠指上去右鍵其中某一張圖片-》瀏覽 這樣瀏覽器馬上就能看到如圖所示的效果:
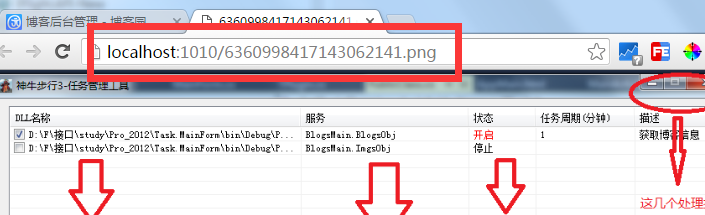
這樣就完成了iis釋出資料夾,當然通過http訪問圖片只是多種方式的一種;有些字尾的檔案可能訪問不了,需要手動在iis中增加mime型別:

. 示例A - 普通表單上傳檔案,Request.Files獲取上傳檔案
首先,我們來看下html主要程式碼:
1 <fieldset>
2             <legend>示例A - 普通表單上傳檔案,Request.Files獲取上傳檔案</legend>
3             <form action="/Error/A" method="post" enctype="multipart/form-data">
4                 <input type="file" name="fileA" multiple />
5                 <button type="submit">提交</button>
6             </form>
7         </fieldset>
看是簡單簡單及簡短的程式碼,其實是上傳的重要部分必不可少的,下面就來簡單總結下:
. form元素的action屬性:表單提交地址,這裡是檔案上傳的介面地址
. 必須採用method="post"提交方式
. 表單提交資料的格式是enctype="multipart/form-data"
. type="file"元素必須要有屬性name,這裡例子是name="fileA"
. type="file"元素的multiple屬性可選,意思是可以選擇多個上傳檔案不用再增加file標籤元素來支援上傳多個檔案了,這個在近幾年移動端火熱的時候幾乎所有最新版本瀏覽器都支援
再來,我們一起看下後端怎麼接受表單提交過來的檔案資訊,先來看程式碼:
 1 [HttpPost]
 2         public ActionResult A()
 3         {
 4             var sbLog = new StringBuilder(string.Empty);
 5
 6             var fileCount = Request.Files.Count;
 7             //訪問上傳檔案地址
 8             var path = @"http://localhost:1010/{0}";
 9             //儲存檔案地址
10             var uploadPath = @"D:\D\TTest";
11             sbLog.AppendFormat("上傳檔案目錄:{0}<br/>", uploadPath);
12             sbLog.AppendFormat("上傳檔案量:{0}<br/>", fileCount);
13             for (int i = 0; i < fileCount; i++)
14             {
15                 var file = Request.Files[i];
16                 if (file == null || string.IsNullOrEmpty(file.FileName)) { continue; }
17
18                 var fileName = file.FileName;
19                 var fileNewName = DateTime.Now.Ticks + fileName;
20                 sbLog.AppendFormat("第:{0}個檔名稱:{1}新名稱:{2}下載地址:<a href='{3}' target='_blank'>{2}</a><br/>", i + 1, fileName, fileNewName, string.Format(path, fileNewName));
21                 file.SaveAs(Path.Combine(uploadPath, fileNewName));
22             }
23             return Content(sbLog.ToString());
24         }
這段程式碼的總要點列舉如下:
. Request.Files:用來獲取上傳的檔案,所有上傳檔案都以此來獲取,什麼檔名稱也包含在列表中
. path變數:就是咋們在前面配置的iis釋出資料夾的url路徑,只需要傳遞上傳的檔案的名稱就可以訪問
. uploadPath:儲存檔案地址
. 通過for迴圈獲取上傳上來的檔案資訊和通過file.SaveAs儲存到uploadPath指定的資料夾中去
. Path.Combine方法把傳遞進來的引數拼接長一個磁碟路徑如第一個引數值是D:/第二個引數是test.png那麼這個方法返回的結果是D:/test.png
最終我這個Action返回的是ContentResult,因為我想在頁面輸入一些資訊好截圖哈哈,好了咋們通過複製上面的程式碼執行起來點"提交"按鈕得到的效果如圖:
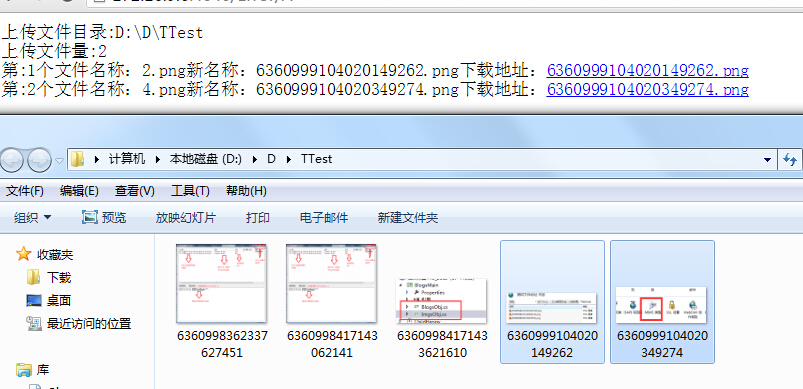
資料夾中選擇上的兩張圖片,就是我們頁面上傳上來的,通過點選Action返回給頁面的下載地址,我們可以在瀏覽器中瀏覽圖片;好這個上傳圖片,瀏覽圖片的過程描述大概就是這樣,朋友們有收穫一些麼
. 示例B - 普通表單上傳檔案,HttpPostedFileBase獲取上傳檔案
經過示例A描述的上傳,下載圖片流程應該都很清楚了,這個小節主要是換了一種獲取上傳檔案資訊的方式,我們通過HttpPostedFileBase獲取(其實示例ARequest.Files的最底層就是這個),因為可能上傳多個檔案所以使用了IEnumerable<HttpPostedFileBase>型別來當做Action的引數,試圖部分我們使用HtmlHelper的BeginForm方法來生成form標籤,具體程式碼如:
1  <fieldset>
2             <legend>示例B - 普通表單上傳檔案,HttpPostedFileBase獲取上傳檔案</legend>
3             @using (Html.BeginForm("B", "Error", FormMethod.Post, new { enctype = "multipart/form-data" }))
4             {
5                 <input type="file" name="files" multiple />
6                 <button>提交</button>
7             }
8         </fieldset>
這裡使用@html.BeginForm寫法主要是滿足使用mvc的同學,簡單說下這裡使用的BeginForm引數:BeginForm(Action,Controller,表單提交方式,增加form屬性enctype);好再來看下Controller的程式碼如:
 1 [HttpPost]
 2         public ActionResult B(IEnumerable<HttpPostedFileBase> files)
 3         {
 4             var sbLog = new StringBuilder(string.Empty);
 5
 6             var fileCount = files == null ? 0 : files.Count();
 7             //訪問上傳檔案地址
 8             var path = @"http://localhost:1010/{0}";
 9             //儲存檔案地址
10             var uploadPath = @"D:\D\TTest";
11             sbLog.AppendFormat("上傳檔案目錄:{0}<br/>", uploadPath);
12             sbLog.AppendFormat("上傳檔案量:{0}<br/>", fileCount);
13             var i = 0;
14             foreach (var file in files)
15             {
16                 if (file == null || string.IsNullOrEmpty(file.FileName)) { continue; }
17
18                 var fileName = file.FileName;
19                 var fileNewName = DateTime.Now.Ticks + fileName;
20                 sbLog.AppendFormat("第:{0}個檔名稱:{1}新名稱:{2}下載地址:<a href='{3}' target='_blank'>{2}</a><br/>", i + 1, fileName, fileNewName, string.Format(path, fileNewName));
21                 file.SaveAs(Path.Combine(uploadPath, fileNewName));
22             }
23             return Content(sbLog.ToString());
24         }
上面的程式碼與示例A對比一下,可以看出處理方式幾乎是一模一樣呢,那這裡就沒什麼說的了,主要是展示下兩種獲取file檔案資訊的方式,但下面的將與眾不同
. 示例C - ajax+FormData上傳檔案,Request.Files獲取上傳檔案
首先,來了解下FormData這個近幾年才被幾乎所有瀏覽器支援的js物件,它的建構函式:new FormData (form? : HTMLFormElement),後面的?號和C#引數差不多表示引數非必須,FormData的最大優點就是可以非同步上傳一個二進位制檔案,好吧這個神奇了;繼續來將示例C,通常我們提交一般的文字資訊直接通過jquery的ajax,post,get等幾個方法就能傳遞到後臺,這些直接傳參方式無法吧file資訊傳遞給後臺,但用到FormData我們就可以用ajax把file檔案資訊傳遞給後臺,這樣我們也可以有更好的無重新整理效果的上傳檔案了,先來看下前端html程式碼和js程式碼:
<fieldset>
            <legend>示例C - ajax+FormData上傳檔案,Request.Files獲取上傳檔案</legend>
            @using (Html.BeginForm("C", "Error", FormMethod.Post, new { enctype = "multipart/form-data", @id = "form_c" }))
            {
                <span>賬號:</span><input type="text" name="userName" value="神牛步行3" /><br />
                <span>密碼:</span><input type="password" name="userPwd" value="神牛" /><br />
                <span>檔案:</span><input type="file" name="filesc" multiple /><br />
                <button type="button">提交</button><br />
                <span id="msg_c"></span>
            }
</fieldset>
<script>
    $(function () {

        //示例C程式碼
        $("#form_c button[type='button']").click(function () {

            var msg = $("#msg_c");
            var btnSave = $(this);
            var formData = new FormData(document.getElementById("form_c"));
            console.log(formData);

            $.ajax({
                url: '/Error/C',
                type: 'post',
                beforeSend: function (e) {

                    btnSave.attr("disabled", "disabled");
                    msg.html("上傳中...");
                },
                success: function (data) {
                    console.log(data);
                    var alertMsg = "上傳失敗";
                    if (data) {
                        alertMsg = data.Status == 1 ? data.Data : alertMsg;
                    }
                    msg.html(alertMsg);
                    btnSave.removeAttr("disabled");
                },
                error: function (data) {

                    msg.html("上傳失敗");
                    btnSave.removeAttr("disabled");
                },
                data: formData,
                cache: false,
                contentType: false,
                processData: false
            });
        });
    })
</script>
上面的html程式碼與示例B的格式差不多,只是增加了兩個input元素方便我們來測試;重點在js程式碼中,由上面介紹可以看到FormData的構造只能是HTMLFormElement,所以我們通過document.getElementById("form_c")來獲取這個表單的物件傳遞給它;
然後,我們用普通的$.ajax提交FormData物件到後臺進行上傳,至於後臺我們參照示例A的方式來獲取檔案資訊,不用做什麼特殊額處理,只是我們返回的資訊是Json資料,程式碼如:


 1 [HttpPost]
 2         public JsonResult C()
 3         {
 4             Thread.Sleep(1000 * 5);
 5             var response = new MoResponse();
 6             var sbLog = new StringBuilder("開始處理...");
 7             try
 8             {
 9
10                 sbLog.AppendFormat("賬號:{0}<br/>", Request.Params["userName"]);
11                 sbLog.AppendFormat("密碼:{0}<br/>", Request.Params["userPwd"]);
12
13                 var fileCount = Request.Files.Count;
14                 //訪問上傳檔案地址
15                 var path = @"http://localhost:1010/{0}";
16                 //儲存檔案地址
17                 var uploadPath = @"D:\D\TTest";
18                 sbLog.AppendFormat("上傳檔案目錄:{0}<br/>", uploadPath);
19                 sbLog.AppendFormat("上傳檔案量:{0}<br/>", fileCount);
20                 for (int i = 0; i < fileCount; i++)
21                 {
22                     var file = Request.Files[i];
23                     if (file == null || string.IsNullOrEmpty(file.FileName)) { continue; }
24
25                     var fileName = file.FileName;
26                     var fileNewName = DateTime.Now.Ticks + fileName;
27                     sbLog.AppendFormat("第:{0}個檔名稱:{1}新名稱:{2}下載地址:<a href='{3}' target='_blank'>{2}</a><br/>", i + 1, fileName, fileNewName, string.Format(path, fileNewName));
28                     file.SaveAs(Path.Combine(uploadPath, fileNewName));
29                     response.Status = 1;
30                 }
31             }
32             catch (Exception ex)
33             {
34                 sbLog.AppendFormat("異常資訊:{0}", ex.Message);
35             }
36             finally
37             {
38                 response.Data = sbLog.ToString();
39             }
40             return Json(response);
41         }
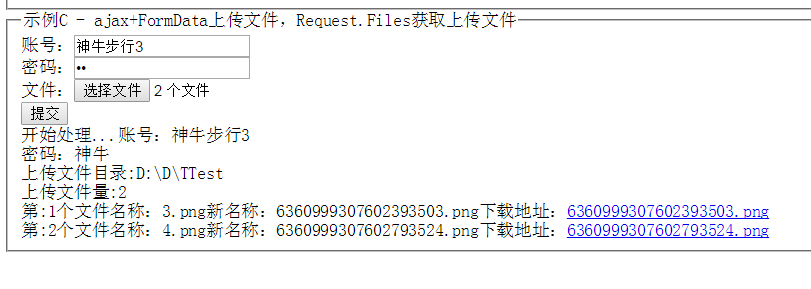
下面我們看一下新增"提交"按鈕執行後返回的效果,可以看出提交後沒有跳轉到action指向的路由,這樣使用者體驗就好多了:
. 示例D - 自定義上傳外掛,Request.Files獲取上傳檔案並提交表單內容
首先,我發個外掛下載地址shenniu.upfile-0.0.1.js,只需要在試圖或者html頁面引用jquery-1.10.2.min.js庫和這個外掛,我們就可以這樣使用:
 1 <script>
 2     $(function () {
 3
 4         //示例D程式碼
 5         //初始化外掛
 6         var shenniu = new shenniu_UpFile({
 7
 8             url: "/Error/D_A",
 9             fileEleName: "filesd"
10         });
11
12         //提交事件
13         $("#form_d button[type='button']").click(function () {
14
15             var msg = $("#msg_d");
16             var btnSave = $(this);
17             btnSave.attr("disabled", "disabled");
18             msg.html("上傳中..");
19
20             //上傳檔案
21             shenniu.submitFun(function (data) {
22
23                 try {
24
25                     var result = JSON.parse(data);
26                     //上傳成功,儲存資料
27                     if (result.Status == 1) {
28
29                         //增加上傳成功的檔名稱到表單
30                         var hidFileNames = $("#form_d input[name='hidFileNames']");
31                         if (hidFileNames.length <= 0) { $("#form_d").append("<input type='hidden' name='hidFileNames' value='" + result.Data + "'/>"); }
32                         else {
33                             hidFileNames.val(result.Data);
34                         }
35
36                         //獲取表單鍵值對,提交表單資料
37                         var param = $("#form_d").serialize();
38                         var action = $("#form_d").attr("action");
39                         $.post(action, param, function (res) {
40
41                             msg.html(res.Status == 1 ? "儲存成功<br/>" + res.Data : "儲存失敗");
42                         });
43
44                     } else {
45
46                         msg.html(result.Data);
47                     }
48                 } catch (e) {
49                     console.log(e.message);
50                 } finally {
51                     btnSave.removeAttr("disabled");
52                 }
53             });
54         });
55     })
56 </script>
使用外掛的地方和js關鍵點已經通過程式碼註釋備註好了,朋友們可仔細閱讀下,這裡要將的是外掛上傳檔案和提交表單資料的邏輯;我們分析下:
. form表單中通常有其他的屬性資料
. form表單的提交資料的後臺地址可能和上傳檔案的後臺地址不一樣
. 需要單獨上傳檔案後,返回是否上傳成功,再提交form表單的其他資料到後臺
由上面幾點外掛的引數定義為:
1  var defOption = {
2
3         url: "http://www.cnblogs.com/wangrudong003/",   //上傳路由地址,注:1.目前通過該地址上傳檔案成功後,返回的資訊是text/plain  2.跨域暫未考慮
4         fileEleName: "fileName",                        //上傳input file控制元件的唯一名稱
5         uid: new Date().getTime(),                      //防重複
6         backFun: function () { }                         //回撥函式
7     };
這個自定義外掛原理和幾個重點是:
. 自動建立一個iframe(用來做無重新整理體驗),iframe裡面建立一個form表單,form表單裡面只包含要上傳的檔案file物件,最終把iframe加入到檢視頁面中
. 通過iframe.load()方法來獲取上傳檔案後返回到contentWindow.document.body中的資訊,並且執行自定義回撥函式,把引數傳遞給自定義方法方便使用者自由的控制體驗效果
. 建立的form表單裡面只能使用頁面選擇檔案上傳的檔案file物件,使用jquery的clone()函式無法獲取到選擇的檔案物件(這是一個悲劇),所以我這個使用append把使用者使用的那個file物件直接包含到建立的form中去,然後在建立一個初始化的file元素物件到原始的檢視中去代替被移除掉的file元素,程式碼如(這個還真花了我2個小時的時間嘗試):
1             //清空自定義form多餘的file元素
2             form.html("");
3             var files = $("input[name='" + defOption.fileEleName + "']");
4             //複製上傳控制元件物件
5             var filesClone = files.clone(true);
6             filesClone.insertAfter(files);
7             form.append(files);
. 使用該外掛提交原始表單資料的順序是:使用者點選頁面的儲存按鈕-》通過外掛建立的上傳檔案的form表單,提交上傳檔案-》上傳檔案返回成功與否的資訊-》收到上傳成功新檔名稱資訊,建立個hidden儲存新檔名稱到原始form中去-》再真實提交原始form表單的其他資料
下面來看下效果圖:
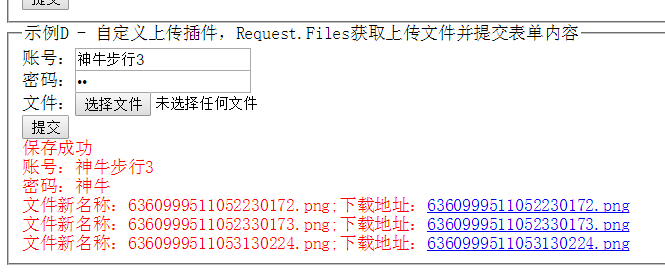
示例D的後臺程式碼分為兩部分:1.上傳檔案的Action 2.真實獲取表單form引數的Action,程式碼如:
 1  /// <summary>
 2         /// 儲存form提交的表單資料
 3         /// </summary>
 4         /// <returns></returns>
 5         [HttpPost]
 6         public JsonResult D()
 7         {
 8             var response = new MoResponse();
 9             var sbLog = new StringBuilder(string.Empty);
10             try
11             {
12                 //訪問上傳檔案地址
13                 var path = @"http://localhost:1010/{0}";
14                 sbLog.AppendFormat("賬號:{0}<br/>", Request.Params["userName"]);
15                 sbLog.AppendFormat("密碼:{0}<br/>", Request.Params["userPwd"]);
16                 foreach (var item in Request.Params["hidFileNames"].Split(new char[] { '|' }, StringSplitOptions.RemoveEmptyEntries))
17                 {
18                     sbLog.AppendFormat("檔案新名稱:{0};下載地址:<a href='{1}' target='_blank'>{0}</a><br/>", item, string.Format(path, item));
19                 }
20                 response.Status = 1;
21             }
22             catch (Exception ex)
23             {
24                 sbLog.AppendFormat("異常資訊:{0}", ex.Message);
25             }
26             finally
27             {
28                 response.Data = sbLog.ToString();
29             }
30             return Json(response);
31         }
32
33
34         /// <summary>
35         /// 獲取上傳檔案資訊
36         /// </summary>
37         /// <returns></returns>
38         [HttpPost]
39         public ContentResult D_A()
40         {
41             var response = new MoResponse();
42             response.Data = "上傳失敗";
43             try
44             {
45                 Thread.Sleep(1000 * 3);
46                 var fileCount = Request.Files.Count;
47                 //儲存檔案地址
48                 var uploadPath = @"D:\D\TTest";
49                 var fileNames = string.Empty;
50                 for (int i = 0; i < fileCount; i++)
51                 {
52                     var file = Request.Files[i];
53                     if (file == null || string.IsNullOrEmpty(file.FileName)) { continue; }
54
55                     var fileName = file.FileName;
56                     var fileNewName = DateTime.Now.Ticks + fileName;
57                     file.SaveAs(Path.Combine(uploadPath, fileNewName));
58                     fileNames += fileNewName + "|";
59                 }
60                 if (!string.IsNullOrEmpty(fileNames))
61                 {
62
63                     response.Status = 1;
64                     response.Data = fileNames.TrimEnd('|');
65                 }
66             }
67             catch (Exception ex)
68             {
69                 response.Data = ex.Message;
70             }
71             return Content(JsonConvert.SerializeObject(response));
72         }
好了外掛需要講解的就這麼多,不知不覺有隻剩我一個人了,該回家了,下面給出整體的程式碼,外掛程式碼請使用連線獲取:
外掛下載地址:shenniu.upfile-0.0.1.js
Controller程式碼:
  1 public class ErrorController : Controller
  2     {
  3         //
  4         // GET: /Error/
  5         public ActionResult Index()
  6         {
  7
  8             return View();
  9         }
 10
 11         [HttpPost]
 12         public ActionResult A()
 13         {
 14             var sbLog = new StringBuilder(string.Empty);
 15
 16             var fileCount = Request.Files.Count;
 17             //訪問上傳檔案地址
 18             var path = @"http://localhost:1010/{0}";
 19             //儲存檔案地址
 20             var uploadPath = @"D:\D\TTest";
 21             sbLog.AppendFormat("上傳檔案目錄:{0}<br/>", uploadPath);
 22             sbLog.AppendFormat("上傳檔案量:{0}<br/>", fileCount);
 23             for (int i = 0; i < fileCount; i++)
 24             {
 25                 var file = Request.Files[i];
 26                 if (file == null || string.IsNullOrEmpty(file.FileName)) { continue; }
 27
 28                 var fileName = file.FileName;
 29                 var fileNewName = DateTime.Now.Ticks + fileName;
 30                 sbLog.AppendFormat("第:{0}個檔名稱:{1}新名稱:{2}下載地址:<a href='{3}' target='_blank'>{2}</a><br/>", i + 1, fileName, fileNewName, string.Format(path, fileNewName));
 31                 file.SaveAs(Path.Combine(uploadPath, fileNewName));
 32             }
 33             return Content(sbLog.ToString());
 34         }
 35
 36         [HttpPost]
 37         public ActionResult B(IEnumerable<HttpPostedFileBase> files)
 38         {
 39             var sbLog = new StringBuilder(string.Empty);
 40
 41             var fileCount = files == null ? 0 : files.Count();
 42             //訪問上傳檔案地址
 43             var path = @"http://localhost:1010/{0}";
 44             //儲存檔案地址
 45             var uploadPath = @"D:\D\TTest";
 46             sbLog.AppendFormat("上傳檔案目錄:{0}<br/>", uploadPath);
 47             sbLog.AppendFormat("上傳檔案量:{0}<br/>", fileCount);
 48             var i = 0;
 49             foreach (var file in files)
 50             {
 51                 if (file == null || string.IsNullOrEmpty(file.FileName)) { continue; }
 52
 53                 var fileName = file.FileName;
 54                 var fileNewName = DateTime.Now.Ticks + fileName;
 55                 sbLog.AppendFormat("第:{0}個檔名稱:{1}新名稱:{2}下載地址:<a href='{3}' target='_blank'>{2}</a><br/>", i + 1, fileName, fileNewName, string.Format(path, fileNewName));
 56                 file.SaveAs(Path.Combine(uploadPath, fileNewName));
 57             }
 58             return Content(sbLog.ToString());
 59         }
 60
 61         [HttpPost]
 62         public JsonResult C()
 63         {
 64             Thread.Sleep(1000 * 5);
 65             var response = new MoResponse();
 66             var sbLog = new StringBuilder("開始處理...");
 67             try
 68             {
 69
 70                 sbLog.AppendFormat("賬號:{0}<br/>", Request.Params["userName"]);
 71                 sbLog.AppendFormat("密碼:{0}<br/>", Request.Params["userPwd"]);
 72
 73                 var fileCount = Request.Files.Count;
 74                 //訪問上傳檔案地址
 75                 var path = @"http://localhost:1010/{0}";
 76                 //儲存檔案地址
 77                 var uploadPath = @"D:\D\TTest";
 78                 sbLog.AppendFormat("上傳檔案目錄:{0}<br/>", uploadPath);
 79                 sbLog.AppendFormat("上傳檔案量:{0}<br/>", fileCount);
 80                 for (int i = 0; i < fileCount; i++)
 81                 {
 82                     var file = Request.Files[i];
 83                     if (file == null || string.IsNullOrEmpty(file.FileName)) { continue; }
 84
 85                     var fileName = file.FileName;
 86                     var fileNewName = DateTime.Now.Ticks + fileName;
 87                     sbLog.AppendFormat("第:{0}個檔名稱:{1}新名稱:{2}下載地址:<a href='{3}' target='_blank'>{2}</a><br/>", i + 1, fileName, fileNewName, string.Format(path, fileNewName));
 88                     file.SaveAs(Path.Combine(uploadPath, fileNewName));
 89                     response.Status = 1;
 90                 }
 91             }
 92             catch (Exception ex)
 93             {
 94                 sbLog.AppendFormat("異常資訊:{0}", ex.Message);
 95             }
 96             finally
 97             {
 98                 response.Data = sbLog.ToString();
 99             }
100             return Json(response);
101         }
102
103         /// <summary>
104         /// 儲存form提交的表單資料
105         /// </summary>
106         /// <returns></returns>
107         [HttpPost]
108         public JsonResult D()
109         {
110             var response = new MoResponse();
111             var sbLog = new StringBuilder(string.Empty);
112             try
113             {
114                 //訪問上傳檔案地址
115                 var path = @"http://localhost:1010/{0}";
116                 sbLog.AppendFormat("賬號:{0}<br/>", Request.Params["userName"]);
117                 sbLog.AppendFormat("密碼:{0}<br/>", Request.Params["userPwd"]);
118                 foreach (var item in Request.Params["hidFileNames"].Split(new char[] { '|' }, StringSplitOptions.RemoveEmptyEntries))
119                 {
120                     sbLog.AppendFormat("檔案新名稱:{0};下載地址:<a href='{1}' target='_blank'>{0}</a><br/>", item, string.Format(path, item));
121                 }
122                 response.Status = 1;
123             }
124             catch (Exception ex)
125             {
126                 sbLog.AppendFormat("異常資訊:{0}", ex.Message);
127             }
128             finally
129             {
130                 response.Data = sbLog.ToString();
131             }
132             return Json(response);
133         }
134
135
136         /// <summary>
137         /// 獲取上傳檔案資訊
138         /// </summary>
139         /// <returns></returns>
140         [HttpPost]
141         public ContentResult D_A()
142         {
143             var response = new MoResponse();
144             response.Data = "上傳失敗";
145             try
146             {
147                 Thread.Sleep(1000 * 3);
148                 var fileCount = Request.Files.Count;
149                 //儲存檔案地址
150                 var uploadPath = @"D:\D\TTest";
151                 var fileNames = string.Empty;
152                 for (int i = 0; i < fileCount; i++)
153                 {
154                     var file = Request.Files[i];
155                     if (file == null || string.IsNullOrEmpty(file.FileName)) { continue; }
156
157                     var fileName = file.FileName;
158                     var fileNewName = DateTime.Now.Ticks + fileName;
159                     file.SaveAs(Path.Combine(uploadPath, fileNewName));
160                     fileNames += fileNewName + "|";
161                 }
162                 if (!string.IsNullOrEmpty(fileNames))
163                 {
164
165                     response.Status = 1;
166                     response.Data = fileNames.TrimEnd('|');
167                 }
168             }
169             catch (Exception ex)
170             {
171                 response.Data = ex.Message;
172             }
173             return Content(JsonConvert.SerializeObject(response));
174         }
175     }
176
177     public class MoResponse
178     {
179
180         public object Data { get; set; }
181
182         /// <summary>
183         ///  0:失敗 1:成功
184         /// </summary>
185         public int Status { get; set; }
186     }
View程式碼:
  1 @{
  2     ViewBag.Title = "上傳 - 示例";
  3 }
  4 <!DOCTYPE html>
  5 <html>
  6 <head>
  7     <title></title>
  8     <meta />
  9 </head>
 10 <body>
 11
 12     <div class=" error-container">
 13         <fieldset>
 14             <legend>示例A - 普通表單上傳檔案,Request.Files獲取上傳檔案</legend>
 15             <form action="/Error/A" method="post" enctype="multipart/form-data">
 16                 <input type="file" name="fileA" multiple />
 17                 <button type="submit">提交</button>
 18             </form>
 19         </fieldset>
 20
 21
 22         <fieldset>
 23             <legend>示例B - 普通表單上傳檔案,HttpPostedFileBase獲取上傳檔案</legend>
 24             @using (Html.BeginForm("B", "Error", FormMethod.Post, new { enctype = "multipart/form-data" }))
 25             {
 26                 <input type="file" name="files" multiple />
 27                 <button>提交</button>
 28             }
 29         </fieldset>
 30
 31         <fieldset>
 32             <legend>示例C - ajax+FormData上傳檔案,Request.Files獲取上傳檔案</legend>
 33             @using (Html.BeginForm("C", "Error", FormMethod.Post, new { enctype = "multipart/form-data", @id = "form_c" }))
 34             {
 35                 <span>賬號:</span><input type="text" name="userName" value="神牛步行3" /><br />
 36                 <span>密碼:</span><input type="password" name="userPwd" value="神牛" /><br />
 37                 <span>檔案:</span><input type="file" name="filesc" multiple /><br />
 38                 <button type="button">提交</button><br />
 39                 <span id="msg_c"></span>
 40             }
 41         </fieldset>
 42
 43         <fieldset>
 44             <legend>示例D - 自定義上傳外掛,Request.Files獲取上傳檔案並提交表單內容</legend>
 45             @using (Html.BeginForm("D", "Error", FormMethod.Post, new { enctype = "multipart/form-data", @id = "form_d" }))
 46             {
 47                 <span>賬號:</span><input type="text" name="userName" value="神牛步行3" /><br />
 48                 <span>密碼:</span><input type="password" name="userPwd" value="神牛" /><br />
 49                 <span>檔案:</span><input type="file" name="filesd" multiple /><br />
 50                 <button type="button">提交</button><br />
 51                 <span id="msg_d" style="color:red"></span>
 52             }
 53         </fieldset>
 54     </div>
 55 </body>
 56 </html>
 57 <script src="~/Scripts/jquery-1.10.2.min.js"></script>
 58 <script src="http://7xn3fx.com1.z0.glb.clouddn.com/js/PlugTool/shenniu.upfile-0.0.1.js"></script>
 59 <script>
 60     $(function () {
 61
 62         //示例D程式碼
 63         //初始化外掛
 64         var shenniu = new shenniu_UpFile({
 65
 66             url: "/Error/D_A",
 67             fileEleName: "filesd"
 68         });
 69
 70         //提交事件
 71         $("#form_d button[type='button']").click(function () {
 72
 73             var msg = $("#msg_d");
 74             var btnSave = $(this);
 75             btnSave.attr("disabled", "disabled");
 76             msg.html("上傳中..");
 77
 78             //上傳檔案
 79             shenniu.submitFun(function (data) {
 80
 81                 try {
 82
 83                     var result = JSON.parse(data);
 84                     //上傳成功,儲存資料
 85                     if (result.Status == 1) {
 86
 87                         //增加上傳成功的檔名稱到表單
 88                         var hidFileNames = $("#form_d input[name='hidFileNames']");
 89                         if (hidFileNames.length <= 0) { $("#form_d").append("<input type='hidden' name='hidFileNames' value='" + result.Data + "'/>"); }
 90                         else {
 91                             hidFileNames.val(result.Data);
 92                         }
 93
 94                         //獲取表單鍵值對,提交表單資料
 95                         var param = $("#form_d").serialize();
 96                         var action = $("#form_d").attr("action");
 97                         $.post(action, param, function (res) {
 98
 99                             msg.html(res.Status == 1 ? "儲存成功<br/>" + res.Data : "儲存失敗");
100                         });
101
102                     } else {
103
104                         msg.html(result.Data);
105                     }
106                 } catch (e) {
107                     console.log(e.message);
108                 } finally {
109                     btnSave.removeAttr("disabled");
110                 }
111             });
112         });
113     })
114 </script>