使用vue init webpack test(專案資料夾名)命令初始化一個vue專案,cd test,然後安裝依賴npm install之後會生成一些預設的資料夾和檔案,這些檔案和資料夾中有些和配置有關的。如果去專門的瞭解webpack一定會雲裡霧裡,這裡簡單說明一下常用的配置。
1.babelrc檔案
這個檔案放在根目錄下面設定轉碼規則的。
例如要想在程式碼中使用es6,就要在這個檔案中配置"presets": ["es2015"]。
在專案程式碼中要使用jsx語法除了安裝babel-plugin-transform-vue-jsx外掛之外,還要配置"plugins": ["transform-runtime", "transform-vue-jsx"]。
2..editorconfig檔案
這個檔案配置編輯器的編碼風格,目前本人還沒有修改過。
3..eslintrc.js檔案
這個檔案放在根目錄下面是負責程式碼規範,引入外掛的。例如:
"globals": {
  "plus": true,
  "alert": true,
  "xhook": true,
  "sessionStorage": true,
  "AlloyFingerVue": true,
  "FastClick": true,
  "_": true,
  "IScroll": true,
  'Swiper': true
}
這一段是用來允許使用第三方外掛中的函式,如下舉例
比如我們使用HBuilder打包程式,用到一些擴充套件,使用plus.downloader.createDownload下載,plus.runtime.version獲取app當前版本等,所以配置"plus": true,然後在在程式碼中可以直接使用plus.xxxx。
在專案除錯的時候有時候用到alert,所以配置"alert": true,然後在程式碼中可以直接使用alert()語句。
使用xhook攔截器,所以配置"xhook": true,在index.html中引入xhook外掛<script src="static/js/xhook.min.js"></script>,在src/modules中新建xhoo.js檔案並處理邏輯,然後在main.js中引入這個檔案import './modules/xhook'。
在專案中想直接使用sessionStorage,所以配置"sessionStorage": true。
在專案中想使用AlloyFingerVue,所以配置"AlloyFingerVue": true,在static/js/下新增alloy_finger.vue.js檔案,並匯出AlloyFingerVue模組,然後在main.js中直接使用這個模組Vue.use(AlloyFingerVue)。
在專案中想使用FastClick,所以配置"FastClick": true,在index.html中引入fastclick外掛<script src="static/js/fastclick.js"></script>,在src/modules中新建fast-click.js檔案處理邏輯,在main.js中引入這個檔案import './modules/fast-click'。
在專案中想使用underscore,所以配置"_": true,在static/js中新增underscore-min.js外掛<script src="static/js/underscore-min.js"></script>,然後可以在程式碼中直接使用_.pluck,_.values等。
在專案中想使用iscroll,所以配置,在index.html中引入iscroll外掛<script src="static/js/iscroll-probe.js"></script>,然後可以在程式碼中直接使用<iscroll-view></iscroll-view>並使用new IScroll語句。
在專案中想使用Swiper,所以配置,在msite.vue中引入js和css檔案,import './../../../static/swiper/swiper.min.css',import './../../../static/swiper/swiper.min',然後可以在程式碼中直接使用this.swiper = new Swiper語句
如果在專案中js語句後面不加分號可以這樣配置:"semi": 0,當時webstorm有警告提醒:Unterminated statement,這是可以修改webstorm配置,如下圖:,如果必須加則是:'semi':['error','always']
4..eslintignore檔案
想要引入三方js庫,但是這些庫不符合eslint規範,可以在這個檔案裡忽略掉,例如:
build/*.js
config/*.js
static
5..gitignore檔案
這個檔案用於配置不需要加入版本管理的檔案,例如:
.DS_Store
node_modules/
npm-debug.log
test/unit/coverage
test/e2e/reports
selenium-debug.log
.idea
/clear
/src/modules/cache.js
6.package.json檔案
這個檔案主要用來配置專案要用到的依賴外掛,這個檔案一般不會手動更改,而是使用npm install xxxx 來安裝外掛,然後這個檔案自動被修改。scripts節點配置命令的執行檔案。執行npm run dev執行build/dev-server.js,執行npm run build的時候執行待是build/build.js檔案。如下:
{
  "name": "test",
  "version": "1.0.0",
  "description": "A Vue.js project",
  "author": "xxx<xxx@qq.com>",
  "private": true,
  "scripts": {
    "dev": "node build/dev-server.js",
    "build": "node build/build.js",
    "unit": "karma start test/unit/karma.conf.js --single-run",
    "e2e": "node test/e2e/runner.js",
    "test": "npm run unit && npm run e2e",
    "lint": "eslint --ext .js,.vue src test/unit/specs test/e2e/specs"
  },
  "dependencies": {
    "date-fns": "^1.22.0",
    "echarts": "^3.4.0",
    "element-ui": "^1.1.2",
  ......
  },
  "devDependencies": {
    "autoprefixer": "^6.6.1",
    "babel-core": "^6.21.0",
    "babel-eslint": "^7.1.1",
  ... ...

  },
  "engines": {
    "node": ">= 4.0.0",
    "npm": ">= 3.0.0"
  }
}
7.build/build.js檔案
執行打包命令的時候會執行這個檔案,然後不知所云
8.build/check-versions.js檔案
檢查版本?不知所云
9.build/dev-client.js檔案
不知所云
10.build/dev-server.js檔案
app.use(staticPath, express.static('./static'))這句是指向static目錄。執行npm run dev的時候最先執行build/dev-server.js檔案,這個檔案主要完成下面幾個事情:
- 檢查node的npm待版本,引入外掛和配置
- webpack對原始碼進行編譯打包並返回compiler物件
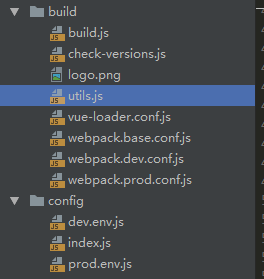
11.build/utils.js檔案
不知所云
12.build/vue-loader.conf.js檔案
不知所云
13.build/webpack.base.conf.js檔案
1.配置專案入口檔案,如下:
  entry: {
    app: './src/main.js',
    global: './src/window-global.js'
  }
這樣就有兩個入口,在window-global.js中可以定義全域性變數,在整個專案中都可以使用,比如ajaxBaseUrl: 'http://192.168.1.36:8080/',在後在介面檔案中使用,很方便
var instance = axios.create({
  baseURL: window.global.ajaxBaseUrl + 'api/system/subSystem',
  timeout: window.global.timeout
  // headers: {'X-Custom-Header': 'foobar'}
})
2.配置專案輸出,如下:
  output: {
    path: config.build.assetsRoot,
    filename: '[name].js',
    publicPath: process.env.NODE_ENV === 'production'
      ? config.build.assetsPublicPath
      : config.dev.assetsPublicPath
  }
3.配置快捷訪問方式
  resolve: {
    extensions: ['.js', '.vue', '.json'],
    alias: {
      'vue$': 'vue/dist/vue.esm.js',
      '@': resolve('src'),
      'src': resolve('src'),
      'api':resolve('src/api'),
      'storage':resolve('src/module/storage.js'),
      'common':resolve('src/components/common')
    }
  },
這樣在頁面中訪問api或者storage就不用考慮當前頁面的路徑,例如在src\components\laboratory\chemical\material\apply-dialog.vue這樣一個路徑下匯入api,可以直接寫import * as api from 'api' , 否則要寫成import * as api from './../../../../api' 這樣,要考慮當前的路徑。也有一個缺點,就是不能使用ctrl + 滑鼠左鍵點選快速定位到介面程式碼。如下程式碼這裡不能快速定位。
4.配置需要babel編譯的目錄和檔案
在執行npm run build的時候要知道babel-loader編譯那些目錄下的js檔案。初始化webpack的時候專案主要的檔案存放在src目錄下面,有時候需要修改這個資料夾的名字,這個時候需要修改這裡。還有解決element-ui一個bug的時候需要把一個外掛中的檔案打包。如下程式碼:
      {
        test: /\.js$/,
        loader: 'babel-loader',
        include: [
          resolve('src'),
          resolve('test'),
          resolve('node_modules/element-ui/src/mixins/emitter.js')]
      }
下面一個專案把src資料夾名字修改了,另外新加了一個packages的資料夾,這裡也要改一下,如下:
      {
        test: /\.js$/,
        loader: 'babel-loader',
        include: [resolve('examples'), resolve('test'), resolve('packages')]
      },
還有在我們需要在vue專案中引入markdown檔案也需要引入一個vue-markdown-loader,,如下:
      // 配置markdown-loader by ningdong
      {
        test: /\.md$/,
        loader: "vue-markdown-loader",
        options: vueMarkdown
      }
注意這裡vue-markdown-loader需要事先安裝。
還有我們專案中如果想使用less檔案,就可以先安裝less和less-loader,然後在這裡新增一個配置項,如下:
npm install less less-loader --save
// 配置less-loader
{
  test: /\.less$/,
  loader: 'style-loader!css-loader!less-loader'
}
14.build/webpack.dev.conf.js檔案
配置devtool選項更改打包方式。
15.build/webpack.prod.conf.js檔案
(1)打包的時候報錯:FATAL ERROR: CALL_AND_RETRY_LAST Allocation failed - process out of memory,說記憶體不夠,可以修改打包配置,就是npm run build生成靜態檔案時候用到的配置,減少記憶體消耗。
修改sourceMap配置成false可以在打包後不再生成map檔案,如下:
    new webpack.optimize.UglifyJsPlugin({
      compress: {
        warnings: false
      },
      sourceMap: false
    })
dist/static/js目錄下沒有map檔案了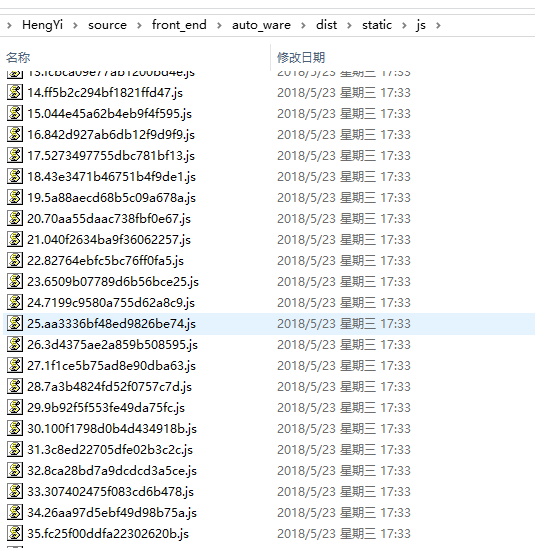
(2)還可以修改node_modules\.bin\webpack.cmd檔案新增記憶體配置項
16.build/webpack.test.conf.js檔案
不知所云。
17.config/dev.env.js檔案
不知所云。
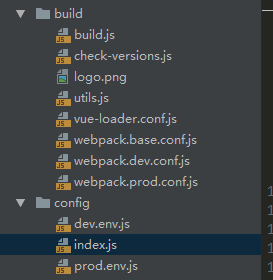
18.config/index.js檔案
1. 打包目錄
配置打包目錄,index檔案,打包後的js檔案路徑等,如下,打包後的檔案放在dist目錄下面,入口檔案是index.html
  build: {
    env: require('./prod.env'),
    index: path.resolve(__dirname, '../dist/index.html'),
    assetsRoot: path.resolve(__dirname, '../dist'),
    assetsSubDirectory: 'static',
    assetsPublicPath: '/',
    productionSourceMap: true,
    // Gzip off by default as many popular static hosts such as
    // Surge or Netlify already gzip all static assets for you.
    // Before setting to `true`, make sure to:
    // npm install --save-dev compression-webpack-plugin
    productionGzip: false,
    productionGzipExtensions: ['js', 'css'],
    // Run the build command with an extra argument to
    // View the bundle analyzer report after build finishes:
    // `npm run build --report`
    // Set to `true` or `false` to always turn it on or off
    bundleAnalyzerReport: process.env.npm_config_report
  }
這裡注意,並不是所有的webpack都是這個位置,這個欄位。在使用create-react-app建立的專案中,是配置config/paths.js檔案。關鍵程式碼如下:
module.exports = {
  dotenv: resolveApp('.env'),
  appPath: resolveApp('.'),
  appBuild: resolveApp('build'),
  appPublic: resolveApp('public'),
  appHtml: resolveApp('public/index.html'),
  appIndexJs: resolveModule(resolveApp, 'src/index'),
  appPackageJson: resolveApp('package.json'),
  appSrc: resolveApp('src'),
  appTsConfig: resolveApp('tsconfig.json'),
  yarnLockFile: resolveApp('yarn.lock'),
  testsSetup: resolveModule(resolveApp, 'src/setupTests'),
  proxySetup: resolveApp('src/setupProxy.js'),
  appNodeModules: resolveApp('node_modules'),
  publicUrl: getPublicUrl(resolveApp('package.json')),
  servedPath: getServedPath(resolveApp('package.json')),
};
需要把appBuild這個欄位配置成你想打包的路徑,注意也可以配置成絕對路徑的,例如:appBuild: 'D:\\JAVA\\app\\resource\\static'
2. 啟動自動開啟預設瀏覽器
最近我個更新了node,npm和vue-cli,npm run dev之後發現沒有自動啟動瀏覽器,和autoOpenBrowser這個配置有關,如下:
autoOpenBrowser: false //不自動開啟瀏覽器,相反設定為true的時候自動開啟瀏覽器。
3. 啟動的埠地址
npm run dev的時候可以通過port屬性指定埠8080
4. 介面除錯地址和埠
路由代理是通過外掛http-proxy-middleware實現的,配置開環境下的除錯埠,介面地址等,如下:
dev: {
    env: require('./dev.env'),
    port: 8080,
    autoOpenBrowser: true,
    assetsSubDirectory: 'static',
    assetsPublicPath: '/',
    proxyTable: {
      /* 張三 */
      // '/jiKonCloud_1': {
      //   target: 'http://192.168.1.60:8080',
      //   changeOrigin: true
      // },

      /* 李四 */
      // '/api': {
      //   target: 'http://192.168.1.9:8080',
      //   changeOrigin: true
      // }
      // '/api': {
      //   target: 'http://192.168.1.130:8080',
      //   changeOrigin: true
      // }

      /* 王五 */
      // '/api': {
      //   target: 'http://192.168.100.120:8080/',
      //   changeOrigin: true
      // }

      /* 趙劉 */
      // '/api': {
      //   target: 'http://192.168.100.176:9595',
      //   changeOrigin: true
      // }
      // '/api': {
      //   target: 'http://192.168.1.121:9595',
      //   changeOrigin: true
      // }

      /* 錢七 */
      // '/api': {
      //   target: 'http://192.168.100.33:8080',
      //   changeOrigin: true
      // }
      // '/api': {
      //   target: 'http://192.168.1.107:8080',
      //   changeOrigin: true
      // }
    }
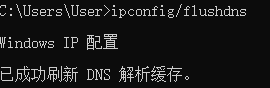
5. DNS快取問題
說以個額外的問題,有時候需要修改host檔案來做路由跳轉,但是有個問題,host檔案是有快取的,這個時候這裡代理就會出報錯:Error occurred while trying to proxy request ... 。這時可以在cmd命令裡使用ipconfig/flushdns 來清除dns快取,執行結果如下:
6. 埠占用問題
有時候啟動多個專案的時候,或者其他程式啟動會佔用這裡指定的埠,npm run dev的時候會報錯:listen EADDRINUSE :::8082,這時可以執行命令:netstat -ano檢視埠對應的PID,如下是16360,然後執行命令:tskill 16360,殺掉這個應用就好了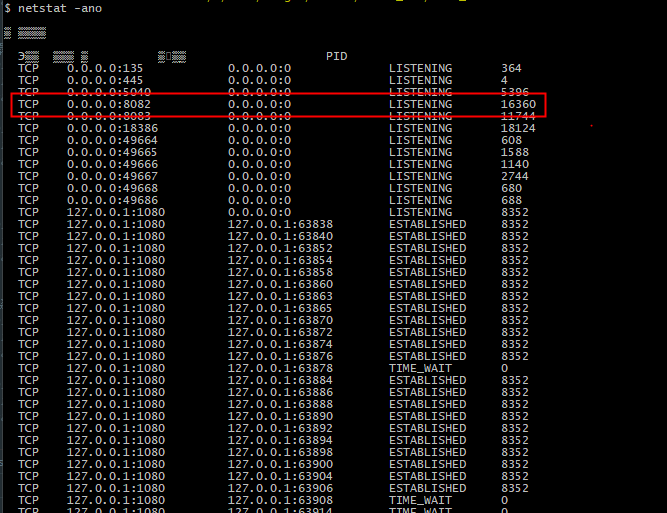
7.相對路徑問題
有些情況下需要把vue打包後的檔案放在某子目錄下,需要修改兩個地方一個是這個config/index.js,修改build下的assetsPublicPath屬性,在斜槓前面加一個“.”,一個是build/utils.js,新增一個配置publicPath: '../../'。截圖如下
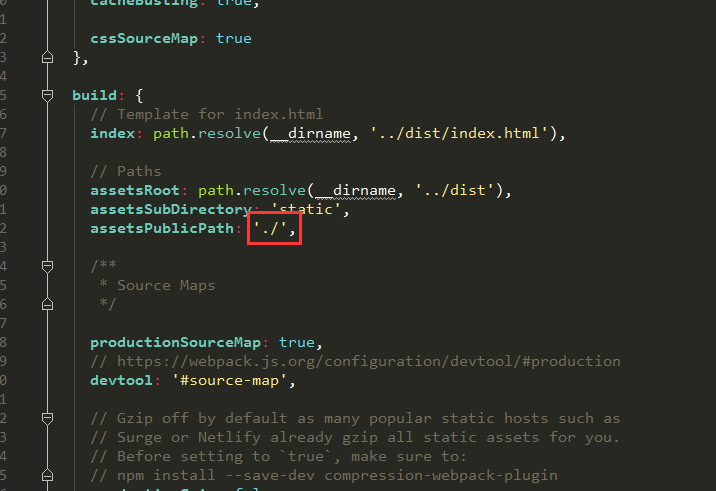
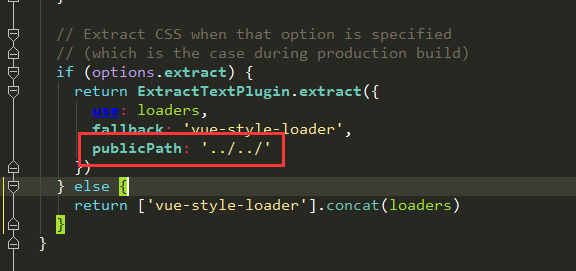
這樣打包之後就可以把檔案放在伺服器任何目錄下。
19.config/prod.env.js檔案
不知所云
20.config/test.env.js檔案
不知所云