android實踐專案七自定義的Spinner
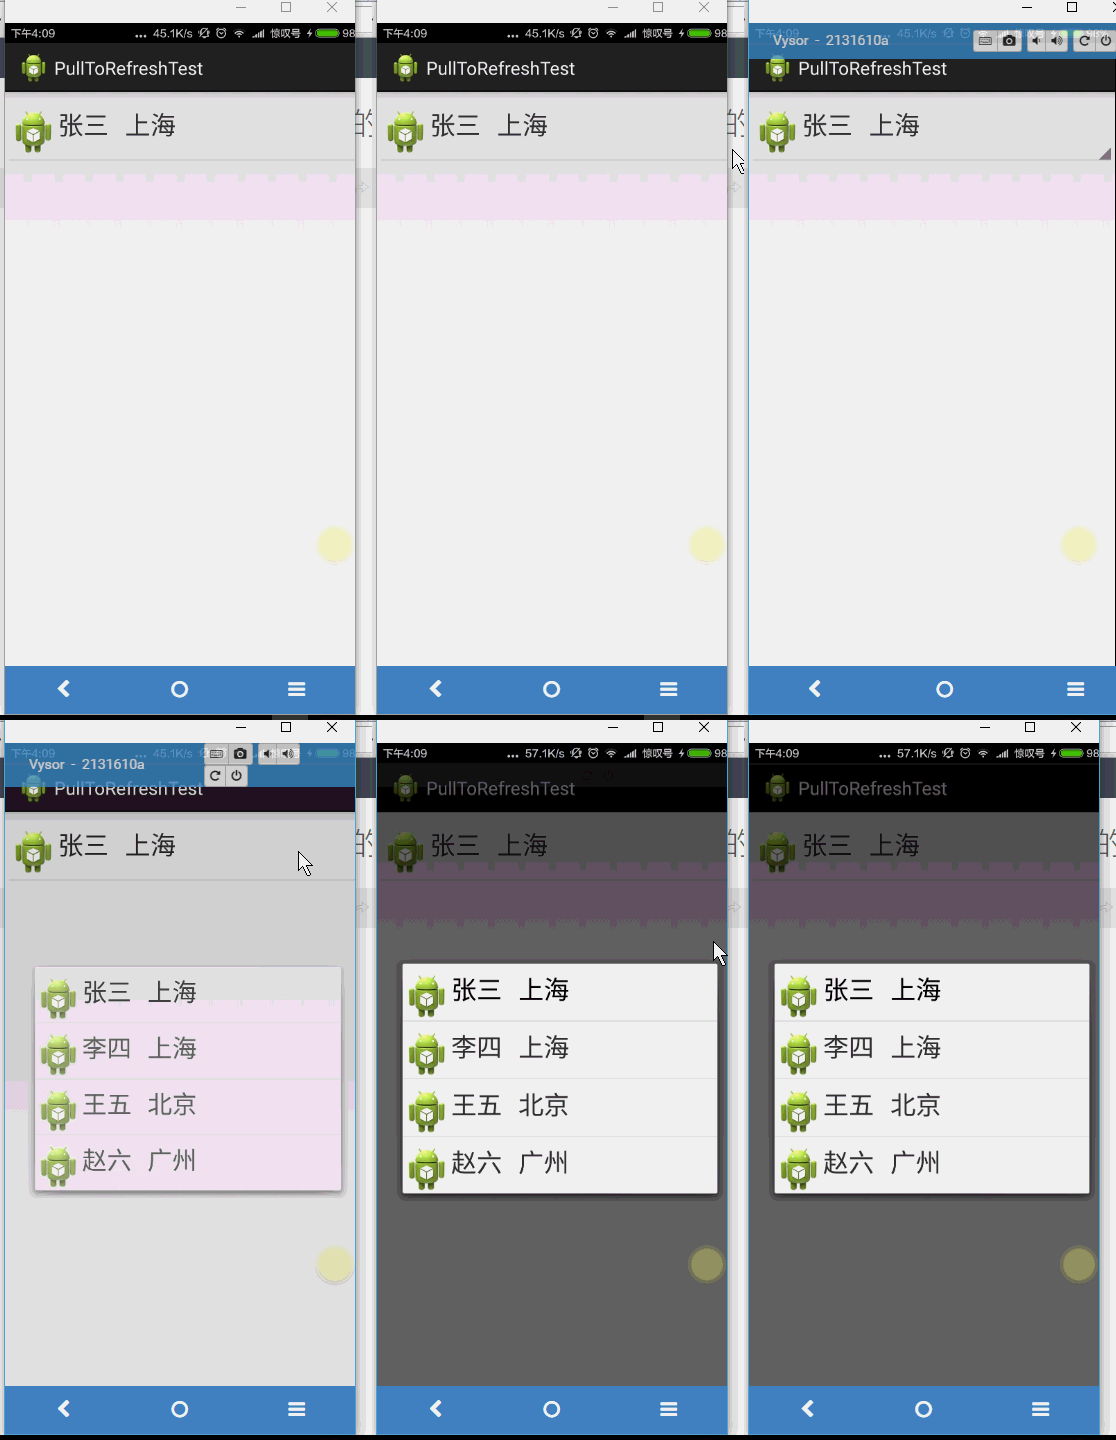
程式實現的效果

話不多說先上子佈局
<?xml version="1.0" encoding="utf-8"?>
<LinearLayout xmlns:android="http://schemas.android.com/apk/res/android"
    android:layout_width="match_parent"
    android:layout_height="match_parent"
    android:orientation="horizontal" >

    <TextView
        android:id="@+id/textView1"
        android:layout_width="wrap_content"
        android:layout_height="wrap_content"
        android:drawableLeft="@drawable/ic_launcher"
        android:paddingRight="8dip"
        android:paddingTop="8dip"
        android:text="TextView"
        android:textSize="25sp" />

    <TextView
        android:id="@+id/textView2"
        android:layout_width="wrap_content"
        android:layout_height="wrap_content"
        android:paddingLeft="8dip"
        android:paddingTop="8dip"
        android:text="TextView"
        android:textSize="25sp" />

</LinearLayout>
構造一個peeson類來封裝資料
package com.example.demotest;

public class Person {
    private String personName;
    private String personAddress;
    public Person(String personName, String personAddress) {
        super();
        this.personName = personName;
        this.personAddress = personAddress;
    }
    public String getPersonName() {
        return personName;
    }
    public void setPersonName(String personName) {
        this.personName = personName;
    }
    public String getPersonAddress() {
        return personAddress;
    }
    public void setPersonAddress(String personAddress) {
        this.personAddress = personAddress;
    }

}
再來寫最重要的資料介面卡(自定義元件的核心)
package com.example.demotest;

 import java.util.List;
import android.content.Context;
import android.view.LayoutInflater;
import android.view.View;
import android.view.ViewGroup;
import android.widget.BaseAdapter;
import android.widget.TextView;

public class MySpinnerAdapter extends BaseAdapter {
    private List<Person> mList;
    private Context mContext;

    public MySpinnerAdapter(Context pContext, List<Person> pList) {
        this.mContext = pContext;
        this.mList = pList;
    }

    @Override
    public int getCount() {
        return mList.size();
    }

    @Override
    public Object getItem(int position) {
        return mList.get(position);
    }

    @Override
    public long getItemId(int position) {
        return position;
    }
    /**
     * 下面是重要程式碼
     */
    @Override
    public View getView(int position, View convertView, ViewGroup parent) {
        LayoutInflater _LayoutInflater=LayoutInflater.from(mContext);
        convertView=_LayoutInflater.inflate(R.layout.spinner3, null);
        if(convertView!=null)
        {
            TextView _TextView1=(TextView)convertView.findViewById(R.id.textView1);
            TextView _TextView2=(TextView)convertView.findViewById(R.id.textView2);
            _TextView1.setText(mList.get(position).getPersonName());
            _TextView2.setText(mList.get(position).getPersonAddress());
        }
        return convertView;
    }
}
看重寫的getview方法用佈局構建器載入子佈局在例項化自佈局裡面的Textview 表示還可以用viewholder優化
最後再看主要的活動
package com.example.demotest;

import java.util.ArrayList;
import java.util.List;

import android.app.Activity;
import android.os.Bundle;
import android.widget.Spinner;

public class SpinnerTest extends Activity {
    @Override
    protected void onCreate(Bundle savedInstanceState) {
        // TODO Auto-generated method stub
        super.onCreate(savedInstanceState);
        setContentView(R.layout.spinner4);
        Spinner mSpinner = (Spinner) findViewById(R.id.spinnertest);
        // 建立資料來源
        List<Person> persons = new ArrayList<Person>();
        persons.add(new Person("張三", "上海 "));
        persons.add(new Person("李四", "上海 "));
        persons.add(new Person("王五", "北京"));
        persons.add(new Person("趙六", "廣州 "));
        // 建立Adapter繫結資料來源
        MySpinnerAdapter _MyAdapter = new MySpinnerAdapter(this, persons);
        // 繫結Adapter
        mSpinner.setAdapter(_MyAdapter);
    }
}
程式碼很簡單 初始化控制元件 和資料 再給Spinner載入介面卡就好了
主佈局檔案就只是一個Spinner
<?xml version="1.0" encoding="utf-8"?>
<LinearLayout xmlns:android="http://schemas.android.com/apk/res/android"
    android:layout_width="match_parent"
    android:layout_height="match_parent"
    android:orientation="horizontal" >

 <Spinner
     android:id="@+id/spinnertest"
     android:layout_width="match_parent"
     android:layout_height="wrap_content"
     android:spinnerMode="dialog"
     />

</LinearLayout>
Spinner的彈出屬性在android:spinnerMode中設定
很簡單的案例 看完跑一遍吧~
相關文章
- 聊聊Dubbo(七):自定義Filter實踐Filter
- Animation Spinner【專案】
- Android 自定義View:深入理解自定義屬性(七)AndroidView
- 鴻蒙專案實戰(三):自定義彈窗開發實踐鴻蒙
- uniapp專案實踐總結(十六)自定義下拉重新整理元件APP元件
- Android元件化實踐專案分享Android元件化
- Android自定義拍照實現Android
- 自定義物件池實踐物件
- 建立自定義專案模板
- 自定義限速功能實踐——Caffeine
- .NET Core - 自定義專案模板
- Android客戶端專案元件化實踐Android客戶端元件化
- Android 自定義 View 實戰之 PuzzleViewAndroidView
- 聊聊springboot專案如何實現自定義actuator端點Spring Boot
- 自定義限速功能實踐——Map 版本
- Flutter 自定義 Widget(理論+實踐)Flutter
- GitHub Pages 自定義域名實踐整理Github
- Android執行緒池的原理以及專案中實踐Android執行緒
- 自定義Vue-cli專案模板Vue
- 五、自定義Zabbix監控專案
- VS2019 自定義專案模板
- Android自定義view之實現帶checkbox的SnackbarAndroidView
- 利用husky實現前端專案自定義規範校驗前端
- SpringBoot專案實戰(7):自定義異常處理介面Spring Boot
- json-server的實踐與自定義配置化JSONServer
- Apache Linkis自定義變數實踐分享Apache變數
- Apache Phoenix自定義函式(UDF)實踐Apache函式
- android自定義view(自定義數字鍵盤)AndroidView
- 專案需求討論-自定義滾輪
- Android 好用的自定義元件、框架Android元件框架
- Android 自定義優雅的BezierSeekBarAndroid
- 【朝花夕拾】Android自定義View篇之(四)自定義View的三種實現方式及自定義屬性詳解AndroidView
- Android 自定義UI元件AndroidUI元件
- android 自定義鍵盤Android
- Android自定義View整合AndroidView
- Android自定義遮罩層Android遮罩
- 自定義Android鍵盤Android
- Android自定義OnTouch事件Android事件
- 自定義控制元件實踐-帶特效的索引欄控制元件特效索引