下拉重新整理--載入更多
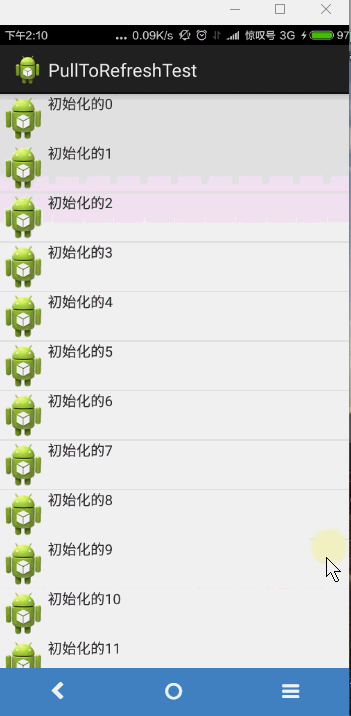
這是程式實現的效果
現在來分析是如何做到的
先來配置footermore的佈局檔案
<?xml version="1.0" encoding="utf-8"?>
<LinearLayout xmlns:android="http://schemas.android.com/apk/res/android"
    android:layout_width="match_parent"
    android:layout_height="match_parent"
    android:orientation="vertical" >

    <LinearLayout
        android:id="@+id/footer_layout"
        android:layout_width="match_parent"
        android:layout_height="wrap_content"
        android:gravity="center"
        android:layout_marginTop="10dp"
        android:layout_marginBottom="10dp"
        android:orientation="horizontal"
        >

        <ProgressBar
            style="?android:attr/progressBarStyleSmall"
            android:layout_width="wrap_content"
            android:layout_height="wrap_content" />

        <TextView
            android:layout_width="wrap_content"
            android:layout_height="wrap_content"
            android:text="正在載入,請稍等。。。" />
    </LinearLayout>

</LinearLayout>
很簡單就是一個progressbar和一個textview
然後新建一個LoadListView來將其載入。
public class LoadListView extends ListView implements OnScrollListener {
    private View footer;// 底部佈局
    int totalItemCount;// 總數量
    int lastVisibieItem;// 最後一個可見的item;
    boolean isLoading;// 判斷變數
    IloadListener iLoadListener;// 介面變數

    public LoadListView(Context context, AttributeSet attrs) {
        super(context, attrs);
        initView(context);
    }

    public LoadListView(Context context) {
        super(context);
        initView(context);
    }

    public LoadListView(Context context, AttributeSet attrs, int defStyle) {
        super(context, attrs, defStyle);
        initView(context);
        // TODO Auto-generated constructor stub
    }

    // listview載入底部佈局
    private void initView(Context context) {
        LayoutInflater inflater = LayoutInflater.from(context);
        footer = inflater.inflate(R.layout.footermore, null);
        // 設定隱藏底部佈局
        footer.findViewById(R.id.footer_layout).setVisibility(View.GONE);
        this.addFooterView(footer);
        this.setOnScrollListener(this);
    }

    @Override
    public void onScrollStateChanged(AbsListView view, int scrollState) {
        // TODO Auto-generated method stub
        if (totalItemCount == lastVisibieItem && scrollState == SCROLL_STATE_IDLE) {
            if (!isLoading) {
                isLoading = true;
                footer.findViewById(R.id.footer_layout).setVisibility(View.VISIBLE);
                // 載入更多(獲取介面)
                iLoadListener.onLoad();
            }
        }
    }

    @Override
    public void onScroll(AbsListView view, int firstVisibleItem, int visibleItemCount, int totalItemCount) {
        // TODO Auto-generated method stub
        this.lastVisibieItem = firstVisibleItem + visibleItemCount;
        this.totalItemCount = totalItemCount;
    }

    public void setInterface(IloadListener iLoadListener) {

        this.iLoadListener = iLoadListener;
    }

    // 載入更多資料的回撥介面
    public interface IloadListener {
        public void onLoad();
    }

    // 載入完成通知隱藏
    public void loadComplete() {
        isLoading = false;
        footer.findViewById(R.id.footer_layout).setVisibility(View.GONE);

    }
}
此段程式碼先重寫了Listview的3個構造方法,然後用一個initview()方法來載入底部佈局用佈局構造器LayoutInflater類來實現,然後呼叫listview的addFooterView方法。開始時先將底部佈局設定為隱藏,再在下拉時間中將其顯示出來。我們來看程式碼 重寫了listview的onScrollListener方法,監聽事件裡面有兩個值得注意的方法
    @Override
    public void onScrollStateChanged(AbsListView view, int scrollState) {
        // TODO Auto-generated method stub
        if (totalItemCount == lastVisibieItem && scrollState == SCROLL_STATE_IDLE) {
            if (!isLoading) {
                isLoading = true;
                footer.findViewById(R.id.footer_layout).setVisibility(View.VISIBLE);
                // 載入更多(獲取介面)
                iLoadListener.onLoad();
            }
        }
    }

    @Override
    public void onScroll(AbsListView view, int firstVisibleItem, int visibleItemCount, int totalItemCount) {
        // TODO Auto-generated method stub
        this.lastVisibieItem = firstVisibleItem + visibleItemCount;
        this.totalItemCount = totalItemCount;
    }
先看onScroll()方法帶有四個引數 根據名稱很好看出引數的含義 view ,開始項,可見項的個數,總個數。我們定義一個lastVisibieItem = firstVisibleItem + visibleItemCount;等於開始項加可見項個數。來判斷下拉是否到底了。if (totalItemCount == lastVisibieItem && scrollState == SCROLL_STATE_IDLE)當到底了,且停止滾動了。就載入底部佈局。
因為改變ui不能再子執行緒中完成 所以我們,呼叫一個介面IloadListener 並在主執行緒中實現其的onLoad方法來載入底部佈局。
listview類
public class ListviewItem {
    private String name;
    private int imageid;

    public ListviewItem(String name, int imageid) {
        super();
        this.name = name;
        this.imageid = imageid;
    }

    public String getName() {
        return name;
    }

    public int getImageid() {
        return imageid;
    }

}
在ListViewTest中實現
public class ListViewTest extends Activity implements IloadListener {
    private LoadListView listview;
    private List<ListviewItem> listviewitems = new ArrayList<ListviewItem>();
    private ItemAdapter adapter;
    private int count = 0;

    @Override
    protected void onCreate(Bundle savedInstanceState) {
        super.onCreate(savedInstanceState);
        setContentView(R.layout.listviewtest);
        listview = (LoadListView) findViewById(R.id.listview);
        adapter = new ItemAdapter(this, R.layout.listview_items, listviewitems);
        listview.setAdapter(adapter);// 載入介面卡
        listview.setInterface(this);//將介面傳進來
        initItems();// 初始化資料

    }

    private void initItems() {
        // TODO Auto-generated method stub
        for(int i=0;i<15;i++){
            ListviewItem listviewitem1 = new ListviewItem("初始化的"+i, R.drawable.ic_launcher);
            listviewitems.add(listviewitem1);
        }
    }

    // 獲取更多資料 通知listview顯示
    @Override
    public void onLoad() {
        // 重新整理太快 所以新啟一個執行緒延遲兩秒
        Handler handler = new Handler();
        handler.postDelayed(new Runnable() {

            @Override
            public void run() {
                // TODO Auto-generated method stub
                for (int i = 0; i < 3; i++) {
                    ListviewItem listviewitem1 = new ListviewItem("載入的" + count, R.drawable.ic_launcher);
                    listviewitems.add(listviewitem1);
                    count++;

                } // 通知listview載入完畢
            listview.loadComplete();
            }
        }, 2000);
        // TODO Auto-generated method stub

    }

}
還有主佈局listviewtest.xml
<LinearLayout xmlns:android="http://schemas.android.com/apk/res/android"
    xmlns:tools="http://schemas.android.com/tools"
    android:layout_width="match_parent"
    android:layout_height="match_parent"
    android:orientation="vertical"
    tools:context="com.example.demotest.MainActivity" >

    <com.example.demotest.LoadListView
        android:id="@+id/listview"
        android:layout_width="match_parent"
        android:layout_height="match_parent" >
    </com.example.demotest.LoadListView>

</LinearLayout>
相關文章
- Flutter 下拉重新整理上拉載入更多Flutter
- Flutter listview下拉重新整理 上拉載入更多FlutterView
- UITableView:下拉重新整理和上拉載入更多UIView
- Flutter下拉重新整理,上拉載入更多資料Flutter
- ListView下拉重新整理,上拉自動載入更多View
- Flutter ListView封裝,下拉重新整理、上拉載入更多FlutterView封裝
- 微信開發之下拉重新整理上拉載入更多
- Flutter入門進階之旅(十五)ListView下拉重新整理&上拉載入更多FlutterView
- HarmonyOS 下拉重新整理 上拉載入更多 第二種實現方式
- 上拉重新整理,下拉載入
- Android LRecyclerView 實現下拉重新整理,滑動到底部自動載入更多AndroidView
- Flutter——下拉重新整理,上拉載入Flutter
- 小程式 分屏載入&下拉重新整理
- flutter - listView 下拉重新整理 上拉載入FlutterView
- 上拉載入下拉重新整理瞭解下
- Flutter 入門與實戰(六):給列表增加下拉重新整理和上滑載入更多功能Flutter
- SwipeRecyclerView 的下拉重新整理和載入更多的實現,simple版,有引入包的過程View
- Flutter 開發從 0 到 1(四)ListView 下拉載入和載入更多FlutterView
- Flutter 實現下拉重新整理&上拉載入Flutter
- RecyclerView下拉重新整理 上拉載入 原理DemoView
- 如何實現上拉載入,下拉重新整理?
- 分享輪子-flutter下拉重新整理上拉載入Flutter
- 載入更多
- uni-app | 上拉載入和下拉重新整理探索APP
- 給RecyclerView擴充套件下拉重新整理上拉載入View套件
- js實現 web頁面的滾動條下拉時載入更多JSWeb
- pulltorefreshRecylerView下拉重新整理上拉載入,支援自能預載入,可定製的底部View
- 下拉重新整理,上拉載入外掛mescroll原始碼分析原始碼
- vue 實現上拉載入下拉重新整理(思路賊清晰)Vue
- 仿健客、京東、天貓下拉重新整理載入動畫實現動畫
- 那些年不容錯過的智慧下拉重新整理載入框架框架
- vue載入更多,上拉重新整理 VueScroller 簡單化思維Vue
- Movable-view實現列表的下拉重新整理上拉載入View
- 移動端上拉載入和下拉重新整理的vue外掛Vue
- 搭建自己的直播平臺,RecycleView下拉重新整理,上拉載入View
- React Native——自定義下拉重新整理上拉載入的列表React Native
- Flutter之封裝一個下拉重新整理上拉載入的listviewFlutter封裝View
- 移動端用下拉重新整理的方式實現上拉載入