作者:Vamei 出處:http://www.cnblogs.com/vamei 歡迎轉載,也請保留這段宣告。謝謝!
使用者驗證(User Authentification)複合的使用Play框架的數個功能,包括前面已經瞭解的表單和資料庫,以及這篇文章裡要提到的加密和會話。根據應用或站點的複雜程度,使用者驗證也可以隨之變化。這裡將介紹使用者驗證的一個基本實現方式。
加密
為了資訊保安,使用者密碼需要加密,而不是儲存為明文。Bcrypt演算法可以對明文密碼進行雜湊(Hash)轉換。我儲存在資料庫中的密碼,是經過轉換後的文字。
JBcrypt是一個外部的包,提供了Bcrypt功能。要在build.sbt中說明這個包的來源和版本:
name := "test"

version := "1.0-SNAPSHOT"

libraryDependencies ++= Seq(
  javaJdbc,
  javaEbean,
  cache,
  "mysql" % "mysql-connector-java" % "5.1.18",
  "org.mindrot" % "jbcrypt" % "0.3m"
)

play.Project.playJavaSettings
即上面新增的jbcrypt行。重新執行Play後即可使用。為了Eclipse能自動補齊該包的相關呼叫,可以使用play eclipse,並重新在Eclipse引入專案。
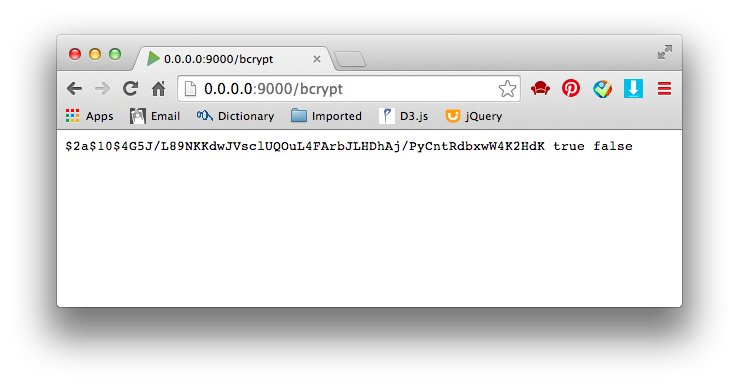
我下面用一個小例子,來說明該Bcrypt的雜湊轉換。在Play中增加動作:
public static Result bcrypt() {
    String passwordHash = BCrypt.hashpw("Hello",BCrypt.gensalt());
    boolean correct = BCrypt.checkpw("Hello", passwordHash);
    boolean wrong = BCrypt.checkpw("World", passwordHash);
    return ok(passwordHash + " " + correct + " " + wrong);
}
上面程式需引入org.mindrot.jbcrypt.BCrypt。動作中對"Hello"字串進行了雜湊轉換,並驗證"Hello"和"World"是否為原始的明文文字。
在routes增加對應URL,/bcrypt
GET /bcrypt controllers.Application.bcrypt()
訪問頁面:

使用者註冊
有了表單、資料庫和加密的基礎,使用者註冊很容易實現。首先建立資料模型app/models/User.java:
package models;

import javax.persistence.*;
import play.db.ebean.Model;
import org.mindrot.jbcrypt.BCrypt;


@Entity
public class User extends Model {
    @Id
    private String email;
    private String password;

    // Constructor
    public User(String email, String password) {
        String passwordHash = BCrypt.hashpw(password, BCrypt.gensalt());
        this.email = email;
        this.password = passwordHash;
    }
}
這段程式碼建立了User類,包含兩個屬性email和password。在構造器中,我對密碼進行了雜湊轉換。
下面修改控制器Application(app/controllers/Application.java)。控制器中包含兩個動作和一個表單類Registration。一個動作register()用於顯示註冊頁面,另一個動作postRegister處理表單提交的資訊,並增加相應的資料庫記錄。Registration則對應註冊頁面所顯示的表格:
package controllers;

import play.*;
import play.mvc.*;
import play.data.Form;
import play.data.validation.Constraints.*;import models.User;

public class Application extends Controller {
    public static class Registration {
        @Email
        public String email;
        @Required
        public String password;
    }

    public static Result register() {
        Form<Registration> userForm = Form.form(Registration.class);
        return ok(views.html.register.render(userForm));
    }


    public static Result postRegister() {
        Form<Registration> userForm =
                Form.form(Registration.class).bindFromRequest();
        User user = new User(userForm.get().email, userForm.get().password);
        user.save();
        return ok("registered");
    }
}
register()動作使用的模板為app/views/register.scala.html:
@(userForm: Form[controllers.Application.Registration])

<!DOCTYPE html>
<html>
  <body>
    <h1> Registration </h1>
    @helper.form(action = routes.Application.postRegister()) {
      @helper.inputText(userForm("email"))
      @helper.inputPassword(userForm("password"))
      <input type="submit">
    }
  </body>
</html>
在routes中為兩個動作增加對應的URL:
GET     /register                   controllers.Application.register()
POST    /register                   controllers.Application.postRegister()
訪問頁面:

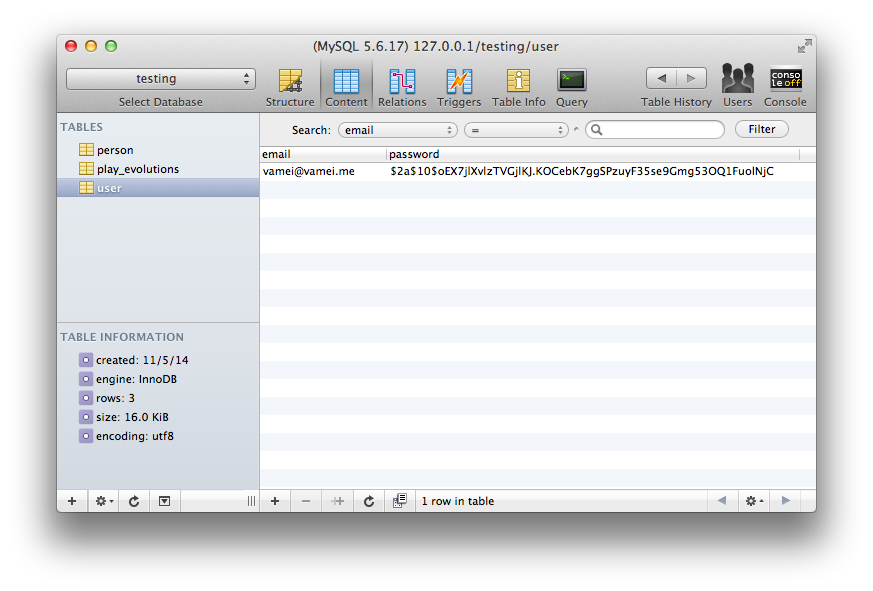
輸入使用者名稱和密碼,可以看到資料庫中增加的記錄:

使用者驗證
將使用者驗證的主要邏輯放入到模型User中。修改User類,為User類增加authenticate()方法:
package models;

import javax.persistence.*;
import play.db.ebean.Model;
import org.mindrot.jbcrypt.BCrypt;

@Entity
public class User extends Model {
    @Id
    private String email;
    private String password;

    // Constructor
    public User(String email, String password) {
        String passwordHash = BCrypt.hashpw(password, BCrypt.gensalt());
        this.email = email;
        this.password = passwordHash;
    }

    // Query
    public static Model.Finder<Integer, User> find =
        new Model.Finder<>(Integer.class, User.class);

    // Authentification
    public static User authenticate(String email, String password) {
        User user =  find.where()
                .eq("email", email)
                .findUnique();
        if (user == null) {
            return user;
        } else if (BCrypt.checkpw(password, user.password)) {
            return user;
        } else {
            return null;
        }
    }
}
authenticate()接收的是明文密碼。上面的驗證中,首先檢查使用者郵箱是否存在。如果存在,則檢查密碼是否符合資料庫的記錄。如果郵箱或者密碼錯誤,將返回null。否則返回正確的使用者物件。
我進一步修改控制器Application。這一次還是增加兩個動作和一個表單類。動作login()用於顯示登入頁面,動作postLogin()用於處理登入表單填寫的資訊,並根據資訊決定是否登入使用者。Login類對應登入頁面的表單。
package controllers;

import play.*;
import play.mvc.*;

import play.data.Form;
import play.data.validation.Constraints.*;

import models.User;

public class Application extends Controller {

    public static class Registration {
        @Email
        public String email;
        @Required
        public String password;
    }


    public static Result register() {
        Form<Registration> userForm = Form.form(Registration.class);
        return ok(views.html.register.render(userForm));
    }


    public static Result postRegister() {
        Form<Registration> userForm =
                Form.form(Registration.class).bindFromRequest();
        User user = new User(userForm.get().email, userForm.get().password);
        user.save();
        return ok("registered");
    }

    public static class Login {
        @Email
        public String email;
        @Required
        public String password;

        public String validate() {
            if (User.authenticate(email, password) == null) {
                return "Invalid user or password";
            }
            return null;
        }
    }

    public static Result login() {
        Form<Login> userForm = Form.form(Login.class);
        return ok(views.html.login.render(userForm));
    }

    public static Result postLogin() {
        Form<Login> userForm = Form.form(Login.class).bindFromRequest();
        if (userForm.hasErrors()) {
            return badRequest("Wrong user/password");
        } else {
            return ok("Valid user");
        }
    }
}
上面的表單類Login中,增加了validate()方法,並在其中呼叫User的驗證邏輯。正如postLogin()中所示,表單的hasErrors()方法將自動檢查validate()方法的返回值。如果validate()方法返回為null,則說明表單無誤。postLogin()的if結構,將根據登入是否合法,來返回不同的結果。
為新增的動作增加對應的URL:
GET     /login                      controllers.Application.login()
POST    /login                      controllers.Application.postLogin()
訪問/login頁面,並嘗試登入。
會話
HTTP協議是無狀態的。即使我在/login登入成功,但下一次訪問時,伺服器又會忘記我是誰。HTTP協議可以用會話(Session)的方式,來記錄使用者的登入資訊。在會話有效期內,伺服器可以識別相應客戶的訪問。Play實現會話相當方便。
提交登入表格時,如果登入合法,我將讓伺服器開啟和該客戶的會話,記錄客戶的資訊。因此,修改postLogin()為:
    public static Result postLogin() {
        Form<Login> userForm = Form.form(Login.class).bindFromRequest();
        if (userForm.hasErrors()) {
            return badRequest(views.html.login.render(userForm));
        } else {
            session().clear();
            session("email",userForm.get().email);
            return redirect("/");
        }
    }
這裡使用者登入成功後,將啟動一個會話。在會話中,可放入鍵值對(key-value pair)形式的資訊。這裡的鍵名為"email",對應值為登入使用者的郵箱地址。登入成功後將重新定向到/。
增加index()動作,對應/這一URL。在該動作中,我呼叫session中儲存的使用者資訊:
    public static Result index() {
        String email = session("email");
        if (email != null) {
            return ok(email);
        } else {
            return ok("not login");
        }
    }
增加routes中對應的URL:
GET / controllers.Application.index()
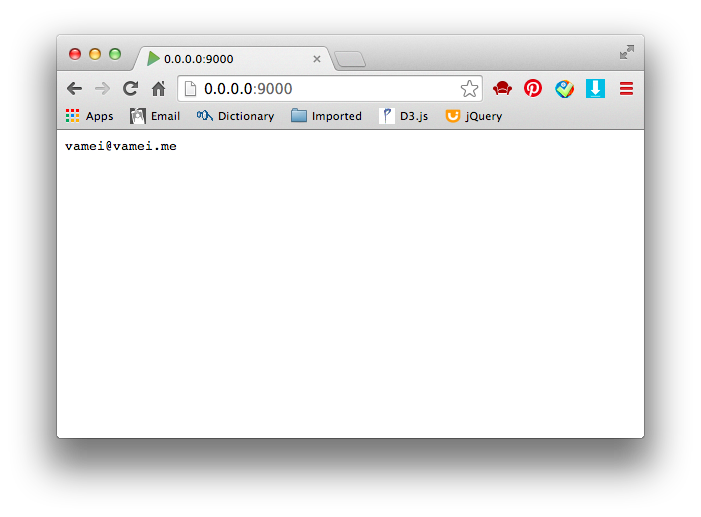
訪問/login,並登入。成功登入後重新定向到/,頁面為:

可以看到,會話中的資訊可以持續到以後的頁面訪問。為了銷燬會話,可以在某個動作中呼叫:
session().clear();
總結
使用者驗證
會話
歡迎繼續閱讀“Java快速教程”系列文章