1)禁止系統響應任何從外部/內部來的ping請求攻擊者一般首先通過ping命令檢測此主機或者IP是否處於活動狀態
如果能夠ping通 某個主機或者IP,那麼攻擊者就認為此係統處於活動狀態,繼而進行攻擊或破壞。如果沒有人能ping通機器並收到響應,那麼就可以大大增強伺服器的安全性,
linux下可以執行如下設定,禁止ping請求:
[root@localhost ~]# echo "1"> /proc/sys/net/ipv4/icmp_echo_ignore_all
預設情況下"icmp_echo_ignore_all"的值為"0",表示響應ping操作。
可以加上面的一行命令到/etc/rc.d/rc.local檔案中,以使每次系統重啟後自動執行。
2)禁止Control-Alt-Delete組合鍵重啟系統
在linux的預設設定下,同時按下Control-Alt-Delete鍵,系統將自動重啟,這是很不安全的,因此要禁止Control-Alt-Delete組合鍵重啟系統,檢視/etc/inittab檔案:
[root@localhost ~]# cat /etc/inittab
.......
# Ctrl-Alt-Delete is handled by /etc/init/control-alt-delete.conf
.......
[root@localhost ~]# cat /etc/init/control-alt-delete.conf
# control-alt-delete - emergency keypress handling
#
# This task is run whenever the Control-Alt-Delete key combination is
# pressed. Usually used to shut down the machine.
#
# Do not edit this file directly. If you want to change the behaviour,
# please create a file control-alt-delete.override and put your changes there.
start on control-alt-delete
exec /sbin/shutdown -r now "Control-Alt-Delete pressed"
可以將/etc/init/control-alt-delete.conf檔案刪除或移走或更名。
[root@localhost ~]# mv /etc/init/control-alt-delete.conf /etc/init/control-alt-delete.conf.bak
或者將/etc/init/control-alt-delete.conf檔案裡的內容註釋掉!
3)限制Shell記錄歷史命令大小
預設情況下,bash shell會在檔案$HOME/.bash_history中存放多達1000條命令記錄(根據系統不同,預設記錄條數不同)。系統中每個使用者的主目錄下都有一個這樣的檔案。
這麼多的歷史命令記錄,肯定是不安全的,因此必須限制該檔案的大小。
可以編輯/etc/profile檔案,修改其中的選項如下:
[root@localhost ~]# vim /etc/profile
.......
HISTSIZE=1000
.......
預設Shell記錄歷史命令的條數是1000,可以修改為100條,即HISTSIZE=1000,表示在檔案$HOME/.bash_history中記錄最近的30條歷史命令。
如果將"HISTSIZE"設定為0,則表示不記錄歷史命令,那麼也就不能用鍵盤的上下鍵查詢歷史命令了。
4)設定tcp_wrappers防火牆
Tcp_Wrappers是一個用來分析TCP/IP封包的軟體,類似的IP封包軟體還有iptables,linux預設都安裝了此軟體,作為一個安全的系統,Linux本身有兩層安全防火牆,通過IP
過濾機制的iptables實現第一層防護,iptables防火牆通過直觀地監視系統的執行狀況,阻擋網路中的一些惡意攻擊,保護整個系統正常執行,免遭攻擊和破壞。
如果通過了iptables的第一層防護,那麼下一層防護就是tcp_wrappers了,通過Tcp_Wrappers可以實現對系統中提供的某些服務的開放與關閉、允許和禁止,從而更有效地保
證系統安全執行。
4.1)Tcp_Wrappers的使用很簡單,僅僅兩個配置檔案:/etc/hosts.allow和/etc/hosts.deny檢視系統是否安裝了Tcp_Wrappers:
[root@localhost ~]# rpm -q tcp_wrappers
tcp_wrappers-7.6-58.el6.x86_64
如果有上面的類似輸出,表示系統已經安裝了tcp_wrappers模組。如果沒有顯示,可能是沒有安裝,可以從linux系統安裝盤找到對應RPM包進行安裝。
4.2)tcp_wrappers防火牆的侷限性
系統中的某個服務是否可以使用tcp_wrappers防火牆,取決於該服務是否應用了libwrapped庫檔案,如果應用了就可以使用tcp_wrappers防火牆,系統中預設的一些服務如:
sshd、portmap、sendmail、xinetd、vsftpd、tcpd等都可以使用tcp_wrappers防火牆。
4.3)tcp_wrappers設定的規則(使用例子可以參考:http://www.cnblogs.com/kevingrace/p/6245859.html)
tcp_wrappers防火牆的實現是通過/etc/hosts.allow和/etc/hosts.deny兩個檔案來完成的,首先看一下設定的格式:
service:host(s) [:action]
service:代表服務名,例如sshd、vsftpd、sendmail等。
host(s):主機名或者IP地址,可以有多個,例如192.168.60.0、www.ixdba.netl action:動作, 符合條件後所採取的動作。
幾個關鍵字:
ALL:所有服務或者所有IP。
ALL EXCEPT:所有的服務或者所有IP除去指定的。
例如:ALL:ALL EXCEPT 192.168.60.132
表示除了192.168.60.132這臺機器,任何機器執行所有服務時或被允許或被拒絕。
瞭解了設定語法後,下面就可以對服務進行訪問限定。
例如:網際網路上一臺linux伺服器,實現的目標是:僅僅允許222.90.66.4、61.185.224.66以及域名softpark.com通過SSH服務遠端登入到系統,設定如下:
首先設定允許登入的計算機,即配置/etc/hosts.allow檔案,設定很簡單,只要修改/etc/hosts.allow(如果沒有此檔案,請自行建立)這個檔案即可。
只需將下面規則加入/etc/hosts.allow即可。
sshd: 222.90.66.4 61.185.224.66 softpark.com
接著設定不允許登入的機器,也就是配置/etc/hosts.deny檔案了。
一般情況下,linux會首先判斷/etc/hosts.allow這個檔案,如果遠端登入的計算機滿足檔案/etc/hosts.allow設定的話,就不會去使用/etc/hosts.deny檔案了,相反,如果
不滿足hosts.allow檔案設定的規則的話,就會去使用hosts.deny檔案了,如果滿足hosts.deny的規則,此主機就被限制為不可訪問linux伺服器,如果也不滿足hosts.deny的
設定,此主機預設是可以訪問linux伺服器的,因此,當設定好/etc/hosts.allow檔案訪問規則之後,只需設定/etc/hosts.deny為"所有計算機都不能登入狀態"即可。
sshd:ALL
這樣,一個簡單的tcp_wrappers防火牆就設定完畢了。
5)網路安全選項的設定
編輯 "/etc/sysctl.conf" 檔案,並加入下面幾行,
[root@localhost ~]# vim /etc/sysctl.conf
# Enable ignoring broadcasts request(讓系統對廣播沒有反應)
net.ipv4.icmp_echo_ignore_broadcasts = 1
# Disables IP source routing(取消 IP source routing)
net.ipv4.conf.all.accept_source_route = 0
# Enable TCP SYN Cookie Protection(開啟 TCP SYN Cookie 保護)
net.ipv4.tcp_syncookies = 1
# Disable ICMP Redirect Acceptance(取消 ICMP 接受 Redirect)
net.ipv4.conf.all.accept_redirects = 0
# Enable bad error message Protection(開啟錯誤訊息保護)
net.ipv4.icmp_ignore_bogus_error_responses = 1
# Enable IP spoofing protection, turn on Source Address Verification(開啟 IP 欺騙保護)
net.ipv4.conf.all.rp_filter = 1
# Log Spoofed Packets, Source Routed Packets, Redirect Packets(記錄Spoofed Packets, Source Routed Packets, Redirect Packets)
net.ipv4.conf.all.log_martians = 1
最後重新啟動network
[root@localhost ~]# /etc/rc.d/init.d/network restart
或者sysctl –p 生效
[root@localhost ~]# echo 1 > /proc/sys/net/ipv4/icmp_echo_ignore_all
6)系統檔案和日誌的安全
更改各種服務啟動指令碼目錄的訪問許可權:
[root@localhost ~]# chmod -R 700 /etc/rc.d/
更改系統檔案的訪問許可權:
[root@localhost ~]# chmod 700 /etc/services
[root@localhost ~]# chmod 700 /etc/xinetd.conf
[root@localhost ~]# chmod 700 /etc/inittab
更改日誌的訪訪許可權:
[root@localhost ~]# chmod 700 /var/log/secure*
[root@localhost ~]# chmod 700 /var/log/messages*
7)系統登陸的設定
每次登陸退出時,清除所用過命令的歷史紀: 在.bash_logout文件中增加一行:
[root@localhost ~]# vim /root/.bashrc
......
history –c
設定系統全域性環境變數檔案/etc/profile 增加一行:
[root@localhost ~]# vim /etc/profile
......
TMOUT=600
單位為秒,表示如果在600秒(10分鐘)之內沒有做任何的操作,登陸終端將自動登出。 3.資源限制
編輯/etc/security/limits.conf 加入:
[root@localhost ~]# vim /etc/security/limits.conf
......
* hard core 0
* hard rss 5000
* hard nproc 20
同時必須編輯/etc/pam.d/login檔案加/檢查下面這一行的存在:
[root@localhost ~]# vim /etc/pam.d/login
.......
session required /lib/security/pam_limits.so
上面的命令分別是禁止建立core檔案,其他使用者(除root)最多使用5M記憶體,限制最多程式數為20
8)vsftp配置
vsftpd的配置檔案有三個,分別是:
/etc/vsftpd/vsftpd.conf
/etc/ vsftpd/vsftpd.ftpusers
/etc/ vsftpd/vsftpd.user_list
其中:
/etc/vsftpd.conf是主配置檔案
/etc/vsftpd.ftpusers中指定了哪些使用者不能訪問FTP伺服器
/etc/vsftpd.user_list中指定的使用者預設情況下(即在/etc/vsftpd.conf中設定了userlist_deny= YES)不能訪問FTP伺服器
當在/etc/vsftpd.conf中設定了userlist_deny=NO時,僅僅允許/etc/vsftpd.user_list中指定的使用者訪問FTP伺服器。
一般要在/etc/vsftpd.conf中設定userlist_deny=NO,通過/etc/vsftpd.user_list嚴格控制FTP使用者。
配置基本的效能和安全選項
//禁止匿名登陸
anonymous_enable=NO (預設為YES)
//設定空閒的使用者會話的中斷時間 例如下面的配置:
idle_session_timeout=600
將在使用者會話空閒10分鐘後被中斷。
//設定空閒的資料連線的的中斷時間 例如下面的配置:
data_connection_timeout=120
將在資料連線空閒2分鐘後被中斷。
//設定客戶端空閒時的自動中斷和啟用連線的時間 例如下面的配置: accept_timeout=60 connect_timeout=60
將使客戶端空閒1分鐘後自動中斷連線,並在中斷1分鐘後自動啟用連線
//設定最大傳輸速率限制 例如下面的配置:(傳輸速率可根據實際情況自行修改) local_max_rate=50000 anon_max_rate=30000
將使本地使用者的最大傳輸速率為50kbytes / sec,匿名使用者的 傳輸速率為30 kbytes / sec。
//設定客戶端連線時的埠範圍 例如下面的配置: pasv_min_port=50000 pasv_max_port=60000
將使客戶端連線時的埠範圍在50000和60000之間。這提高了系統的安全性
截短歷史命令 "~/.bash_history"檔案,這個檔案中儲存著以前使用的命令列表。截短這個檔案可以使您以前執行過的命令暴露在別人眼光下的機會減小.
(在您的命令中很可能包括象密碼資訊這樣的保密資訊)。通過編輯/etc/profile的下面兩項可以做到這一點:
HISTFILESIZE=20
通過下面的措施可以防止任何人都可以su為root:
編輯su檔案(vi /etc/pam.d/su)在檔案的頭部加入下面兩行:
auth sufficient /lib/security/pam_rootok.so debug
auth required /lib/security/pam_wheel.so group=wheel
9)使用DenyHosts阻止SSH暴力破解(同時可以保護FTP)
當你的Linux伺服器暴露在網際網路之中,該伺服器將會遭到網際網路上的掃描軟體進行掃描,並試圖猜測SSH登入口令,不可避免的有病毒或無聊的人會嘗試攻擊SSH。。你會發現,每天會有多條SSH登入失敗紀錄。那些掃描工具將對你的伺服器構成威脅,你必須設定複雜登入口令,並將嘗試多次登入失敗的IP給阻止掉,讓其在一段時間內不能訪問該伺服器。DenyHosts是Python語言寫的一個程式,用DenyHosts可以阻止試圖猜測SSH登入口令,它會分析/var/log/secure等日誌檔案,當發現有重複的IP在進行多次SSH密碼嘗試時就會記錄IP到/etc/hosts.deny檔案,從而達到自動遮蔽該IP的目的。
下載DenyHosts-2.6.tar.gz安裝包以下是安裝記錄:
[root@localhost ~]# wget http://sourceforge.net/projects/denyhosts/files/denyhosts/2.6/DenyHosts-2.6.tar.gz
[root@localhost ~]# tar -zxvf DenyHosts-2.6.tar.gz
[root@localhost ~]# cd DenyHosts-2.6
[root@localhost DenyHosts-2.6]# python setup.py install
預設是安裝到/usr/share/denyhosts/目錄的。
[root@localhost DenyHosts-2.6]# cd /usr/share/denyhosts/
[root@localhost denyhosts]# cp denyhosts.cfg-dist denyhosts.cfg
[root@localhost denyhosts]# cp daemon-control-dist daemon-control
[root@localhost denyhosts]# vim daemon-control
DENYHOSTS_BIN = "/usr/bin/denyhosts.py"
DENYHOSTS_LOCK = "/var/lock/subsys/denyhosts"
DENYHOSTS_CFG = "/usr/share/denyhosts/denyhosts.cfg"
[root@localhost denyhosts]# chown root daemon-control
[root@localhost denyhosts]# chmod 700 daemon-control
完了之後執行daemon-contron start就可以了(重啟是restart)。
[root@localhost denyhosts]# ./daemon-control start //或者執行"service denyhosts start"命令來啟動
如果要使DenyHosts每次重起後自動啟動還需做如下設定:
[root@localhost denyhosts]# cd /etc/init.d
[root@localhost denyhosts]# ln -s /usr/share/denyhosts/daemon-control denyhosts
[root@localhost denyhosts]# chkconfig --add denyhosts
[root@localhost denyhosts]# chkconfig --level 2345 denyhosts on
或者修改/etc/rc.local檔案:
[root@localhost denyhosts]# vim /etc/rc.local //加入下面這條命令
/usr/share/denyhosts/daemon-control start
DenyHosts配置檔案說明:
[root@localhost denyhosts]# vim denyhosts.cfg
#這裡根據自己需要進行相應的配置
SECURE_LOG = /var/log/secure
#sshd日誌檔案,它是根據這個檔案來判斷的,不同的作業系統,檔名稍有不同。
HOSTS_DENY = /etc/hosts.deny #控制使用者登陸的檔案
PURGE_DENY = 5m
#過多久後清除已經禁止的
BLOCK_SERVICE = sshd
BLOCK_SERVICE = vsftpd #(如果啟用FTP服務,務必加上這一行) ,禁止的服務名
DENY_THRESHOLD_INVALID = 1 #允許無效使用者失敗的次數
DENY_THRESHOLD_VALID = 10 #允許普通使用者登陸失敗的次數
DENY_THRESHOLD_ROOT = 5 #允許root登陸失敗的次數
HOSTNAME_LOOKUP=NO #是否做域名反解
DAEMON_LOG = /var/log/denyhosts #DenyHosts的日誌檔案
DenyHosts防SSH暴力破解測試:
192.168.10.200伺服器按照上面步驟安裝並啟動了DenyHosts
現在在另一臺伺服器192.168.10.205上用ssh工具連線192.168.10.200,用錯誤的密碼嘗試幾次:
[root@host-205 ~]# ssh -p22 root@192.168.10.200
root@192.168.10.200's password:
Permission denied, please try again.
root@192.168.10.200's password:
Permission denied, please try again.
root@192.168.10.200's password:
Permission denied (publickey,gssapi-keyex,gssapi-with-mic,password).

[root@host-205 ~]# ssh -p22 root@192.168.10.200
root@192.168.10.200's password:
Permission denied, please try again.
root@192.168.10.200's password:
Permission denied, please try again.
root@192.168.10.200's password:
Permission denied (publickey,gssapi-keyex,gssapi-with-mic,password).

[root@host-205 ~]# ssh -p22 root@192.168.10.200
ssh_exchange_identification: Connection closed by remote host

[root@host-205 ~]# ssh -p22 root@192.168.10.200
ssh_exchange_identification: Connection closed by remote host

發現在192.168.10.205上使用錯誤密碼去ssh連線192.168.10.200機器失敗多數後,就是禁止205這臺機器去ssh連線200機器了。

檢視192.168.10.200機器的/var/log/denyhosts,可以發現如下資訊:
[root@host-200 ~]# tail -f /var/log/denyhosts
......
2018-02-12 00:59:59,320 - denyhosts   : INFO     monitoring log: /var/log/secure
2018-02-12 00:59:59,320 - denyhosts   : INFO     sync_time: 3600
2018-02-12 00:59:59,320 - denyhosts   : INFO     purging of /etc/hosts.deny is disabled
2018-02-12 00:59:59,320 - denyhosts   : INFO     denyhosts synchronization disabled
2018-02-12 01:16:00,203 - denyhosts   : INFO     new denied hosts: ['192.168.10.205']

同時,/etc/hosts.deny中也會加入192.168.10.205,即禁止這臺機器使用ssh來連線:
[root@host-200 ~]# cat  /etc/hosts.deny
#
# hosts.deny  This file contains access rules which are used to
#   deny connections to network services that either use
#   the tcp_wrappers library or that have been
#   started through a tcp_wrappers-enabled xinetd.
#
#   The rules in this file can also be set up in
#   /etc/hosts.allow with a 'deny' option instead.
#
#   See 'man 5 hosts_options' and 'man 5 hosts_access'
#   for information on rule syntax.
#   See 'man tcpd' for information on tcp_wrappers
#
sshd: 192.168.10.205

若要手動允許該IP通過ssh訪問,請把對應的IP從/etc/hosts.deny中刪掉,然後,重啟denyhosts服務即可。
除了上面原始碼方式安裝,還可以採用yum安裝DenyHosts
1)yum 安裝 denyhosts
[root@denyhosts ~]# yum search denyhosts
[root@denyhosts ~]# yum install denyhosts
[root@denyhosts ~]# rpm -ql denyhosts

2)denyhosts幾個比較重要的目錄
該目錄中主要存放計劃任務,日誌壓縮 以及 chkconfig 和 service 啟動的文件
/etc/cron.d/denyhosts
/etc/denyhosts.conf
/etc/logrotate.d/denyhosts
/etc/rc.d/init.d/denyhosts
/etc/sysconfig/denyhosts

該目錄中主要存放 denyhosts 所拒絕及允許的一些主機資訊
/var/lib/denyhosts/allowed-hosts
/var/lib/denyhosts/allowed-warned-hosts
/var/lib/denyhosts/hosts
/var/lib/denyhosts/hosts-restricted
/var/lib/denyhosts/hosts-root
/var/lib/denyhosts/hosts-valid
/var/lib/denyhosts/offset
/var/lib/denyhosts/suspicious-logins
/var/lib/denyhosts/sync-hosts
/var/lib/denyhosts/users-hosts
/var/lib/denyhosts/users-invalid
/var/lib/denyhosts/users-valid
/var/log/denyhosts

3)來看看 /etc/denyhosts.conf 中的配置引數
[root@denyhosts ~]# egrep -v "(^$|^#)" /etc/denyhosts.conf
############ THESE SETTINGS ARE REQUIRED ############
# 系統安全日誌檔案,主要獲取ssh資訊
SECURE_LOG = /var/log/secure

# 拒絕寫入IP檔案 hosts.deny
HOSTS_DENY = /etc/hosts.deny

# 過多久後清除已經禁止的,其中w代表周,d代表天,h代表小時,s代表秒,m代表分鐘
PURGE_DENY = 4w

# denyhosts所要阻止的服務名稱
BLOCK_SERVICE  = sshd

# 允許無效使用者登入失敗的次數
DENY_THRESHOLD_INVALID = 3

# 允許普通使用者登入失敗的次數
DENY_THRESHOLD_VALID = 10

# 允許ROOT使用者登入失敗的次數
DENY_THRESHOLD_ROOT = 6

# 設定 deny host 寫入到該資料夾
DENY_THRESHOLD_RESTRICTED = 1

# 將deny的host或ip紀錄到Work_dir中
WORK_DIR = /var/lib/denyhosts

SUSPICIOUS_LOGIN_REPORT_ALLOWED_HOSTS=YES

# 是否做域名反解
HOSTNAME_LOOKUP=YES

# 將DenyHOts啟動的pid紀錄到LOCK_FILE中,已確保服務正確啟動,防止同時啟動多個服務
LOCK_FILE = /var/lock/subsys/denyhosts

############ THESE SETTINGS ARE OPTIONAL ############
# 管理員Mail地址(可以不用設定)
ADMIN_EMAIL = root
SMTP_HOST = localhost
SMTP_PORT = 25
SMTP_FROM = DenyHosts <nobody@localhost>
SMTP_SUBJECT = DenyHosts Report from $[HOSTNAME]

# 有效使用者登入失敗計數歸零的時間
AGE_RESET_VALID=5d

# ROOT使用者登入失敗計數歸零的時間
AGE_RESET_ROOT=25d

# 使用者的失敗登入計數重置為0的時間(/usr/share/denyhosts/restricted-usernames)
AGE_RESET_RESTRICTED=25d

# 無效使用者登入失敗計數歸零的時間
AGE_RESET_INVALID=10d

   ######### THESE SETTINGS ARE SPECIFIC TO DAEMON MODE  ##########
# denyhosts log檔案
DAEMON_LOG = /var/log/denyhosts

DAEMON_SLEEP = 30s

# 該項與PURGE_DENY 設定成一樣,也是清除hosts.deniedssh 使用者的時間
DAEMON_PURGE = 1h

4)啟動 denyhosts 服務並檢視狀態
[root@denyhosts ~]# service denyhosts status
denyhosts.py is stopped
[root@denyhosts ~]# service denyhosts start
Starting denyhosts:                                        [  OK  ]
[root@denyhosts ~]# service denyhosts status
denyhosts.py (pid  19784) is running...

5)通過測試 invalid、valid、root 等使用者設定不同的ssh連線失敗次數,來測試 denyhosts。

這裡只測試使用系統中不存在的使用者進行失敗登入嘗試~
這裡允許 invalid 使用者只能失敗4次、ROOT 使用者失敗7次、valid使用者失敗10次
DENY_THRESHOLD_INVALID = 4
DENY_THRESHOLD_VALID = 10
DENY_THRESHOLD_ROOT = 7

測試:
在客戶機(192.168.10.204)上使用一個沒有建立的使用者失敗登入denyhosts機器(192.168.10.202)四次
[root@centos6-06 ~]# ssh -p22 haha@192.168.10.202
.......
多次嘗試登陸失敗後,就會發現客戶機就不能使用ssh登陸denyhosts伺服器了
[root@centos6-06 ~]# ssh -p22 haha@192.168.10.202
ssh_exchange_identification: Connection closed by remote host

檢視denyhosts伺服器的/etc/hosts.deny
[root@denyhosts ~]# echo -n ""  > /var/log/secure
[root@denyhosts ~]# tail -f /var/log/secure
Feb 12 01:47:14 ceph-node3 sshd[19885]: refused connect from 192.168.10.204 (192.168.10.204)
[root@denyhosts ~]# tail -f /etc/hosts.deny
#
#   The rules in this file can also be set up in
#   /etc/hosts.allow with a 'deny' option instead.
#
#   See 'man 5 hosts_options' and 'man 5 hosts_access'
#   for information on rule syntax.
#   See 'man tcpd' for information on tcp_wrappers
#
# DenyHosts: Mon Feb 12 01:44:48 2018 | sshd: 192.168.10.204
sshd: 192.168.10.204

/var/log/secure 日誌資訊:
[root@denyhosts ~]# tail -f /var/log/secure
.......
Feb 12 01:48:15 ceph-node3 sshd[19892]: Invalid user haha from 192.168.10.204
Feb 12 01:48:15 ceph-node3 sshd[19893]: input_userauth_request: invalid user haha
Feb 12 01:48:17 ceph-node3 sshd[19892]: pam_unix(sshd:auth): check pass; user unknown
Feb 12 01:48:17 ceph-node3 sshd[19892]: pam_unix(sshd:auth): authentication failure; logname= uid=0 euid=0 tty=ssh ruser= rhost=192.168.10.204
Feb 12 01:48:17 ceph-node3 sshd[19892]: pam_succeed_if(sshd:auth): error retrieving information about user haha
Feb 12 01:48:18 ceph-node3 sshd[19892]: Failed password for invalid user haha from 192.168.10.204 port 60196 ssh2
Feb 12 01:48:19 ceph-node3 sshd[19892]: pam_unix(sshd:auth): check pass; user unknown
Feb 12 01:48:19 ceph-node3 sshd[19892]: pam_succeed_if(sshd:auth): error retrieving information about user haha
Feb 12 01:48:22 ceph-node3 sshd[19892]: Failed password for invalid user haha from 192.168.10.204 port 60196 ssh2
Feb 12 01:48:23 ceph-node3 sshd[19892]: pam_unix(sshd:auth): check pass; user unknown
Feb 12 01:48:23 ceph-node3 sshd[19892]: pam_succeed_if(sshd:auth): error retrieving information about user haha
Feb 12 01:48:25 ceph-node3 sshd[19892]: Failed password for invalid user haha from 192.168.10.204 port 60196 ssh2
Feb 12 01:48:25 ceph-node3 sshd[19893]: Connection closed by 192.168.10.204
Feb 12 01:48:25 ceph-node3 sshd[19892]: PAM 2 more authentication failures; logname= uid=0 euid=0 tty=ssh ruser= rhost=192.168.10.204
Feb 12 01:48:27 ceph-node3 sshd[19899]: refused connect from 192.168.10.204 (192.168.10.204)
關於DenyHosts中清除及新增可信主機記錄
DenyHosts會讀取多個記錄確保沒有漏網之魚,如果想刪除一個或多個已經禁止的主機IP,僅清空/var/log/secure和/etc/hosts.deny並不能完美解除已被鎖定的IP,
很快就會被DenyHosts重新鎖定,這也是DenyHosts強大的地方!!需要進入 /var/lib/denyhosts 目錄,進入以下操作:

針對原始碼方式安裝DenyHosts後的解鎖ip的措施:
1)停止DenyHosts服務:service denyhosts stop
2)在下列檔案中找到想解鎖的IP記錄並刪除(通常只修改前兩個檔案就OK了)。不推薦這種方法,因為用vim在下面的檔案中找到解鎖IP是非常費時費力的.
/var/log/secure
/etc/hosts.deny
/usr/share/denyhosts/data/hosts
/usr/share/denyhosts/data/hosts-restricted
/usr/share/denyhosts/data/hosts-root
/usr/share/denyhosts/data/hosts-valid

如果不在乎上面的記錄檔案, 推薦清空上面幾個Linux系統日誌然後重新開啟DennyHosts. 清空這些Linux系統日誌不會影響任何功能.
如果你覺得這幾個檔案記錄對你很重要(真的?), 請不要隨意清空, 老老實實使用上面的方法.
清空上面幾個Linux系統日誌很簡單, 在SSH中敲入下面的命令:
cat /dev/null > /var/log/secure
cat /dev/null > /etc/hosts.deny
cat /dev/null > /usr/share/denyhosts/data/hosts
cat /dev/null > /usr/share/denyhosts/data/hosts-restricted
cat /dev/null > /usr/share/denyhosts/data/hosts-root
cat /dev/null > /usr/share/denyhosts/data/hosts-valid
cat /dev/null > /usr/share/denyhosts/data/offset
cat /dev/null > /usr/share/denyhosts/data/suspicious-logins
cat /dev/null > /usr/share/denyhosts/data/users-hosts
cat /dev/null > /usr/share/denyhosts/data/users-invalid
cat /dev/null > /usr/share/denyhosts/data/users-valid

把日誌檔案全部清空!要注意的是,清空後一定要
# service rsyslog restart 重啟日誌記數器!
因為如果你不重啟服務,你會發現secure日誌檔案會停止記錄一切活動了!那麼denyhosts也就無效了

然後重新開啟Deny Hosts
# service denyhosts start

最好重啟ssh服務和iptables防火牆(如果開啟的話)
#service sshd restart
#service iptables restart

針對yum方式安裝DenyHosts後的解鎖ip的措施:
1)停止DenyHosts服務:service denyhosts stop
2)在 /etc/hosts.deny 中刪除你想取消的主機IP
3)編輯 DenyHosts 工作目錄的所有檔案 /var/lib/denyhosts,並且刪除已被新增的主機資訊。
/var/lib/denyhosts/hosts
/var/lib/denyhosts/hosts-restricted
/var/lib/denyhosts/hosts-root
/var/lib/denyhosts/hosts-valid
/var/lib/denyhosts/users-hosts
/var/lib/denyhosts/users-invalid
/var/lib/denyhosts/users-valid
4)新增你想允許的主機IP地址到
/var/lib/denyhosts/allowed-hosts
5)啟動DenyHosts服務: service denyhosts start
通過郵件接收 denyhosts 所傳送的資訊
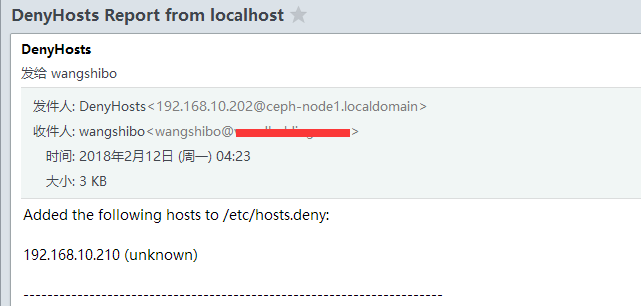
1)安裝sendmail郵件服務,請參考:http://www.cnblogs.com/kevingrace/p/6143977.html

2)denyhosts機器的主機名配置
[root@ceph-node1 ~]# cat /etc/hosts
127.0.0.1   localhost localhost.localdomain localhost4 localhost4.localdomain4
::1         localhost localhost.localdomain localhost6 localhost6.localdomain6
192.168.10.202 ceph-node1.localdomain ceph-node1

[root@ceph-node1 ~]# cat /etc/sysconfig/network
NETWORKING=yes
HOSTNAME=ceph-node1

2)修改 /etc/denyhosts.conf檔案中的mail配置,並重denyhosts 服務
[root@ceph-node1 ~]# cat /etc/denyhosts.conf
......
# 管理員Mail地址
ADMIN_EMAIL = wangshibo@kevin.com                     //若有ip被禁用發郵件通知
SMTP_HOST = ceph-node1                                //這個是mail機器的主機名。這裡我是在denyhosts本機部署的mail服務
SMTP_PORT = 25
SMTP_FROM = DenyHosts <nobody@localhost>              //郵件的傳送發
SMTP_SUBJECT = DenyHosts Report from $[HOSTNAME]      //郵件主題

[root@ceph-node1 ~]# /etc/init.d/denyhosts restart
Stopping denyhosts:                                        [  OK  ]
Starting denyhosts:                                        [  OK  ]

3)在客戶機(192.168.10.210)上通過ssh連線denyhosts部署機(192.168.10.202),ssh連線失敗次數到達denyhosts設定的失敗次數後,
192.168.10.210的ip就會被denyhosts機器自動螢幕,這時候就會觸發郵件發信動作。

注意:這裡僅僅是在denyhosts機器剛發現客戶機的ip被禁用的時候傳送郵件,當已經禁用後,再次ssh連線失敗後就不會重複傳送郵件了,及郵件只會傳送一次!

[root@zabbix-server ~]# ssh -p22 root@192.168.10.202
The authenticity of host '192.168.10.202 (192.168.10.202)' can't be established.
RSA key fingerprint is fd:82:c3:2d:f1:3e:0f:69:39:bf:7e:f7:82:59:a3:cb.
Are you sure you want to continue connecting (yes/no)? yes
Warning: Permanently added '192.168.10.202' (RSA) to the list of known hosts.
root@192.168.10.202's password:
Permission denied, please try again.
root@192.168.10.202's password:
Permission denied, please try again.
root@192.168.10.202's password:
Permission denied (publickey,gssapi-keyex,gssapi-with-mic,password).

[root@zabbix-server ~]# ssh -p22 root@192.168.10.202
root@192.168.10.202's password:
Permission denied, please try again.
root@192.168.10.202's password:
Permission denied, please try again.
root@192.168.10.202's password:
Permission denied (publickey,gssapi-keyex,gssapi-with-mic,password).

[root@zabbix-server ~]# ssh -p22 root@192.168.10.202
root@192.168.10.202's password:
Permission denied, please try again.
root@192.168.10.202's password:
Permission denied, please try again.
root@192.168.10.202's password:
Permission denied (publickey,gssapi-keyex,gssapi-with-mic,password).

[root@zabbix-server ~]# ssh -p22 root@192.168.10.202
root@192.168.10.202's password:
Permission denied, please try again.
root@192.168.10.202's password:
Permission denied, please try again.
root@192.168.10.202's password:
Permission denied (publickey,gssapi-keyex,gssapi-with-mic,password).

[root@zabbix-server ~]# ssh -p22 root@192.168.10.202
ssh_exchange_identification: Connection closed by remote host

此時,客戶機192.168.10.210的ip已經被denyhosts機器那邊給自動遮蔽掉了,也是在這個時候,通知郵件發出去了。
[root@ceph-node1 ~]# cat /etc/hosts.deny
.......
# DenyHosts: Mon Feb 12 04:34:10 2018 | sshd: 192.168.10.210
sshd: 192.168.10.210