一般來說,使用ssh遠端登入伺服器,只需要輸入賬號和密碼,顯然這種方式不是很安全。為了安全著想,可以使用GoogleAuthenticator(谷歌身份驗證器),以便在賬號和密碼之間再增加一個驗證碼,只有輸入正確的驗證碼之後,再輸入密碼才能登入。這樣就增強了ssh登入的安全性。賬號、驗證碼、密碼三者缺一個都不能登入,即使賬號和密碼正確,驗證碼錯誤,同樣登入失敗。其中,驗證碼是動態驗證碼,並且是通過手機客戶端自動獲取(預設每隔30秒失效一次)。好了,廢話不多說了,下面記錄下GoogleAuthenticator部署過程(Centos6系統下):
一、關閉SELINUX
[root@test ~]# vim /etc/selinux/config      #永久關閉。需要reboot重啟後生效
SELINUX=disabled

[root@test ~]# setenforce 0   #臨時性關閉。不需要reboot重啟
二、安裝編輯工具包
[root@test ~]# yum install wget gcc make
[root@test ~]# yum install pam-devel libpng-devel

下載repoforge第三方yum源及libpam-google-authenticator-1.0-source.tar.bz2、qrencode-3.4.4.tar.gz(後兩個軟體需要在FQ條件下才能下載。這裡我提前下載了)
下載地址:https://pan.baidu.com/s/1i4WDbyX
提取密碼:anxd

下載到/data/software目錄下
[root@test ~]# cd /data/software/
[root@test software]# ls
libpam-google-authenticator-1.0-source.tar.bz2  qrencode-3.4.4.tar.gz  rpmforge-release-0.5.3-1.el6.rf.x86_64.rpm

[root@test software]# rpm -ivh rpmforge-release-0.5.3-1.el6.rf.x86_64.rpm

[root@test software]# yum install mercurial

安裝google authenticator PAM外掛
[root@test ~]# cd /data/software/
[root@test software]# tar -jxvf libpam-google-authenticator-1.0-source.tar.bz2
[root@test software]# cd libpam-google-authenticator-1.0
[root@test libpam-google-authenticator-1.0]# make && make install

安裝QrenCode,此工具可以在Linux命令列下生成二維碼
[root@test ~]# cd /data/software/
[root@test software]# tar -zvxf qrencode-3.4.4.tar.gz
[root@test software]# cd qrencode-3.4.4
[root@test qrencode-3.4.4]# ./configure --prefix=/usr
[root@test qrencode-3.4.4]# make && make install
三、配置ssh服務呼叫google authenticator PAM外掛
[root@test ~]# vim /etc/pam.d/sshd       #在第一行(即auth       required pam_sepermit.so的下一行)增加以下程式碼
auth required pam_google_authenticator.so

[root@test ~]# vim /etc/ssh/sshd_config
......
ChallengeResponseAuthentication yes          #修改no為yes

[root@test ~]# service sshd restart
四、使用google authenticator PAM外掛為ssh登入賬號生成動態驗證碼
注意:哪個賬號需要動態驗證碼,請切換到該賬號下操作。(可以在不同使用者下執行這個命令以生成各自的二次驗證碼)
[root@test ~]# google-authenticator
Do you want authentication tokens to be time-based (y/n) y
https://www.google.com/chart?chs=200x200&chld=M|0&cht=qr&chl=otpauth://totp/root@BJLX_NET_TEST-01%3Fsecret%3DCGB5NWP6SABN3TM7 #這個連結只能在FQ條件下才能開啟

Your new secret key is: CGB5NWP6SABN3TM7 #如果在手機的谷歌身份驗證器上不想通過"掃描條形碼"的方式新增,就輸入這個key,通過"手動輸入驗證碼的方式"。賬號就是伺服器主機名。
Your verification code is 730249
Your emergency scratch codes are: #下面會生成5個緊急驗證碼(當無法獲取動態驗證碼或驗證碼不能使用使用可以使用這5個)
66151894 #需要注意的是:這5個驗證碼用一個就會少一個!請儲存好!
91475582
37383236
70667696
70522112
Do you want me to update your "/root/.google_authenticator" file (y/n) y #提示是否要更新驗證檔案,選擇y
Do you want to disallow multiple uses of the same authentication
token? This restricts you to one login about every 30s, but it increases
your chances to notice or even prevent man-in-the-middle attacks (y/n) y #禁止使用相同口令
By default, tokens are good for 30 seconds and in order to compensate for
possible time-skew between the client and the server, we allow an extra
token before and after the current time. If you experience problems with poor
time synchronization, you can increase the window from its default
size of 1:30min to about 4min. Do you want to do so (y/n) n #預設動態驗證碼在30秒內有效,由於客戶端和伺服器可能會存在時間差,可將時間增加到最長4分鐘,是否要這麼做:這裡選擇是n,繼續預設30秒
If the computer that you are logging into isn't hardened against brute-force
login attempts, you can enable rate-limiting for the authentication module.
By default, this limits attackers to no more than 3 login attempts every 30s.
Do you want to enable rate-limiting (y/n) y #是否限制嘗試次數,每30秒只能嘗試最多3次,這裡選擇y進行限制
五、手機安裝Google身份驗證器,通過此工具掃描上一步生成的二維碼圖形,獲取動態驗證碼。
在App Store裡直接可以下載Authenticator

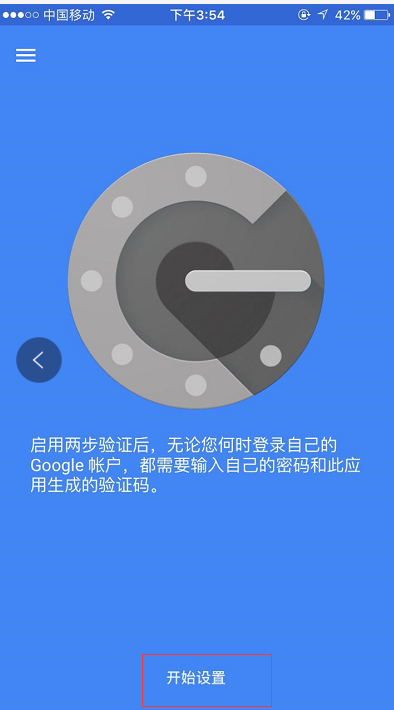
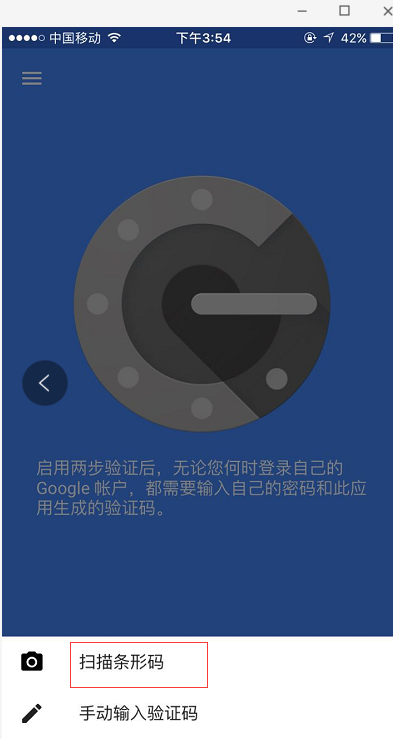
然後掃描上面在伺服器上生成的二維碼,每個使用者都會有一個單獨的二維碼

接著在ssh的客戶端裡設定,如下,設定"Keyboard Interactive"方式登入
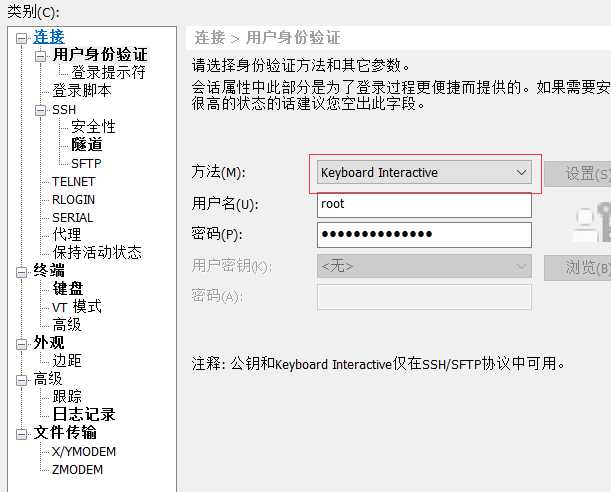
然後再次連線的時候,就會提示先輸入二次身份驗證碼,再輸入使用者密碼。
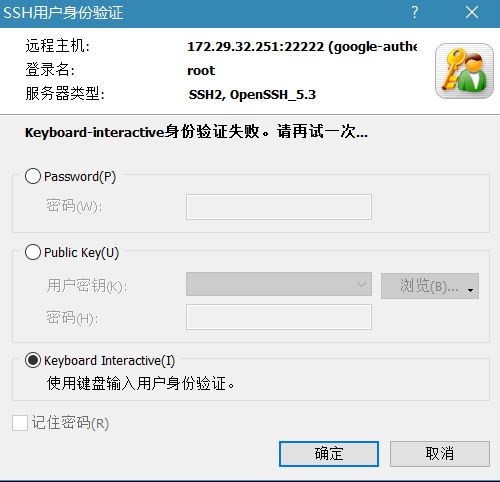
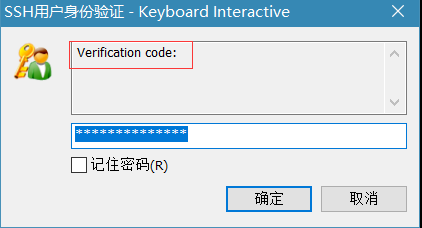

在linux客戶機上遠端登入,效果一樣:
[wangshibo@BJLX_NET_TEST-01 ~]$ ssh root@172.29.32.251
The authenticity of host '[172.29.32.251]:22 ([172.29.32.251]:22)' can't be established.
RSA key fingerprint is 5c:e7:1a:05:8b:2e:66:99:20:90:1f:47:56:bf:b9:41.
Are you sure you want to continue connecting (yes/no)? yes
Warning: Permanently added '[172.29.32.251]:22' (RSA) to the list of known hosts.
Verification:
Password:
[root@test ~]#