在部署openstack雲平臺環境的時候,需要上傳映象到glance。
首先下載iso映象,這裡下載了centos6.5映象,放到/usr/local/src目錄下
然後用OZ工具製作openstack的映象
*******************************安裝libvirt虛擬機器軟體****************************************
[root@openstack-server src]# yum install qemu-kvm libvirt libvirt-python libguestfs-tools virt-install
[root@openstack-server src]# systemctl enable libvirtd && systemctl start libvirtd
************************************************************************************
[root@openstack-server src]#yum install -y oz libguestfs-tools
[root@openstack-server src]# pwd
/usr/local/src
[root@openstack-server src]# ll CentOS-6.5-x86_64-bin-DVD1.iso #下載的iso映象
-rw-r--r--. 1 root root 4467982336 Nov 29 2013 CentOS-6.5-x86_64-bin-DVD1.iso
[root@openstack-server src]# cat CentOS6u5-x86_64.tdl #建立tdl 檔案
<template>
<name>CentOS6u5-x86_64</name>
<description>CentOS6u5-x86_64 template</description>
<os>
<name>CentOS-6</name>
<version>5</version>
<arch>x86_64</arch>
<rootpw>PASSWORD</rootpw> #這個是虛擬機器建立好後,root的登陸密碼,密碼是在這個映象裡定義的!
<install type='iso'>
<iso>file:///usr/local/src/CentOS-6.5-x86_64-bin-DVD1.iso</iso>
</install>
</os>
<commands> #centos7系統裡沒有/boot/grub/grub.conf檔案,這塊可以不用寫,但寫了也無妨。這裡我是centos7,也寫了
<command name='console'>
sed -i 's/ rhgb//g' /boot/grub/grub.conf
sed -i 's/ quiet//g' /boot/grub/grub.conf
sed -i 's/ console=tty0 / serial=tty0 console=ttyS0,115200n8 /g' /boot/grub/grub.conf
</command>
</commands>
</template>
在用OZ工具製作openstack映象,有報錯:
[root@openstack-server src]# oz-install -u -d3 CentOS6u5-x86_64.tdl #報錯如下:
..................
raise oz.OzException.OzException("Could not find a libvirt bridge. Please run 'virsh net-start default' to start the default libvirt network, or see http://github.com/clalancette/oz/wiki/Oz-Network-Configuration for more information")
oz.OzException.OzException: Could not find a libvirt bridge. Please run 'virsh net-start default' to start the default libvirt network, or see http://github.com/clalancette/oz/wiki/Oz-Network-Configuration for more information
[root@openstack-server src]# virsh net-start default
error: failed to get network 'default'
error: Network not found: no network with matching name 'default'
查閱資料,說是因為 default 網路不存在
回想了一下,我開始在搗鼓openstack 的時候,可能用命令刪除了default,也或許沒有啟動default網路
因為在不同的環境下,default.xml 的存放路徑不同,這裡筆者以自己的 centos7 為例
[root@openstack-server src]# find / -name "default.xml"
/etc/libvirt/qemu/networks/autostart/default.xml
/etc/libvirt/qemu/networks/default.xml
/usr/share/backgrounds/default.xml
/usr/share/libvirt/networks/default.xml
[root@openstack-server src]# virsh net-define /usr/share/libvirt/networks/default.xml
Network default defined from /usr/share/libvirt/networks/default.xml
[root@openstack-server src]# virsh net-start default
Network default started
[root@openstack-server src]# virsh net-list
Name State Autostart Persistent
----------------------------------------------------------
default active no yes
[root@openstack-server src]#
然後接著再進行openstack映象的製作:
[root@openstack-server src]# oz-install -u -d3 CentOS6u5-x86_64.tdl
libvirt bridge name is virbr0
Libvirt type is kvm
Name: CentOS6u5-x86_64, UUID: 0a9b1d18-f517-40ae-9de9-1fd6101878e2
MAC: 52:54:00:fb:0b:c9, distro: CentOS-6
update: 5, arch: x86_64, diskimage: /var/lib/libvirt/images/CentOS6u5-x86_64.dsk
nicmodel: virtio, clockoffset: utc
mousetype: ps2, disk_bus: virtio, disk_dev: vda
icicletmp: /var/lib/oz/icicletmp/CentOS6u5-x86_64, listen_port: 36050
Original ISO path: /var/lib/oz/isos/CentOS-65x86_64-iso.iso
Modified ISO cache: /var/lib/oz/isos/CentOS-65x86_64-iso-oz.iso
Output ISO path: /var/lib/libvirt/images/CentOS6u5-x86_64-iso-oz.iso
ISO content path: /var/lib/oz/isocontent/CentOS6u5-x86_64-iso
Checking for guest conflicts with CentOS6u5-x86_64
Generating install media
Attempting to get the lock for /var/lib/oz/isos/CentOS-65x86_64-iso.iso
Got the lock for /var/lib/oz/isos/CentOS-65x86_64-iso.iso
Fetching the original media
Fetching the original install media from file:///usr/local/src/CentOS-6.5-x86_64-bin-DVD1.iso
15kB of 4363264kB
10255kB of 4363264kB
20494kB of 4363264kB
30734kB of 4363264kB
40973kB of 4363264kB
51212kB of 4363264kB
....................
....................
....................
Cleaning up guestfs handle for CentOS6u5-x86_64
Syncing
Unmounting all
Libvirt XML was written to CentOS6u5-x86_64Aug_30_2016-13:47:18
注意:
映象製作完預設會存放到/var/lib/libvirt/images/ 目錄下,可以在/etc/oz/oz.cfg 配置檔案中進行修改路徑。
[root@openstack-server src]# cd /var/lib/libvirt/images/
[root@openstack-server images]# pwd
/var/lib/libvirt/images
[root@openstack-server images]# ll
total 1087336
-rw-rw-rw-. 1 root root 10737418240 Aug 30 13:47 CentOS6u5-x86_64.dsk
[root@openstack-server images]# virt-sysprep --add CentOS6u5-x86_64.dsk
[ 0.0] Examining the guest ...
[ 5.0] Performing "abrt-data" ...
...........
[ 5.0] Setting a random seed
[ 5.0] Performing "lvm-uuids" ...
檢視檔案資訊
[root@openstack-server images]# qemu-img info CentOS6u5-x86_64.dsk
image: CentOS6u5-x86_64.dsk
file format: raw
virtual size: 10G (10737418240 bytes)
disk size: 1.0G
上傳映象到 Glance
[root@openstack-server images]# glance image-create --name "CentOS-6.5" --file /var/lib/libvirt/images/CentOS6u5-x86_64.dsk --disk-format qcow2 --container-format bare --visibility public --progress
[=============================>] 100%
+------------------+--------------------------------------+
| Property | Value |
+------------------+--------------------------------------+
| checksum | 2d16e5ef687fead34fa801aafe37f058 |
| container_format | bare |
| created_at | 2016-08-30T06:03:22Z |
| disk_format | qcow2 |
| id | 508db9d4-6c9f-459d-8782-065ee8b6f2c2 |
| min_disk | 0 |
| min_ram | 0 |
| name | CentOS-6.5 |
| owner | 65a0c00638c247a0a274837aa6eb165f |
| protected | False |
| size | 10737418240 |
| status | active |
| tags | [] |
| updated_at | 2016-08-30T06:04:26Z |
| virtual_size | None |
| visibility | public |
+------------------+--------------------------------------+
檢視映象
[root@openstack-server images]# glance image-list
+--------------------------------------+------------+
| ID | Name |
+--------------------------------------+------------+
| 508db9d4-6c9f-459d-8782-065ee8b6f2c2 | CentOS-6.5 |
+--------------------------------------+------------+
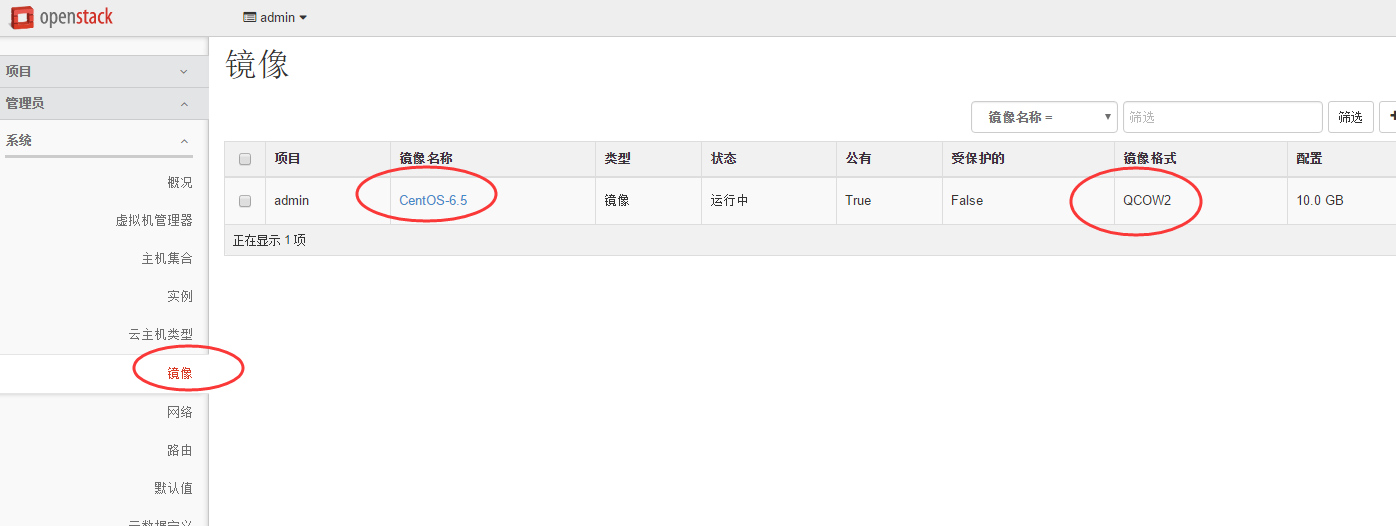
登陸openstack介面,發現可以檢視到上面已經上傳到glance裡面的映象。上面使用OZ工具製作的openstack所需要的Centos6/Centos7映象的預設大小是10G(如下圖)。
----------------------------------------------------------------------------------------------------------
注意:
如果不想用OZ工具製作,可以直接下載centos的qcow2格式映象
下載地址:http://cloud.centos.org/centos 【有centos6/7的映象】
比如:下載centos7的qcow2格式映象
#wget http://cloud.centos.org/centos/7/images/CentOS-7-x86_64-GenericCloud.qcow2
上傳到 galnce
#glance image-create --name "CentOS-7-x86_64" --disk-format qcow2 --container-format bare --file
CentOS-7-x86_64-GenericCloud.qcow2 --visibility public --progress
-------------------------------------------------------------------------------------------------------------
當然,也可以使用OZ工具製作openstack需要的qcow2的Centos7映象
[root@openstack-server src]# pwd
/usr/local/src
[root@openstack-server src]# ls CentOS-7-x86_64-DVD-1511.iso
CentOS-7-x86_64-DVD-1511.iso
[root@openstack-server src]# ls CentOS-7-x86_64.tdl
CentOS-7-x86_64.tdl
[root@openstack-server src]# cat CentOS-7-x86_64.tdl
<template>
<name>CentOS-7-x86_64</name>
<description>CentOS-7-x86_64 template</description>
<os>
<name>CentOS-7</name>
<version>2</version>
<arch>x86_64</arch>
<rootpw>PASSWORD</rootpw>
<install type='iso'>
<iso>file:///usr/local/src/CentOS-7-x86_64-DVD-1511.iso</iso>
</install>
</os>
<commands>
<command name='console'>
sed -i 's/ rhgb//g' /boot/grub/grub.conf
sed -i 's/ quiet//g' /boot/grub/grub.conf
sed -i 's/ console=tty0 / serial=tty0 console=ttyS0,115200n8 /g' /boot/grub/grub.conf
</command>
</commands>
</template>
[root@openstack-server src]# oz-install -u -d3 CentOS-7-x86_64.tdl
後面的步驟跟上面製作Centos6.5版本的操作一樣
----------------------------------------------------------------------------------------------------------
下面是centos6.8版本映象製作的tdl檔案模板:
[root@openstack-server src]# pwd
/usr/local/src
[root@openstack-server src]# ls CentOS-6.8-x86_64-bin-DVD1.iso
CentOS-6.8-x86_64-bin-DVD1.iso
[root@openstack-server src]# cat CentOS6u8-x86_64.tdl
<template>
<name>CentOS6u8-x86_64</name>
<description>CentOS6u8-x86_64 template</description>
<os>
<name>CentOS-6</name>
<version>8</version>
<arch>x86_64</arch>
<rootpw>PASSWORD</rootpw>
<install type='iso'>
<iso>file:///usr/local/src/CentOS-6.8-x86_64-bin-DVD1.iso</iso>
</install>
</os>
<commands>
<command name='console'>
sed -i 's/ rhgb//g' /boot/grub/grub.conf
sed -i 's/ quiet//g' /boot/grub/grub.conf
sed -i 's/ console=tty0 / serial=tty0 console=ttyS0,115200n8 /g' /boot/grub/grub.conf
</command>
</commands>
</template>
[root@openstack-server src]# oz-install -u -d3 CentOS6u8-x86_64.tdl
後面的步驟跟上面製作Centos6.5版本的操作一樣
------------------------------------------------------------------------------------------------------------
下面說下使用OZ工具製作openstack虛擬化環境下的ubuntu版本映象的過程記錄:
下面以ubuntu12.04版本為例,tdl內容參考OZ在github上的模板樣式。
https://github.com/rcbops/oz-image-build/tree/master/templates
[root@openstack-server src]# pwd
/usr/local/src
[root@openstack-server src]# ls ubuntu-12.04-server-amd64.iso
ubuntu-12.04-server-amd64.iso
下面ubuntu的tdl模板可直接使用~
[root@openstack-server src]# cat ubuntu-12.04_x86_64.tdl
<template>
<name>ubuntu-12.04_x86_64</name>
<description>Ubuntu 12.04 15GB template</description>
<disk>
<size>15</size> #映象大小為15G
</disk>
<os>
<name>Ubuntu</name>
<version>12.04</version>
<arch>x86_64</arch>
<rootpw>ROOT-PW_CHANGE-ME!!!</rootpw> #root賬號登入密碼
<install type='iso'>
<iso>file:///usr/local/src/ubuntu-12.04-server-amd64.iso</iso>
</install>
</os>
<commands>
<command name='console'>
sed -i 's/splash//g' /etc/default/grub
sed -i 's/quiet/console=ttyS0/g' /etc/default/grub
/usr/sbin/update-grub
</command>
<command name='update'>
apt-get update
apt-get -y upgrade
echo "cloud-init cloud-init/datasources string NoCloud, OVF, Ec2" > /tmp/debconf-selections
/usr/bin/debconf-set-selections /tmp/debconf-selections
rm -f /tmp/debconf-selections
apt-get -y install cloud-init
apt-get clean
/usr/sbin/useradd -m stack
echo "stack ALL=(ALL) NOPASSWD: ALL" >> /etc/sudoers
sed -i 's/^user: ubuntu/user: stack/g' /etc/cloud/cloud.cfg
echo -n > /etc/udev/rules.d/70-persistent-net.rules
echo -n > /lib/udev/rules.d/75-persistent-net-generator.rules
</command>
</commands>
</template>
[root@openstack-server src]# oz-install -u -d3 ubuntu-12.04_x86_64.tdl
............
............
Waiting for ubuntu-12.04_x86_64 to finish installing, 1200/1200
Waiting for ubuntu-12.04_x86_64 to finish installing, 1190/1200
Waiting for ubuntu-12.04_x86_64 to finish installing, 1180/1200
Waiting for ubuntu-12.04_x86_64 to finish installing, 1170/1200
............
............
Unmounting all
Libvirt XML was written to ubuntu-12.04_x86_64Oct_31_2016-23:01:36
[root@openstack-server src]# cd /var/lib/oz/isos/
[root@openstack-server isos]# pwd
/var/lib/oz/isos
[root@openstack-server isos]# ls #發現oz下已經有了ubuntu12.04映象
Ubuntu12.04x86_64-iso.iso
[root@openstack-server src]# cd /var/lib/libvirt/images/
[root@openstack-server images]# ls
ubuntu-12.04_x86_64.dsk
[root@openstack-server images]# virt-sysprep --add ubuntu-12.04_x86_64.dsk
[ 0.0] Examining the guest ...
...........
[ 5.0] Performing "lvm-uuids" .
[root@openstack-server images]# qemu-img info ubuntu-12.04_x86_64.dsk
image: ubuntu-12.04_x86_64.dsk
file format: raw
virtual size: 15G (16106127360 bytes)
disk size: 1.3G
[root@openstack-server images]# glance image-create --name "ubuntu-12.04" --file /var/lib/libvirt/images/ubuntu-12.04_x86_64.dsk --disk-format qcow2 --container-format bare --visibility public --progress
[=============================>] 100%
+------------------+--------------------------------------+
| Property | Value |
+------------------+--------------------------------------+
| checksum | 15d25f4da354d8fbd5a248fc01894ceb |
| container_format | bare |
| created_at | 2016-10-31T15:25:29Z |
| disk_format | qcow2 |
| id | 042073da-e6cb-4b0b-97dd-1d5ef5be236a |
| min_disk | 0 |
| min_ram | 0 |
| name | ubuntu-12.04 |
| owner | 0cd3632df93d48d6b2c24c67f70e56b8 |
| protected | False |
| size | 64424509440 |
| status | active |
| tags | [] |
| updated_at | 2016-10-31T15:38:09Z |
| virtual_size | None |
| visibility | public |
+------------------+-----------------------------------------+
[root@linux-node2 images]# glance image-list
+--------------------------------------+---------------------+
| ID | Name |
+--------------------------------------+---------------------+
| 042073da-e6cb-4b0b-97dd-1d5ef5be236a | ubuntu-12.04 |
+--------------------------------------+---------------------+
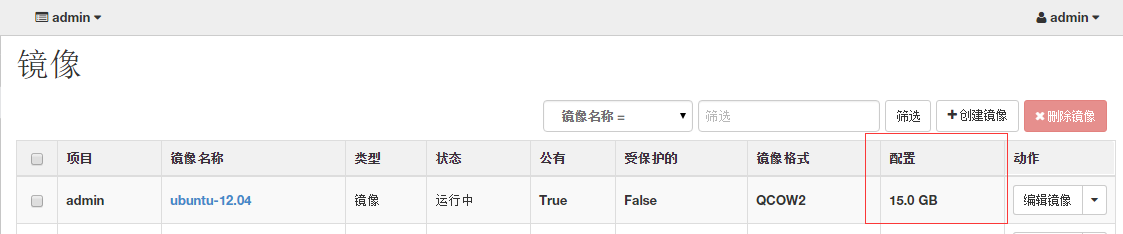
登入openstack介面,發現上面上傳到openstack的ubuntu12.04映象已經有了,映象大小為15G。
ubuntu各歷史版本映象下載地址:http://releases.ubuntu.com/
ubuntu版本升級記錄,詳情參考:http://www.cnblogs.com/kevingrace/p/6084118.html