很高興能再次和大家分享webapi介面的相關文章,本篇將要講解的是如何在應用中呼叫webapi介面;對於大部分做內部管理系統及類似系統的朋友來說很少會去呼叫別人的介面,因此可能在這方面存在一些困惑,希望本篇分享文章內容能給您們帶來幫助或者學習,希望大家喜歡,也希望各位多多掃碼支援和點贊謝謝:
» 簡單做個webapi(查詢+新增)介面
» MVC程式碼中如何呼叫api介面
» ajax如何調api介面
下面一步一個腳印的來分享:
» 簡單做個webapi(查詢+新增)介面
首先,我們需要有一個webapi介面專案,我這裡以前面WebApi介面 - 響應輸出xml和json文章的專案來構建本篇文章的測試用例;這裡新建一個 DbData 資料來源類,主要用來做資料儲存和提供查詢列表資料及新增資料方法,具體程式碼如:
 1 public class DbData
 2     {
 3         public static DbData Current
 4         {
 5             get
 6             {
 7                 var key = "dbKey";
 8                 var db = CallContext.GetData(key) as DbData;
 9                 if (db == null)
10                 {
11                     db = new DbData();
12                     CallContext.SetData(key, db);
13                 }
14                 return db;
15             }
16         }
17
18
19         private static List<MoStudent> students = new List<MoStudent>(){
20             new MoStudent{ Id =1 , Name ="小1", Sex = true, Birthday= Convert.ToDateTime("1991-05-31")},
21                      new MoStudent{ Id =2 , Name ="小2", Sex = false, Birthday= Convert.ToDateTime("1991-05-31")},
22                      new MoStudent{ Id =3 , Name ="小3", Sex = false, Birthday= Convert.ToDateTime("1991-05-31")},
23                      new MoStudent{ Id =4 , Name ="小4", Sex = true, Birthday= Convert.ToDateTime("1991-05-31")}
24         };
25
26         public List<MoStudent> GetAll()
27         {
28             return students;
29         }
30
31         public bool Save(MoStudent moStudent)
32         {
33             moStudent.Id = students.Max(b => b.Id) + 1;
34             students.Add(moStudent);
35             return true;
36         }
37     }
然後,需要在 ValuesController.cs 檔案中增加呼叫資料來源類 DbData ,程式碼: private DbData db = DbData.Current; 這裡使用了 DbData 類中的Current屬性來獲取DbData的例項化物件,這裡和大家簡單說下這樣做的好處在於統一管理呼叫類的例項,因為我們建立的某個操作類後,可能會在不同的檔案或不同業務中呼叫,如果想呼叫其內部方法,那麼需要用到new一個物件,如此一來多次在使用的地方都new一次感覺很繁瑣,而且不容已維護;當然這裡的DbData是簡單的測試用例,沒有用到什麼工廠,抽象等設計來處理宣告這類的例項(大家可以忽略哦);
好了,我們再 ValuesController 中分別建立個獲取學生列表資訊的方法 GetAllStudents01_2 和新增學生資訊的方法 AddStudent ,然後填寫內部程式碼如:
 1 private DbData db = DbData.Current;
 2
 3         [Route("all01_2")]
 4         [AcceptVerbs("POST","GET")]
 5         public HttpResponseMessage GetAllStudents01_2()
 6         {
 7             var students = db.GetAll();
 8             return Request.CreateResponse(HttpStatusCode.OK, students);
 9         }
10
11         [Route("add")]
12         [HttpPost]
13         public HttpResponseMessage AddStudent(MoStudent moStudent)
14         {
15             var httpStatus = HttpStatusCode.OK;
16             if (ModelState.IsValid)
17             {
18                 var isfalse = db.Save(moStudent);
19             }
20             return Request.CreateResponse(httpStatus, moStudent);
21         }
兩個方法的引數或者返回資訊沒有做更多的處理,能夠大家看就行,好了建立完api介面程式碼後,我們來測試訪問下學生列表介面,地址如: http://localhost:1001/s/all01_2 ,得到的結果圖:
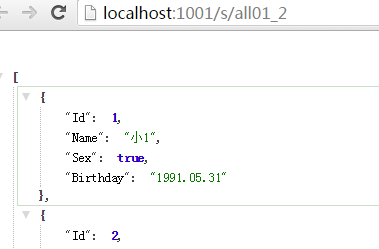
返回的是json格式資料,本篇圍繞的資料格式都是json,這也是很常用的返回資料格式之一;
» MVC程式碼中如何呼叫api介面
首先,建立一個mvc專案,建立方式可以看這篇文章WebApi - 路由,然後再 HomeController.cs 檔案中增加Index(學生列表)和Add(新增學生資訊)兩個Action方法,並且填寫程式碼如:
 1 public class HomeController : Controller
 2     {
 3
 4         public async Task<ActionResult> Index()
 5         {
 6
 7             var searchData = new MoStudent();
 8             //查詢條件
 9
10             var webapiUrl = "http://localhost:1001/s/all01_2";
11             var httpResponseMsg = new HttpResponseMessage();
12
13             using (var httpClient = new HttpClient())
14             {
15                 httpResponseMsg = await httpClient.PostAsync(webapiUrl, searchData, new System.Net.Http.Formatting.JsonMediaTypeFormatter());
16             }
17             var students = httpResponseMsg.Content.ReadAsAsync<List<MoStudent>>().Result;
18
19             return View(students);
20         }
21
22         [HttpGet]
23         public ActionResult Add()
24         {
25
26             return View();
27         }
28
29         [HttpPost]
30         public async Task<ActionResult> Add(MoStudent model)
31         {
32             if (ModelState.IsValid)
33             {
34                 var webapiUrl = "http://localhost:1001/s/add";
35                 var httpResponseMsg = new HttpResponseMessage();
36
37                 using (var httpClient = new HttpClient())
38                 {
39                     httpResponseMsg = await httpClient.PostAsync<MoStudent>(webapiUrl, model, new System.Net.Http.Formatting.JsonMediaTypeFormatter());
40                 }
41                 model = httpResponseMsg.Content.ReadAsAsync<MoStudent>().Result;
42             }
43
44             ModelState.AddModelError("", model.Id > 0 ? "新增成功" : "新增失敗");
45             return View(model);
46         }
47     }
這裡需要講解幾個注意的地方, HttpClient 類主要用來做介面請求的,這裡我通過傳遞引數給她的擴充套件 PostAsync 方法來請求我們剛才建立的webapi地址 http://localhost:1001/s/all01_2 ,這裡先來簡單看下這個方法使用到的引數說明:


 1 //
 2         // 摘要:
 3         //     使用通過給定格式化程式序列化的指定值,以非同步操作方式傳送 POST 請求。
 4         //
 5         // 引數:
 6         //   client:
 7         //     用於發出請求的客戶端。
 8         //
 9         //   requestUri:
10         //     請求將傳送到的 URI。
11         //
12         //   value:
13         //     要寫入到請求的實體正文的值。
14         //
15         //   formatter:
16         //     用於序列化值的格式化程式。
17         //
18         // 型別引數:
19         //   T:
20         //     要序列化的物件的型別。
21         //
22         // 返回結果:
23         //     一個表示非同步操作的任務物件。
24         public static Task<HttpResponseMessage> PostAsync<T>(this HttpClient client, string requestUri, T value, MediaTypeFormatter formatter);
值得注意的是最後一個引數 new System.Net.Http.Formatting.JsonMediaTypeFormatter() , JsonMediaTypeFormatter 類是繼承了 MediaTypeFormatter 類並重寫了格式化的一些方法,因為我們建立的api專案要求的是json格式的引數和返回,所以這裡用的是 JsonMediaTypeFormatter 類,還有其他的格式如: XmlMediaTypeFormatter 等這個也在上一篇分享文章中使用到了,各位可以看下做下了解;PostAsync方法是非同步的方法,所以咋們需要在呼叫的時候使用 await 修飾,有了await自然要有她的配套組合 async 和 Task 因此就有了咋們的 public async Task<ActionResult> Index() 這樣的程式碼;好了廢話太多了,咋們一起來看下試圖view中繫結程式碼和繫結學生列表後的查詢結果:
 1 @model List<Stage.Api.Extend.MoStudent>
 2
 3 <div class="row">
 4     <h3>學生資訊列表</h3>
 5     <hr />
 6     <h4>後臺請求介面</h4>
 7     @using (Html.BeginForm())
 8     {
 9         <button class="btn btn-default" type="submit">查 詢</button>
10         <a class="btn btn-default" href="/home/add">添 加</a>
11         <hr />
12         <table id="tab01" class="table table-hover table-bordered text-center">
13             <thead>
14                 <tr>
15                     <td>學生編號</td>
16                     <td>姓名</td>
17                     <td>性別</td>
18                     <td>出生日期</td>
19                 </tr>
20             </thead>
21             <tbody>
22                 @foreach (var item in Model)
23                 {
24                     <tr>
25                         <td>@item.Id</td>
26                         <td>@item.Name</td>
27                         <td>@(item.Sex ? "男" : "女")</td>
28                         <td>@item.Birthday.ToString("yyyy.MM.dd")</td>
29                     </tr>
30                 }
31             </tbody>
32         </table>
33
34     }
執行方法這個學生列表Action的Index方法後,在瀏覽器的效果如:
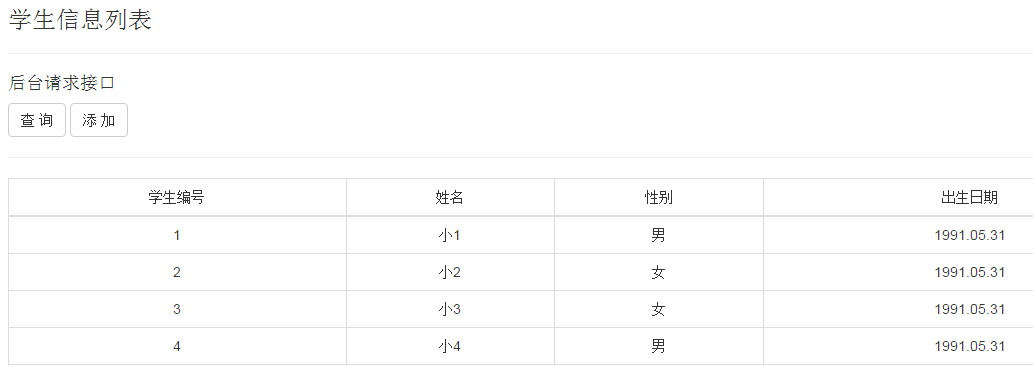
看到結果後,咋們的mvc呼叫webapi的例子就成功了,下面來看下新增功能,新增方法裡面的主要呼叫webapi程式碼和查詢學生列表方法的程式碼幾乎一樣,只是這裡呼叫api方法後返回的結果是單個學生物件資訊不是集合了,這裡只貼一下Add檢視程式碼供大家參考:
 1 @model Stage.Api.Extend.MoStudent
 2
 3 @{
 4     ViewBag.Title = "新增 - 學生";
 5 }
 6
 7 <h3>新增 - 學生</h3>
 8
 9
10 @using (Html.BeginForm())
11 {
12     @Html.AntiForgeryToken()
13
14     <div class="form-horizontal">
15         <hr />
16         @Html.ValidationSummary(true)
17
18         <div class="form-group">
19             @Html.LabelFor(model => model.Name, "姓名", new { @class = "control-label col-md-2" })
20             <div class="col-md-10">
21                 @Html.EditorFor(model => model.Name)
22                 @Html.ValidationMessageFor(model => model.Name)
23             </div>
24         </div>
25
26         <div class="form-group">
27             @Html.LabelFor(model => model.Sex, "性別", new { @class = "control-label col-md-2" })
28             <div class="col-md-10">
29                 @Html.EditorFor(model => model.Sex)
30                 @Html.ValidationMessageFor(model => model.Sex)
31             </div>
32         </div>
33
34         <div class="form-group">
35             @Html.LabelFor(model => model.Birthday, "出生日期", new { @class = "control-label col-md-2" })
36             <div class="col-md-10">
37                 @Html.EditorFor(model => model.Birthday)
38                 @Html.ValidationMessageFor(model => model.Birthday)
39             </div>
40         </div>
41
42         <div class="form-group">
43             <div class="col-md-offset-2 col-md-10">
44                 <input type="submit" value="服務端儲存" class="btn btn-default" />
45                 <input type="button" id="btnAjaxSave" value="ajax儲存" class="btn btn-default" />
46             </div>
47         </div>
48         <div class="form-group">
49             <div id="divResult" class="col-md-offset-2 col-md-10" style="color:red">
50
51             </div>
52         </div>
53     </div>
54 }
55
56 <div>
57     @Html.ActionLink("返回列表", "Index")
58 </div>
值得注意的是這種後臺請求不同域之間的api介面,不會有跨域的限制,除非介面本身有限制外,下面要講解的ajax方式就不相同了;
» ajax如何調api介面
首先,咋們需要明確一個東西,ajax呼叫介面不能跨域,這個是必須瞭解的,比如手機h5的webapp通常都是使用ajax來呼叫介面獲取資料的,而且大部分需求都是跨域來請求的,因此本示例會在下面講解的時候簡單提及到常用的幾種處理方式,並且使用其中一種來講解,希望能給大家帶來幫助;為了測試跨域訪問情況,我們在上一節點的試圖中增加如下佈局程式碼:
 1     <h4>ajax請求介面</h4>
 2     <button class="btn btn-default" id="btnSearch">查 詢</button>
 3     <a class="btn btn-default" href="/home/add">添 加</a>
 4     <hr />
 5     <table id="tab" class="table table-hover table-bordered text-center">
 6         <thead>
 7             <tr>
 8                 <td>學生編號</td>
 9                 <td>姓名</td>
10                 <td>性別</td>
11                 <td>出生日期</td>
12             </tr>
13         </thead>
14         <tbody>
15             <tr>
16                 <td colspan="4"></td>
17             </tr>
18         </tbody>
19     </table>
然後,jquery繫結查詢按鈕事件程式碼如:
 1 <script type="text/javascript">
 2
 3     $(function () {
 4
 5         $("#btnSearch").on("click", function () {
 6
 7             var tabObj = $("#tab tbody");
 8             tabObj.html('tr><td colspan="4">載入中...</td></tr>');
 9
10             $.post("http://localhost:1001/s/all01_2", {}, function (data) {
11
12                 var tabHtml = [];
13                 $.each(data, function (i, item) {
14
15                     tabHtml.push('<tr>');
16                     tabHtml.push("<td>" + item.Id + "</td>");
17                     tabHtml.push("<td>" + item.Name + "</td>");
18                     tabHtml.push("<td>" + (item.Sex ? "男" : "女") + "</td>");
19                     tabHtml.push("<td>" + item.Birthday + "</td>");
20                     tabHtml.push('</tr>');
21                 });
22                 if (tabHtml.length <= 0) { return false; }
23
24                 tabObj.html(tabHtml.join(''));
25             });
26         });
27     })
28 </script>
然後,用iis新釋出一個站點指向和上面mvc專案例子一樣的磁碟目錄,然後iis路由地址為: http://localhost:1002/home ,注意那我們剛才的webapi地址為 http://localhost:1001/s/all01_2 ,這兩個地址區別在於,一個是1002埠一個是1001埠,這樣就構建好了咋們跨域的要求了(當然有些朋友會在意在說為什麼不配置個host本地域名來測試呢 ,我只能說這是一樣的效果),然後我們訪問 http://localhost:1002/home 路由,並且點選我們繫結好的查詢事件按鈕,會有這樣一個ajax請求輸出來的錯誤:

很顯然這是跨域提示的錯誤,我們要怎麼避免他呢,市面上通常的方式
1. 使用jsonp格式來處理
2. 在介面端寫入接受跨域請求的設定
很顯然咋們本次測試用的是第二種,方便,快速就能完成,不過這裡因為是webapi,所以這裡直接使用微軟提供的Cors的服務,我們需要使用nuget控制檯錄入如下指定: Install-Package Microsoft.AspNet.WebApi.Cors -Version 5.0.0 ,目前最後更新的版本是:
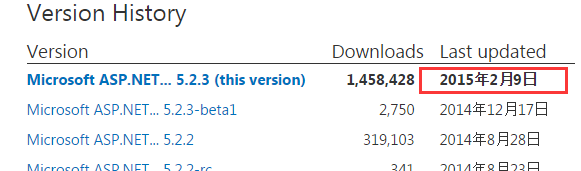
能看出來,這個包現在已經停止了更新了,這裡我為什麼用5.0.0版本呢,因為我專案的其他包最新是5.0.0,而安裝了5.2.3版本的話專案中的很多包都會升級並且有些包自動安裝不上,會導致專案出問題變動很大,多方嘗試後還是這個5.0.0版本的穩定(這個情況需要朋友注意下);怎麼用呢,這裡只需要在咋們webapi專案中的 App_Start/WebApiConfig.cs 檔案中註冊一下就行了,程式碼如: config.EnableCors(); 意思是啟動Cors跨域;然後咋們在自定義 ValuesController class上方增加如下標記: [EnableCors("http://localhost:1002", "*", "*")] ,這個EnableCors第一個引數是允許跨域訪問的域地址,好了咋們還是點選ajax請求介面中的查詢按鈕,得到效果:
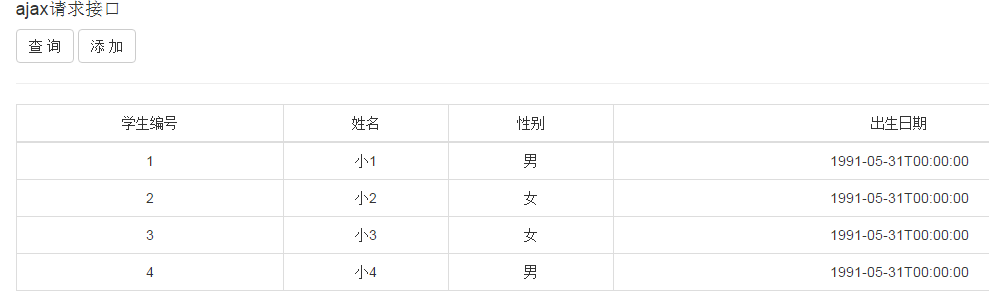
能正常獲取出來webapi介面資料了,好了咋們再來簡單看下在Controller中 EnableCors 允許傳遞的引數說明:
 1 // 摘要:
 2         //     Initializes a new instance of the System.Web.Http.Cors.EnableCorsAttribute
 3         //     class.
 4         //
 5         // 引數:
 6         //   origins:
 7         //     Comma-separated list of origins that are allowed to access the resource.
 8         //     Use "*" to allow all.
 9         //
10         //   headers:
11         //     Comma-separated list of headers that are supported by the resource. Use "*"
12         //     to allow all. Use null or empty string to allow none.
13         //
14         //   methods:
15         //     Comma-separated list of methods that are supported by the resource. Use "*"
16         //     to allow all. Use null or empty string to allow none.
17         public EnableCorsAttribute(string origins, string headers, string methods);
18         //
19         // 摘要:
20         //     Initializes a new instance of the System.Web.Http.Cors.EnableCorsAttribute
21         //     class.
22         //
23         // 引數:
24         //   origins:
25         //     Comma-separated list of origins that are allowed to access the resource.
26         //     Use "*" to allow all.
27         //
28         //   headers:
29         //     Comma-separated list of headers that are supported by the resource. Use "*"
30         //     to allow all. Use null or empty string to allow none.
31         //
32         //   methods:
33         //     Comma-separated list of methods that are supported by the resource. Use "*"
34         //     to allow all. Use null or empty string to allow none.
35         //
36         //   exposedHeaders:
37         //     Comma-separated list of headers that the resource might use and can be exposed.
38         //     Use null or empty string to expose none.
39         public EnableCorsAttribute(string origins, string headers, string methods, string exposedHeaders);
由上的引數說明我們可以這樣設定,來確保任何請求地址都能訪問到我們webapi介面:
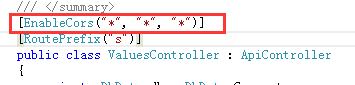
EnableCors的第一個引數如果是*,表示任何請求地址來源都執行訪問該webapi;第二個引數如果是*,表示任意頭部head資訊都可以;第三引數為*,表示任意請求方式(如:Post,put,delete等);總結下ajax方式請求不同域名介面,需要跨域執行設定,這個也是很多網際網路公司webapp應用很常見的一種方式;
只要跨域請求成功後,新增學生資訊就好做了,下面直接貼出通過ajax呼叫新增學生資訊介面程式碼:
 1 <script type="text/javascript">
 2
 3     $(function () {
 4
 5         $("#btnAjaxSave").on("click", function () {
 6
 7             var divResult = $("#divResult");
 8             divResult.html("儲存中,請稍後...");
 9
10             var param = {
11                 Name: $("input[name='Name']").val(),
12                 Sex: $("input[name='Sex']").is(":checked"),
13                 Birthday: $("input[name='Birthday']").val()
14             };
15
16             $.post("http://localhost:1001/s/add", param, function (data) {
17                 console.log(data);
18                 if (data) {
19                     divResult.html(data.Id > 0 ? "新增成功" : "新增失敗");
20                 } else {
21                     divResult.html("");
22                 }
23             });
24         });
25     })
26
27 </script>
對應的學生資訊新增介面:
 1 [Route("add")]
 2         [HttpPost]
 3         public HttpResponseMessage AddStudent(MoStudent moStudent)
 4         {
 5             var httpStatus = HttpStatusCode.OK;
 6             if (ModelState.IsValid)
 7             {
 8                 var isfalse = db.Save(moStudent);
 9             }
10             return Request.CreateResponse(httpStatus, moStudent);
11         }
好了咋們本次分享的內容就到這裡吧,主要講解了怎麼再後臺和用ajax呼叫webapi介面,希望各位喜歡,多多點贊。