Android IntentService完全解析 當Service遇到Handler
轉載請標明出處:
http://blog.csdn.net/lmj623565791/article/details/47143563;
本文出自:【張鴻洋的部落格】
一 概述
大家都清楚,在Android的開發中,凡是遇到耗時的操作儘可能的會交給Service去做,比如我們上傳多張圖,上傳的過程使用者可能將應用置於後臺,然後幹別的去了,我們的Activity就很可能會被殺死,所以可以考慮將上傳操作交給Service去做,如果擔心Service被殺,還能通過設定startForeground(int, Notification)方法提升其優先順序。
那麼,在Service裡面我們肯定不能直接進行耗時操作,一般都需要去開啟子執行緒去做一些事情,自己去管理Service的生命週期以及子執行緒並非是個優雅的做法;好在Android給我們提供了一個類,叫做IntentService,我們看下注釋。
IntentService is a base class for {@link Service}s that handle asynchronous
requests (expressed as {@link Intent}s) on demand. Clients send requests
through {@link android.content.Context#startService(Intent)} calls; the
service is started as needed, handles each Intent in turn using a worker
thread, and stops itself when it runs out of work.
意思說IntentService是一個基於Service的一個類,用來處理非同步的請求。你可以通過startService(Intent)來提交請求,該Service會在需要的時候建立,當完成所有的任務以後自己關閉,且請求是在工作執行緒處理的。
這麼說,我們使用了IntentService最起碼有兩個好處,一方面不需要自己去new Thread了;另一方面不需要考慮在什麼時候關閉該Service了。
好了,那麼接下來我們就來看一個完整的例子。
二 IntentService的使用
我們就來演示一個多個圖片上傳的案例,當然我們會模擬上傳的耗時,畢竟我們的重心在IntentService的使用和原始碼解析上。
首先看下效果圖
效果圖
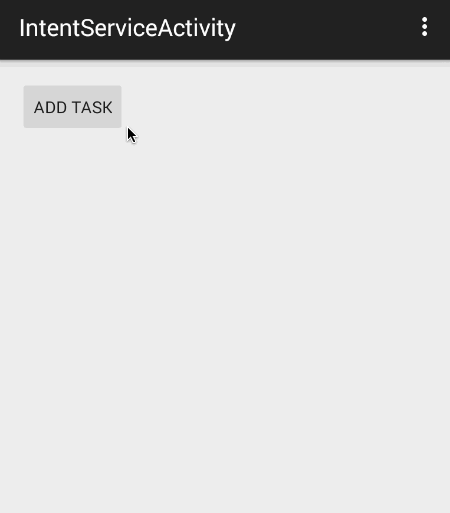
每當我們點選一次按鈕,會將一個任務交給後臺的Service去處理,後臺的Service每處理完成一個請求就會反饋給Activity,然後Activity去更新UI。當所有的任務完成的時候,後臺的Service會退出,不會佔據任何記憶體。
Service
package com.zhy.blogcodes.intentservice;

import android.app.IntentService;
import android.content.Context;
import android.content.Intent;
import android.util.Log;

public class UploadImgService extends IntentService
{
    private static final String ACTION_UPLOAD_IMG = "com.zhy.blogcodes.intentservice.action.UPLOAD_IMAGE";
    public static final String EXTRA_IMG_PATH = "com.zhy.blogcodes.intentservice.extra.IMG_PATH";

    public static void startUploadImg(Context context, String path)
    {
        Intent intent = new Intent(context, UploadImgService.class);
        intent.setAction(ACTION_UPLOAD_IMG);
        intent.putExtra(EXTRA_IMG_PATH, path);
        context.startService(intent);
    }


    public UploadImgService()
    {
        super("UploadImgService");
    }

    @Override
    protected void onHandleIntent(Intent intent)
    {
        if (intent != null)
        {
            final String action = intent.getAction();
            if (ACTION_UPLOAD_IMG.equals(action))
            {
                final String path = intent.getStringExtra(EXTRA_IMG_PATH);
                handleUploadImg(path);
            }
        }
    }

    private void handleUploadImg(String path)
    {
        try
        {
            //模擬上傳耗時
            Thread.sleep(3000);

            Intent intent = new Intent(IntentServiceActivity.UPLOAD_RESULT);
            intent.putExtra(EXTRA_IMG_PATH, path);
            sendBroadcast(intent);

        } catch (InterruptedException e)
        {
            e.printStackTrace();
        }


    }

    @Override
    public void onCreate()
    {
        super.onCreate();
        Log.e("TAG","onCreate");
    }

    @Override
    public void onDestroy()
    {
        super.onDestroy();
        Log.e("TAG","onDestroy");
    }
}程式碼很短,主要就是繼承IntentService,然後複寫onHandleIntent方法,根據傳入的intent來選擇具體的操作。startUploadImg是我寫的一個輔助方法,省的每次都去構建Intent,startService了。
Activity
package com.zhy.blogcodes.intentservice;

import android.content.BroadcastReceiver;
import android.content.Context;
import android.content.Intent;
import android.content.IntentFilter;
import android.os.Bundle;
import android.support.v7.app.AppCompatActivity;
import android.view.Menu;
import android.view.MenuItem;
import android.view.View;
import android.widget.LinearLayout;
import android.widget.TextView;

import com.zhy.blogcodes.R;

public class IntentServiceActivity extends AppCompatActivity
{

    public static final String UPLOAD_RESULT = "com.zhy.blogcodes.intentservice.UPLOAD_RESULT";

    private LinearLayout mLyTaskContainer;

    private BroadcastReceiver uploadImgReceiver = new BroadcastReceiver()
    {
        @Override
        public void onReceive(Context context, Intent intent)
        {
            if (intent.getAction() == UPLOAD_RESULT)
            {
                String path = intent.getStringExtra(UploadImgService.EXTRA_IMG_PATH);

                handleResult(path);

            }

        }
    };

    private void handleResult(String path)
    {
        TextView tv = (TextView) mLyTaskContainer.findViewWithTag(path);
        tv.setText(path + " upload success ~~~ ");
    }


    @Override
    protected void onCreate(Bundle savedInstanceState)
    {
        super.onCreate(savedInstanceState);
        setContentView(R.layout.activity_intent_service);

        mLyTaskContainer = (LinearLayout) findViewById(R.id.id_ll_taskcontainer);

        registerReceiver();
    }

    private void registerReceiver()
    {
        IntentFilter filter = new IntentFilter();
        filter.addAction(UPLOAD_RESULT);
        registerReceiver(uploadImgReceiver, filter);
    }

    int i = 0;

    public void addTask(View view)
    {
        //模擬路徑
        String path = "/sdcard/imgs/" + (++i) + ".png";
        UploadImgService.startUploadImg(this, path);

        TextView tv = new TextView(this);
        mLyTaskContainer.addView(tv);
        tv.setText(path + " is uploading ...");
        tv.setTag(path);
    }


    @Override
    protected void onDestroy()
    {
        super.onDestroy();
        unregisterReceiver(uploadImgReceiver);
    }
}
Activity中,每當我點選一次按鈕呼叫addTask,就回模擬建立一個任務,然後交給IntentService去處理。
注意,當Service的每個任務完成的時候,會傳送一個廣播,我們在Activity的onCreate和onDestroy裡面分別註冊和解註冊了廣播;當收到廣播則更新指定的UI。
佈局檔案
<LinearLayout android:id="@+id/id_ll_taskcontainer"
              xmlns:android="http://schemas.android.com/apk/res/android"
              xmlns:tools="http://schemas.android.com/tools"
              android:layout_width="match_parent"
              android:layout_height="match_parent"
              android:orientation="vertical"
             >


    <Button android:layout_width="wrap_content" android:layout_height="wrap_content"
            android:onClick="addTask" android:text="add Task"/>
</LinearLayout>ok,這樣我們就完成了我們的效果圖的需求;通過上例,大家可以看到我們可以使用IntentService非常方便的處理後臺任務,遮蔽了諸多細節;而Service與Activity通訊呢,我們選擇了廣播的方式(當然這裡也可以使用LocalBroadcastManager)。
學會了使用之後,我們再一鼓作氣的看看其內部的實現。
三 IntentService原始碼解析
直接看IntentService原始碼
/*
 * Copyright (C) 2008 The Android Open Source Project
 *
 * Licensed under the Apache License, Version 2.0 (the "License");
 * you may not use this file except in compliance with the License.
 * You may obtain a copy of the License at
 *
 *      http://www.apache.org/licenses/LICENSE-2.0
 *
 * Unless required by applicable law or agreed to in writing, software
 * distributed under the License is distributed on an "AS IS" BASIS,
 * WITHOUT WARRANTIES OR CONDITIONS OF ANY KIND, either express or implied.
 * See the License for the specific language governing permissions and
 * limitations under the License.
 */

package android.app;

import android.content.Intent;
import android.os.Handler;
import android.os.HandlerThread;
import android.os.IBinder;
import android.os.Looper;
import android.os.Message;


public abstract class IntentService extends Service {
    private volatile Looper mServiceLooper;
    private volatile ServiceHandler mServiceHandler;
    private String mName;
    private boolean mRedelivery;

    private final class ServiceHandler extends Handler {
        public ServiceHandler(Looper looper) {
            super(looper);
        }

        @Override
        public void handleMessage(Message msg) {
            onHandleIntent((Intent)msg.obj);
            stopSelf(msg.arg1);
        }
    }


    public IntentService(String name) {
        super();
        mName = name;
    }


    public void setIntentRedelivery(boolean enabled) {
        mRedelivery = enabled;
    }

    @Override
    public void onCreate() {
                super.onCreate();
        HandlerThread thread = new HandlerThread("IntentService[" + mName + "]");
        thread.start();

        mServiceLooper = thread.getLooper();
        mServiceHandler = new ServiceHandler(mServiceLooper);
    }

    @Override
    public void onStart(Intent intent, int startId) {
        Message msg = mServiceHandler.obtainMessage();
        msg.arg1 = startId;
        msg.obj = intent;
        mServiceHandler.sendMessage(msg);
    }


    @Override
    public int onStartCommand(Intent intent, int flags, int startId) {
        onStart(intent, startId);
        return mRedelivery ? START_REDELIVER_INTENT : START_NOT_STICKY;
    }

    @Override
    public void onDestroy() {
        mServiceLooper.quit();
    }


    @Override
    public IBinder onBind(Intent intent) {
        return null;
    }


    protected abstract void onHandleIntent(Intent intent);
}
可以看到它在onCreate裡面初始化了一個HandlerThread,關於HandlerThread的使用和原始碼
分析參考:Android HandlerThread 完全解析,看到這估計已經能猜到它的邏輯了:
就是每次呼叫onStartCommand的時候,通過mServiceHandler傳送一個訊息,訊息中包含我們的intent。然後在該mServiceHandler的handleMessage中去回撥onHandleIntent(intent);就可以了。
那麼我們具體看一下原始碼,果然是這樣,onStartCommand中回撥了onStart,onStart中通過mServiceHandler傳送訊息到該handler的handleMessage中去。最後handleMessage中回撥onHandleIntent(intent)。
注意下:回撥完成後回撥用 stopSelf(msg.arg1),注意這個msg.arg1是個int值,相當於一個請求的唯一標識。每傳送一個請求,會生成一個唯一的標識,然後將請求放入佇列,當全部執行完成(最後一個請求也就相當於getLastStartId == startId),或者當前傳送的標識是最近發出的那一個(getLastStartId == startId),則會銷燬我們的Service.
如果傳入的是-1則直接銷燬。
那麼,當任務完成銷燬Service回撥onDestory,可以看到在onDestroy中釋放了我們的Looper:mServiceLooper.quit()。
ok~ 如果你的需求可以使用IntentService來做,可以儘可能的使用,設計的還是相當讚的。當然了,如果你需要考慮併發等等需求,那麼可能需要自己去擴充套件建立執行緒池等。
ok~~
相關文章
- Android Service完全解析Android
- Android Https相關完全解析 當OkHttp遇到HttpsAndroidHTTP
- Handler訊息機制完全解析Handler解析
- Android IntentService 的使用和解析AndroidIntent
- Android四大元件之Service,以及IntentServiceAndroid元件Intent
- Android Service和IntentService知識點詳細總結AndroidIntent
- Android Handler 原始碼解析Android原始碼
- Android中IntentService的使用及其原始碼解析AndroidIntent原始碼
- Android IntentServiceAndroidIntent
- Android 8.1 Handler 原始碼解析Android原始碼
- Android IntentService使用全面介紹及原始碼解析AndroidIntent原始碼
- 用IntentService 與ResultReceiver連線web serviceIntentWeb
- Android 使用IntentServiceAndroidIntent
- 【Android自助餐】Handler訊息機制完全解析(二)MessageQueue的佇列管理Android佇列
- Handler解析
- Android Service完全解析,關於服務你所需知道的一切(上)Android
- Android的Handler訊息機制 解析Android
- Android IntentService 工作原理AndroidIntent
- Android Service最全面的解析Android
- Android ToolBar 使用完全解析Android
- Android感測器完全解析Android
- Android DiskLruCache快取完全解析Android快取
- Android面試相關 - IntentServiceAndroid面試Intent
- Android原始碼解析Handler系列第(四)篇 --- 打破Handler那些困惑事兒Android原始碼
- HandlerThread和IntentService原始碼解析threadIntent原始碼
- Android Fragment 真正的完全解析(上)AndroidFragment
- Android 9.0 原始碼_機制篇 -- 全面解析 HandlerAndroid原始碼
- Handler全家桶之 —— Handler 原始碼解析原始碼
- Android中IntentService原始碼分析AndroidIntent原始碼
- [Handler]android-Handler解釋Android
- Android中元件生命週期完全解析Android元件
- Android View 佈局流程(Layout)完全解析AndroidView
- Android View 繪製流程(Draw) 完全解析AndroidView
- Android跨程式元件IPCInvoker用法完全解析Android元件
- Handler機制解析
- Handler原始碼解析原始碼
- Android Service重啟恢復(Service程式重啟)原理解析Android
- Android多執行緒基礎 解析Handler機制Android執行緒