linux配置LAMP 建立DISCUZ論壇系統
LAMP介紹:
LAMP指的Linux(作業系統)、ApacheHTTP 伺服器,MySQL(有時也指MariaDB,資料庫軟體) 和PHP(有時也是指Perl或Python) 的第一個字母,一般用來建立web 伺服器。
本文中使用RHEL7.0+APACHE+Mysql(目前已經更名為maliaDB)+PHP開源論壇
當前為一個剛剛安裝好的RHEL7.0作業系統,修改主機名和hosts檔案

檢查以下LAMP四個包是否存在 httpd mariadb-server php php-mysql
httpd apache服務
mariadb-server Mysql資料庫
php php服務
php-mysql php連線資料庫需要

使用yum源一次性安裝四個包,
yum源配置請參考我的文章《 linux yum源配置方法》http://blog.itpub.net/27771627/viewspace-1223153/
[root@lamp yum.repos.d]# yum -y install httpd mariadb-server php php-mysql
…..
…..
…..
Dependency Installed:
apr.x86_64 0:1.4.8-3.el7 apr-util.x86_64 0:1.5.2-6.el7
httpd-tools.x86_64 0:2.4.6-17.el7 libzip.x86_64 0:0.10.1-8.el7
mailcap.noarch 0:2.1.41-2.el7 mariadb.x86_64 1:5.5.35-3.el7
perl-Compress-Raw-Bzip2.x86_64 0:2.061-3.el7 perl-Compress-Raw-Zlib.x86_64 1:2.061-4.el7
perl-DBD-MySQL.x86_64 0:4.023-5.el7 perl-DBI.x86_64 0:1.627-4.el7
perl-Data-Dumper.x86_64 0:2.145-3.el7 perl-IO-Compress.noarch 0:2.061-2.el7
perl-Net-Daemon.noarch 0:0.48-5.el7 perl-PlRPC.noarch 0:0.2020-14.el7
php-cli.x86_64 0:5.4.16-21.el7 php-common.x86_64 0:5.4.16-21.el7
php-pdo.x86_64 0:5.4.16-21.el7
Complete!
檢視mysql資料庫的配置檔案

目錄/usr/share/mysql/ 下面放了資料配置模板,其中下面是大中小型資料庫配置樣例,我們選在my-medium.cnf

用其覆蓋當前配置檔案

server.cnf內容如下
[root@lamp my.cnf.d]# cat server.cnf
# Example MariaDB config file for medium systems.
#
# This is for a system with little memory (32M - 64M) where MariaDB plays
# an important part, or systems up to 128M where MariaDB is used together with
# other programs (such as a web server)
#
# MariaDB programs look for option files in a set of
# locations which depend on the deployment platform.
# You can copy this option file to one of those
# locations. For information about these locations, do:
# 'my_print_defaults --help' and see what is printed under
# Default options are read from the following files in the given order:
# More information at: http://dev.mysql.com/doc/mysql/en/option-files.html
#
# In this file, you can use all long options that a program supports.
# If you want to know which options a program supports, run the program
# with the "--help" option.
# The following options will be passed to all MariaDB clients
[client]
#password = your_password
port = 3306
socket = /var/lib/mysql/mysql.sock
# Here follows entries for some specific programs
# The MariaDB server
[mysqld]
port = 3306
socket = /var/lib/mysql/mysql.sock
skip-external-locking
key_buffer_size = 16M
max_allowed_packet = 1M
table_open_cache = 64
sort_buffer_size = 512K
net_buffer_length = 8K
read_buffer_size = 256K
read_rnd_buffer_size = 512K
myisam_sort_buffer_size = 8M
# Point the following paths to different dedicated disks
#tmpdir = /tmp/
# Don't listen on a TCP/IP port at all. This can be a security enhancement,
# if all processes that need to connect to mysqld run on the same host.
# All interaction with mysqld must be made via Unix sockets or named pipes.
# Note that using this option without enabling named pipes on Windows
# (via the "enable-named-pipe" option) will render mysqld useless!
#
#skip-networking
# Replication Master Server (default)
# binary logging is required for replication
log-bin=mysql-bin
# binary logging format - mixed recommended
binlog_format=mixed
# required unique id between 1 and 2^32 - 1
# defaults to 1 if master-host is not set
# but will not function as a master if omitted
server-id = 1
# Replication Slave (comment out master section to use this)
#
# To configure this host as a replication slave, you can choose between
# two methods :
#
# 1) Use the CHANGE MASTER TO command (fully described in our manual) -
# the syntax is:
#
# CHANGE MASTER TO MASTER_HOST=
# MASTER_USER=
#
# where you replace
#
#
# Example:
#
# CHANGE MASTER TO MASTER_HOST='125.564.12.1', MASTER_PORT=3306,
# MASTER_USER='joe', MASTER_PASSWORD='secret';
#
# OR
#
# 2) Set the variables below. However, in case you choose this method, then
# start replication for the first time (even unsuccessfully, for example
# if you mistyped the password in master-password and the slave fails to
# connect), the slave will create a master.info file, and any later
# change in this file to the variables' values below will be ignored and
# overridden by the content of the master.info file, unless you shutdown
# the slave server, delete master.info and restart the slaver server.
# For that reason, you may want to leave the lines below untouched
# (commented) and instead use CHANGE MASTER TO (see above)
#
# required unique id between 2 and 2^32 - 1
# (and different from the master)
# defaults to 2 if master-host is set
# but will not function as a slave if omitted
#server-id = 2
#
# The replication master for this slave - required
#master-host =
#
# The username the slave will use for authentication when connecting
# to the master - required
#master-user =
#
# The password the slave will authenticate with when connecting to
# the master - required
#master-password =
#
# The port the master is listening on.
# optional - defaults to 3306
#master-port =
#
# binary logging - not required for slaves, but recommended
#log-bin=mysql-bin
# Uncomment the following if you are using InnoDB tables
#innodb_data_home_dir = /var/lib/mysql
#innodb_data_file_path = ibdata1:10M:autoextend
#innodb_log_group_home_dir = /var/lib/mysql
# You can set .._buffer_pool_size up to 50 - 80 %
# of RAM but beware of setting memory usage too high
#innodb_buffer_pool_size = 16M
#innodb_additional_mem_pool_size = 2M
# Set .._log_file_size to 25 % of buffer pool size
#innodb_log_file_size = 5M
#innodb_log_buffer_size = 8M
#innodb_flush_log_at_trx_commit = 1
#innodb_lock_wait_timeout = 50
[mysqldump]
quick
max_allowed_packet = 16M
[mysql]
no-auto-rehash
# Remove the next comment character if you are not familiar with SQL
#safe-updates
[myisamchk]
key_buffer_size = 20M
sort_buffer_size = 20M
read_buffer = 2M
write_buffer = 2M
重啟mysql服務

設定開機自啟動服務

設定管理員的密碼為root

配置hppt服務可以透過防火牆

重啟hpptd服務

配置hpptd服務開機自啟動

在下面地址下載PHP論壇軟體
http://download.comsenz.com/DiscuzX/3.2/Discuz_X3.2_SC_UTF8.zip
ftp到根目錄下
sftp:/>
sftp:/> lcd d:\
Local directory is now d:\
sftp:/> cd \
cannot change to //\: no such a directory
sftp:/> put Discuz_X3.2_SC_UTF8.zip
Uploading Discuz_X3.2_SC_UTF8.zip to remote://Discuz_X3.2_SC_UTF8.zip
sftp: sent 11.7 MB in 0.66 seconds
sftp:/>
解壓到/root目錄
[root@lamp /]# unzip Discuz_X3.2_SC_UTF8.zip -d /root
將upload內容複製到/var/www/html目錄下

將下面目錄給予寫許可權

關閉selinux(linux不建議這麼做,為了搭建節省時間,暫時關掉selinux)

瀏覽器輸入server IP地址,出現論壇的安裝介面
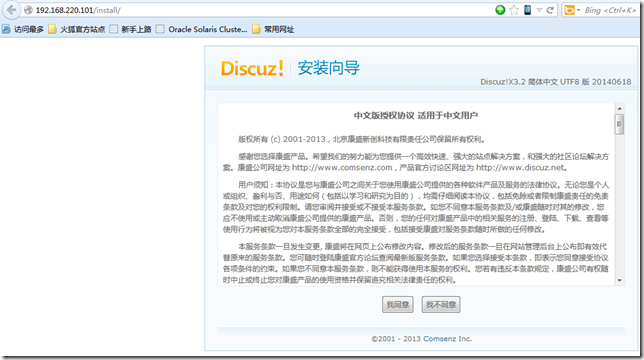
同意繼續
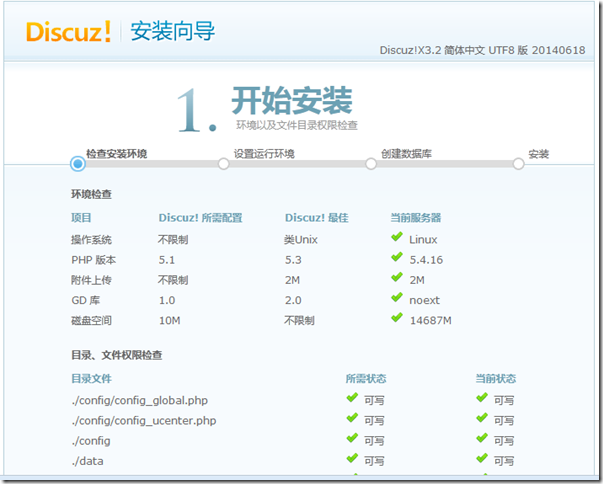
下一步
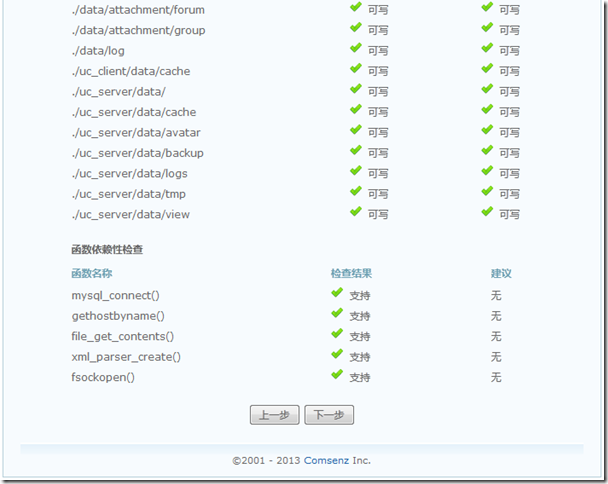
下一步
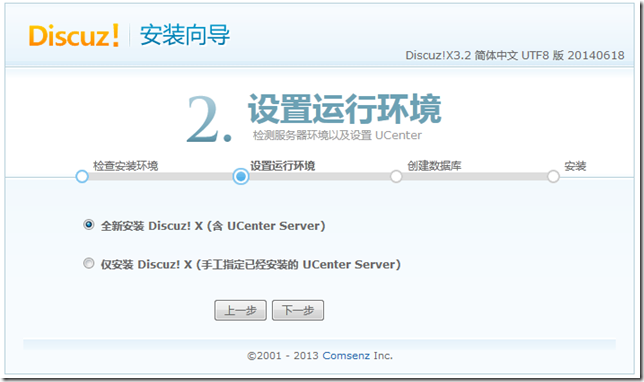
設定admin密碼
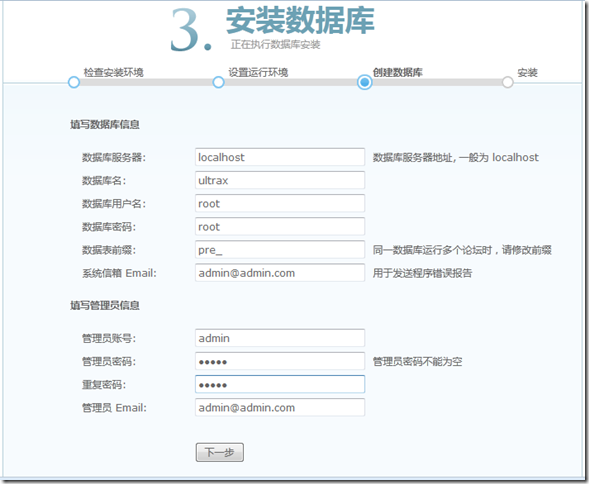
安裝完成

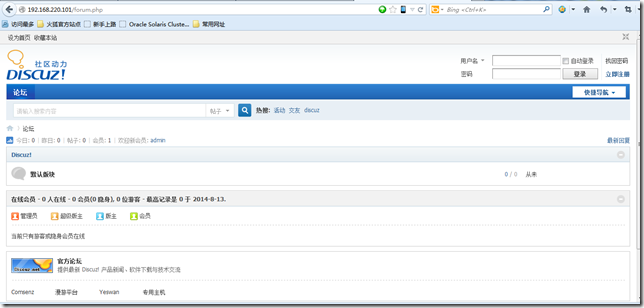
進入了論壇首頁
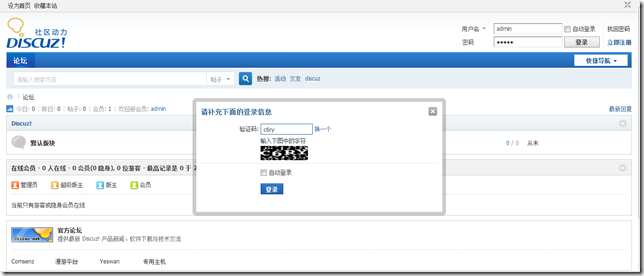
使用admin登入
使用admin/admin賬號密碼,登入成功
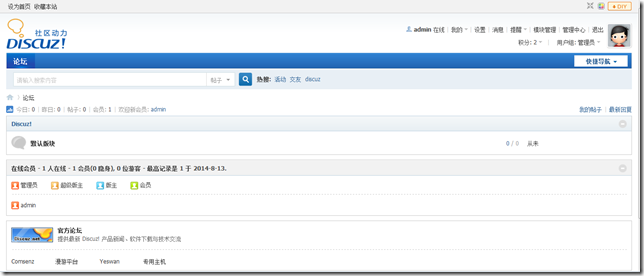
配置完成。
來自 “ ITPUB部落格 ” ,連結:http://blog.itpub.net/27771627/viewspace-1250701/,如需轉載,請註明出處,否則將追究法律責任。
相關文章
- Discuz!論壇搭建
- Linux伺服器---論壇discuzLinux伺服器
- Linux 伺服器安裝discuz 7.2論壇Linux伺服器
- 如何安裝discuz論壇,discuz安裝步驟
- 關於RDP協議的分析(一) - Linux論壇 - 計世網論壇 - Powered by Discuz!協議Linux
- 論壇系統BBS
- 雲虛擬主機搭建Discuz論壇示例
- LAP+Mysql主從釋出Discuz論壇MySql
- lamp 以及ucenter、phpBB、discuz! 搭建LAMPPHP
- CentOS7下LNMP環境搭建Discuz論壇CentOSLNMP
- Linux下Web伺服器應用之基於LAMP構建phpwind論壇LinuxWeb伺服器LAMPPHP
- ERP系統專業論壇
- 中國Linux論壇Linux
- Discuz論壇2.5 升級到PHP MySQL新版遇到的問題PHPMySql
- 中國LINUX公社(論壇)Linux
- java 開源的論壇系統推薦Java
- 一個jive論壇系統的問題?
- 在LNMP環境下搭建Discuz論壇,開啟https,全站綠鎖LNMPHTTP
- LAMP開源高峰論壇10月23日在北京召開(轉)LAMP
- 系統測試論壇-一起測試
- 有什麼好的java中文論壇啊,像PHP的discuz這樣的?JavaPHP
- 為你的論壇系統新增一個『提及』功能
- lamp+discuz+wordpress+phpmyadmin例項安裝詳解LAMPPHP
- Discuz!論壇進行環境檢測時提示不支援fsockopen和pfsockopen函式函式
- <摘錄>linux論壇網站Linux網站
- LAMP平臺搭建+論壇安裝流程(包括遇到的一些問題)LAMP
- LAMP環境(linux+apache+mysql+php)配置LAMPLinuxApacheMySqlPHP
- 論Linux檔案系統Linux
- 記一次 .NET 某券商論壇系統 卡死分析
- Linux系統配置(系統優化)Linux優化
- LAMP(Linux+Apache+MySQL+PHP)(四)+Discuz+Redis+Mysql-proxy讀寫分離(centos7)LAMPLinuxApacheMySqlPHPRedisCentOS
- LAMP配置 and PHP helpLAMPPHP
- 論壇發貼統計(筆記)筆記
- Linux下NFS(網路檔案系統)的建立與配置方法LinuxNFS
- 【Microsoft Azure 的1024種玩法】三.基於Azure雲平臺構建Discuz論壇ROS
- 網站論壇:火龍論壇 正式成立網站
- linux檔案系統概論Linux
- ITPUB論壇