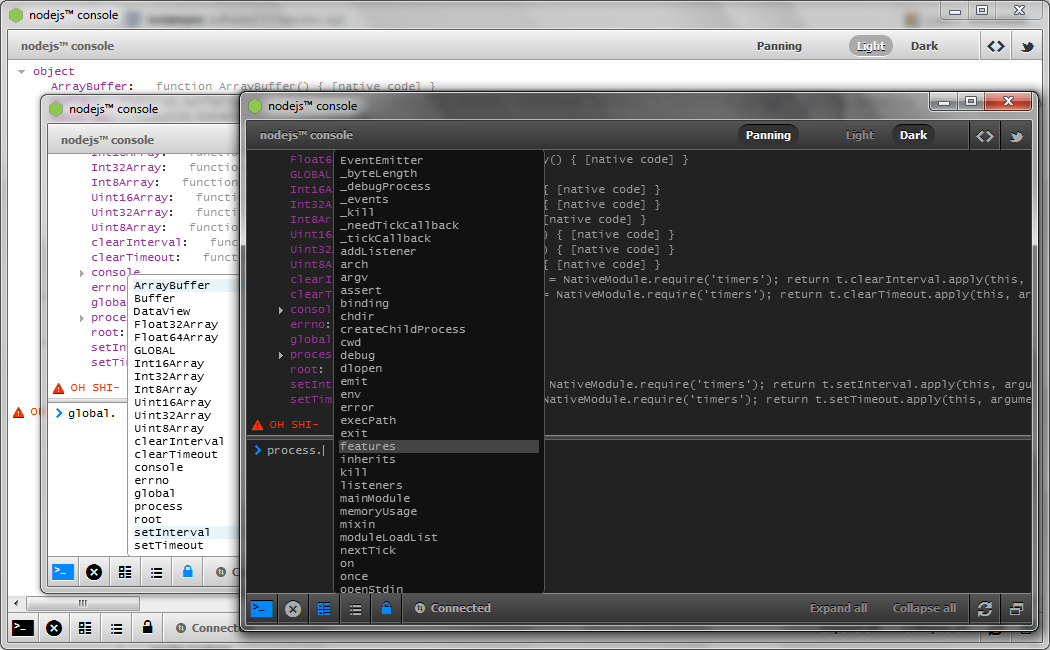
node,npm在前端開發流程中提供了非常完善的自動化工具鏈,但是同樣由於其複雜性導致有很多奇奇怪怪的問題。本文將記錄使用過程中出現的一些問題及其解決方法備案。
- 國內由於gfw問題,導致很多國外的網站不能訪問,比如bitbucket就是一個host程式碼的很優秀平臺,但是由於該平臺可能被block住,從而導致npm安裝時出現奇奇怪怪的問題。有以下方法解決:
1.使用一個proxy來代理訪問,但是這個方法速度可能比較慢;
2.可以通過修改npm的配置檔案讓npm到另外的pacakge mirror站點去找package,通過如下命令
$npm config set registry https://registry.npm.taobao.org
$ npm config set registry http://r.cnpmjs.org
或者:npm config set registry http://registry.npmjs.eunpm install
隨後再執行
或者直接在命令列中指定某些引數,比如phantomjs是一個無圖形介面的瀏覽器,在自動化測試中應用廣泛,可能的安裝方式:
npm install phantomjs --phantomjs_cdnurl=http://cnpmjs.org/downloads
如果上述方法都不奏效,那麼可能需要 配置自己網路卡的dns為國外的dns
- 如果你在企業防火牆的後面,上網是通過企業的代理來上的,或者需要使用代理加速npm安裝過程,那麼需要配置proxy和https-proxy
npm config set proxy http://proxy.company.com:8080
npm config set https-proxy http://proxy.company.com:8080
// 或者簡單粗暴地簡化為在git-bash介面中設定(包括支援shadowsocks本地代理):
export {http,https,ftp}_proxy=‘http://192.168.0.11:1080'
- 在linux下面,你可能需要使用-g引數安裝一些package作為global,比如grunt,gulp,bower等,但是你又沒有root許可權,就有可能出現下面的錯誤:
$ npm install -g gulp
npm ERR! tar.unpack untar error /home/cabox/.npm/gulp/3.9.0/package.tgz
npm ERR! Linux 2.6.32-042stab104.1
npm ERR! argv "/usr/local/bin/node" "/usr/local/bin/npm" "install" "-g" "gulp"
npm ERR! node v0.12.3
npm ERR! npm  v2.9.1
npm ERR! path /usr/local/lib/node_modules/gulp
npm ERR! code EACCES
npm ERR! errno -13

npm ERR! Error: EACCES, mkdir '/usr/local/lib/node_modules/gulp'
npm ERR!     at Error (native)
npm ERR!  { [Error: EACCES, mkdir '/usr/local/lib/node_modules/gulp']
npm ERR!   errno: -13,
npm ERR!   code: 'EACCES',
npm ERR!   path: '/usr/local/lib/node_modules/gulp',
npm ERR!   fstream_type: 'Directory',
npm ERR!   fstream_path: '/usr/local/lib/node_modules/gulp',
npm ERR!   fstream_class: 'DirWriter',
npm ERR!   fstream_stack:
npm ERR!    [ '/usr/local/lib/node_modules/npm/node_modules/fstream/lib/dir-writer.js:36:23',
npm ERR!      '/usr/local/lib/node_modules/npm/node_modules/mkdirp/index.js:46:53',
npm ERR!      'FSReqWrap.oncomplete (fs.js:95:15)' ] }
npm ERR!
npm ERR! Please try running this command again as root/Administrator.

npm ERR! Please include the following file with any support request:
npm ERR!     /home/cabox/npm-debug.log
可能的解決方案是修改npm將安裝的目標目錄的ownershipi:
$ npm config get prefix
/usr/local
$ whoami
cabox
上面的命令可以查到你是以cabox使用者來執行命令的,npm將全域性package安裝package到/usr/local下面的lib/node_modules目錄下面,比如gulp,bower,grunt等需要全域性安裝的node module都將存放到這裡,而如果你對該目錄沒有寫的許可權,則會出現問題,因此你可以做的是chown -R /usr/local your_username
但是這個方案也是有缺點的,特別是當一個系統中有多個使用者使用時,你把這些公共目錄都搞成你自己的ownership,可能會存在問題。
另外一種可能的解決方案修改上述prefix,指定npm的全域性package安裝目錄為自己的Home目錄下面的子目錄,同時需要將上述子目錄放到path中去,這樣就能夠將npm的全域性package安裝到這個我們有許可權控制的目錄中了
$ npm config set prefix /home/cabox/npm-global/
$ npm config get prefix
/home/cabox/npm-global
$ gulp
-bash: gulp: command not found
$ npm install -g gulp
/home/cabox/npm-global/bin/gulp -> /home/cabox/npm-global/lib/node_modules/gulp/bin/gulp.js
gulp@3.9.0 /home/cabox/npm-global/lib/node_modules/gulp
├── pretty-hrtime@1.0.0
├── interpret@0.6.2
├── deprecated@0.0.1
├── archy@1.0.0
├── minimist@1.1.1
├── tildify@1.0.0 (user-home@1.1.1)
├── v8flags@2.0.5 (user-home@1.1.1)
├── chalk@1.0.0 (escape-string-regexp@1.0.3, ansi-styles@2.0.1, supports-color@1.3.1, strip-ansi@2.0.1, has-ansi@1.0.3)
├── semver@4.3.6
├── orchestrator@0.3.7 (stream-consume@0.1.0, sequencify@0.0.7, end-of-stream@0.1.5)
├── liftoff@2.1.0 (extend@2.0.1, rechoir@0.6.1, flagged-respawn@0.3.1, resolve@1.1.6, findup-sync@0.2.1)
├── gulp-util@3.0.5 (array-differ@1.0.0, array-uniq@1.0.2, lodash._reescape@3.0.0, lodash._reevaluate@3.0.0, beeper@1.1.0, lodash._reinterpolate@3.0.0, object-assign@2.1.1
, replace-ext@0.0.1, vinyl@0.4.6, lodash.template@3.6.1, through2@0.6.5, multipipe@0.1.2, dateformat@1.0.11)
└── vinyl-fs@0.3.13 (graceful-fs@3.0.8, strip-bom@1.0.0, defaults@1.0.2, vinyl@0.4.6, mkdirp@0.5.1, through2@0.6.5, glob-stream@3.1.18, glob-watcher@0.0.6)
上面使用cabox使用者安裝gulp到/home/cabox/npm-global目錄中去了。
詳細參照下面的兩篇文章:
http://www.johnpapa.net/how-to-use-npm-global-without-sudo-on-osx/
https://github.com/sindresorhus/guides/blob/master/npm-global-without-sudo.md
但是現在還有一個問題,那就是系統path中並沒有包含該目錄,因此直接執行gulp還是無法找到的
在.bash_profile中新增以下:
- npm config ls 將列出所有已經配置好的npm選項
- 如果遇到一些莫名其妙的問題,你首先可以更新一下npm版本,刪除npm的cache
npm install -g npm@latest或npm install npm -g
npm cache clear && rm -rf node_modules && npm install
- npm ls 和 npm uninstal刪除已安裝的package. npm ls packagewitherror將列出有問題的那個package安裝在哪裡,這樣你就可以直接到那個目錄重新單獨安裝那個pacakge,調查不能安裝成功的原因
[cabox@box-codeanywhere npmtest]$ npm install --save lodash
npm WARN package.json kidsit@1.0.0 No repository field.
npm WARN package.json kidsit@1.0.0 No README data
lodash@3.9.3 node_modules/lodash
[cabox@box-codeanywhere npmtest]$ ls
node_modules  package.json
[cabox@box-codeanywhere npmtest]$ vi package.json
[cabox@box-codeanywhere npmtest]$ ls
node_modules  package.json
[cabox@box-codeanywhere npmtest]$ npm ls
kidsit@1.0.0 /home/cabox/workspace/npmtest
└── lodash@3.9.3
[cabox@box-codeanywhere npmtest]$ npm uninstall lodash --save
unbuild lodash@3.9.3
在這裡如果node系統的模組安裝有問題,這裡會主動列出來:
├── camelcase@1.1.0
├─┬ cliui@2.1.0
│ ├─┬ center-align@0.1.1
│ │ └─┬ align-text@0.1.1
│ │ ├── kind-of@1.1.0
│ │ ├── longest@1.0.1
│ │ └── repeat-string@1.5.2
│ ├─┬ right-align@0.1.1
│ │ └─┬ align-text@0.1.1
│ │ ├── kind-of@1.1.0
│ │ ├── longest@1.0.1
│ │ └── repeat-string@1.5.2
│ └── wordwrap@0.0.2
├── decamelize@1.0.0
└── window-size@0.1.0npm ERR! missing: bytes@1.0.0, required by body-parser@1.12.4
npm ERR! missing: content-type@~1.0.1, required by body-parser@1.12.4
npm ERR! missing: depd@~1.0.1, required by body-parser@1.12.4
npm ERR! missing: iconv-lite@0.4.8, required by body-parser@1.12.4
npm ERR! missing: on-finished@~2.2.1, required by body-parser@1.12.4
npm ERR! missing: qs@2.4.2, required by body-parser@1.12.4
npm ERR! missing: raw-body@~2.0.1, required by body-parser@1.12.4
npm ERR! missing: type-is@~1.6.2, required by body-parser@1.12.4 - 如果你的node_modules目錄中已經安裝了一個package,但是package.json中並沒有對該package做依賴,那麼這個package就應該被刪除。這時如果執行npm ls命令則指示有一個package not used。為了清理程式碼,你需要執行npm prune
[cabox@box-codeanywhere npmtest]$ npm install lodash
npm WARN package.json kidsit@1.0.0 No repository field.
npm WARN package.json kidsit@1.0.0 No README data
lodash@3.9.3 node_modules/lodash
[cabox@box-codeanywhere npmtest]$ ls node_modules/
lodash
[cabox@box-codeanywhere npmtest]$ npm ls
kidsit@1.0.0 /home/cabox/workspace/npmtest
└── lodash@3.9.3 extraneous

npm ERR! extraneous: lodash@3.9.3 /home/cabox/workspace/npmtest/node_modules/lodash
[cabox@box-codeanywhere npmtest]$ npm prune
npm WARN package.json kidsit@1.0.0 No repository field.
npm WARN package.json kidsit@1.0.0 No README data
unbuild lodash@3.9.3
[cabox@box-codeanywhere npmtest]$ npm ls
kidsit@1.0.0 /home/cabox/workspace/npmtest
└── (empty)
- npm ls -g --depth=0可以列出已經安裝的全域性package
[cabox@box-codeanywhere npmtest]$ npm ls -g --depth=0
/home/cabox/npm-global/lib
├── gulp@3.9.0
└── npm@2.11.1

[cabox@box-codeanywhere npmtest]$ npm uninstall -g gulp
unbuild gulp@3.9.0
[cabox@box-codeanywhere npmtest]$ npm ls -g --depth=0
/home/cabox/npm-global/lib
└── npm@2.11.1
- 為了publish一個package,你需要有以下流程: npm init建立一個package.json,建立入口js,比如index.js,exports相應介面,隨後npm adduser, npm publish就可以了。如果要更新你的package,注意需要將版本號做一下變更(npm version patch,npm version minor, npm version major或者手動修改本package的package.json檔案的版本號!),publish完成後,你可以在https://www.npmjs.com/~kidsit網頁上檢視是否確實publish了一個package。注意:npm package遵循semantic versioning method, major.minor.patch/patch表示bugfix,minor:表示new feature,major表示api無法保持相容
[cabox@box-codeanywhere npmtest]$ npm adduser
Username: kidsit
Password:
Email: (this IS public) 1372921435@qq.com
[cabox@box-codeanywhere npmtest]$ npm config ls
; cli configs
user-agent = "npm/2.11.1 node/v0.10.28 linux x64"

; userconfig /home/cabox/.npmrc
prefix = "/home/cabox/npm-global"

; node bin location = /usr/bin/node
; cwd = /home/cabox/workspace/npmtest
; HOME = /home/cabox
; 'npm config ls -l' to show all defaults.

[cabox@box-codeanywhere npmtest]$ npm publish
+ kidsit@0.0.1
[cabox@box-codeanywhere npmtest]$
-
http://blog.izs.me/post/1675072029/10-cool-things-you-probably-didnt-realize-npm
- npm一般在哪些目錄搜尋需要require的模組呢?
var utils = require( "utils" );
上面的require命令將導致node按照以下順序查詢檔案,注意不一定是index.js,這個由package.json中的main定義決定的
./node_modules/utils.js
./node_modules/utils/index.js
./node_modules/utils/package.json
具體參考http://www.bennadel.com/blog/2169-where-does-node-js-and-require-look-for-modules.htm
- 在windows host中的vagrant box linux中使用npm install時,由於host os不支援linux的symbol link,所以必須使用:npm install --no-bin-links命令,否則會出現
info unbuild /home/nicholas/share/node_modules/yuitest
verbose link symlinking /usr/local/lib/node_modules/yuitest to /home/nicholas/share/node_modules/yuitest
ERR! Error: EPROTO, Protocol error '/usr/local/lib/node_modules/yuitest'
- 在執行npm install時如果出現大量的EPERM錯誤時,很有可能是反病毒軟體惹的禍!,同時有可能是npm cache clear沒有執行,參考:http://blogs.msdn.com/b/matt-harrington/archive/2012/02/23/how-to-fix-node-js-npm-permission-problems.aspx
Error: EPERM, operation not permitted 'C:\...\noam\node_modules\phantomjs\tmp\phantomjs-1.7.0-windows'
    at Object.fs.renameSync (fs.js:439:18)
- gulp 是一個task runner,它和grunt的功能差不多,但是卻比grant要快很多,它基於stream,pipe
- 在win7,win10下安裝npm install時,很有可能出現 error MSB3411: Could not load the Visual C++ component "VCBuild.exe". ... 的錯誤,一個可行的方案是:
npm config set msvs_version 2012 --global
如何列出一個特定模組的依賴關係?
有時我們希望看清楚一個模組到底是因為誰被安裝進來的,也就是說它是哪個package的依賴,你可以使用npm ll命令:
比如下面的命令npm -- gulp-less命令你就可以看出,原來gulp-less這個模組在laravel-elixir模組中包含而安裝的,也就是說laravel-elixir已經包含了less預處理功能!
$ npm ll gulp-less
laravel-elixir@5.0.0
│ C:\Users\Administrator\devenvironment\Code\newkidsitfromscratch\node_modules\laravel-elixir
│ Laravel Elixir Core
│ git+https://github.com/laravel/elixir.git
│ https://github.com/laravel/elixir
└── gulp-less@3.1.0
    Less for Gulp
    git://github.com/plus3network/gulp-less.git
    https://github.com/plus3network/gulp-less#readme
npm view gulp-less檢視gup-less這個模組的meta資訊
https://github.com/substack/stream-handbook
- npm 命令大全參考: http://browsenpm.org/help
- npm peerDependency問題:一個可行的思路是:首先升級npm3,然後再分析版本的依賴關係!
- npm install安裝時可能會涉及到phantomjs-2.1.1-windows.zip無法安裝導致失敗的問題,解決辦法:手動下載phantomjs-1.9.7-windows.zip,複製到C:\Users\ADMINI~1\AppData\Local\Temp\phantomjs\目錄,再次執行npm install mocha-phantomjs,安裝成功 http://download.csdn.net/detail/f907279313/9575566
-
windows下如何平滑升級npm3?
參考這篇 https://github.com/felixrieseberg/npm-windows-upgrade 文章,寫的非常詳細,強烈建議升級到npm3,一些怪異的npm模組安裝問題都會沒有了!
windows下面的node-pre-gyp安裝依賴問題
fsevents: AttributeError: 'MSVSProject' object has no attribute 'iteritems'
上述錯誤的原因是windows機器上沒有安裝build tooling依賴,解決辦法是:
npm install --global --production windows-build-tools
參考: https://github.com/nodejs/node-gyp
我們如何向npm run script傳入引數?
version=1 npm run build -- homepage
上面我們的build指令碼就可以得到version和homepage這個引數
https://jurosh.com/blog/npm-pass-parameters-into-script
Nodejs的程式碼如何console.log檢視object的值?
https://github.com/Silviu-Marian/node-codein

npm install -g和local有什麼區別?
通常,如果使用-g引數則安裝的nodejs module儲存在{prefix}/lib/node_modules 目錄中,對應的可執行檔案在{prefix}/bin中, {prefix}/share/man中則儲存幫助檔案資訊
如果不使用-g引數,則直接安裝在./node_modules目錄下,而executable則儲存在./node_modules/.bin/資料夾下
那麼什麼時候應該用-g引數,什麼時候不用-g引數呢?
1. 如果你安裝的node module希望通過 require('modulename')來在你的程式中應用,那麼就應該安裝在local
2.如果你希望安裝一個可以在全域性使用的命令列工具,這時就要用-g引數,因為安裝的binary檔案將在PATH環境變數中可以找到
很多時候,你可能兩者都會需要,比如webpack, gulp既有cli,又有lib程式碼需要在dev環境中使用,這時local和-g都安裝一下
npm shrinkwrap固化你的module dependency
我們在安裝完成我們的npm模組後,會根據當時的各軟體模版版本情況下載合適的版本到本地,而我們知道開源軟體版本變化會很快,你今天安裝除錯ok,明天很有可能就有新的依賴的版本釋出,而這時你如果再次執行npm install就有可能下載了不同版本的依賴,很有可能會產生問題!怎麼辦?一個可行的方案是一旦除錯完畢,你使用npm shrinkwrap的命令將你的依賴版本固化下來,這樣下次執行npm install時就依然能夠得到相同的版本。
如何單獨修改dependency of dependency特定版本安裝?
1.到你已經安裝的dependency目錄下執行npm uninstall xxdependency
2.修改你希望的xxdependency版本
3.執行npm install yourmodule
有時npm run xx時出現 code ELIFECYCLE問題
npm ERR! code ELIFECYCLE
可能的原因就是你可能有其他視窗也開了對應的命令
如何指定npm require的路徑起始點別名?
https://stackoverflow.com/questions/27502608/resolving-require-paths-with-webpack
npm包管理可能的代替方案yarn
yarn是一個能夠替代npm的node包管理替代方案,支援包cache,離線下載(從cache),扁平化目錄等有用的功能,速度快,也很穩定。
但是和npm一樣存在網速奇慢的問題,我們同樣可以通過以下命令來使用淘寶映象。
這裡再次點贊馬雲同學,作為中國網際網路先進的公司,有造福中國開發者的擔當和行動!鄙視baidu和騰訊,一個是無良商業公司,百度一下你就上當。另一個是遊戲發家,毒害孩子心靈,但是他們倆個卻沒有為中國開發者造福,沒有為中國網際網路的進步做出什麼應該有的貢獻
yarn config set registry https://registry.npm.taobao.org
https://yarnpkg.com/zh-Hans/docs/usage
windows檔名過長問題如何解決?
https://support.microsoft.com/zh-cn/help/320081/you-cannot-delete-a-file-or-a-folder-on-an-ntfs-file-system-volume
如何通過npm run xx給xx傳入引數?
在webpack的build中,我們往往藉助npm run script來呼叫對應的構建方法,這時我們可能希望傳入自己的引數,怎麼辦呢?
npm run <command> [-- <args>]
npm run build --  one two=three four
// 等同於
node build.js one two=three four
// 這時傳入的所有引數都在process.argv中,其值如下,可以在build.js中訪問
0: node
1: build.js
2: one
3: two=three
4: four
如何安裝一個特定module的特定版本?
$ npm info bootstrap versions

[ '0.0.1',
  '0.0.2',
  '3.1.1',
  '3.2.0',
  '3.3.0',
  '3.3.1',
  '3.3.2',
  '3.3.4',
  '3.3.5',
  '3.3.6',
  '3.3.7',
  '4.0.0-alpha.2',
  '4.0.0-alpha.3',
  '4.0.0-alpha.4',
  '4.0.0-alpha.5',
  '4.0.0-alpha.6',
  '4.0.0-beta',
  '4.0.0-beta.2',
  '4.0.0-beta.3',
  '4.0.0' ]
$ npm install --save bootstrap@3.3.7
√ All packages installed (1 packages installed from npm registry, use 2s, speed 243.93kB/s, json 1(2.48kB), tarball 568.8kB)