一個由mobxobserver引發的ReactRoute路由失效問題探究
1. 問題描述
最近一直在使用React + React Router(v4.1.1) + Mobx做專案開發,相比繁瑣的React + React Rotuer + Redux方案,爽的不要不要的,當然前提你得忍受Object.defineProperty攔截getter/setter帶來的各種黑魔法問題。咳咳,這裡不是Mobx大戰Redux,就此打住。想了解的人可以去看一下女神Preethi Kasireddy在React Conf 2017上的演講。
最近開發過程中確遇到一個問題,這裡跟大家分享一下。
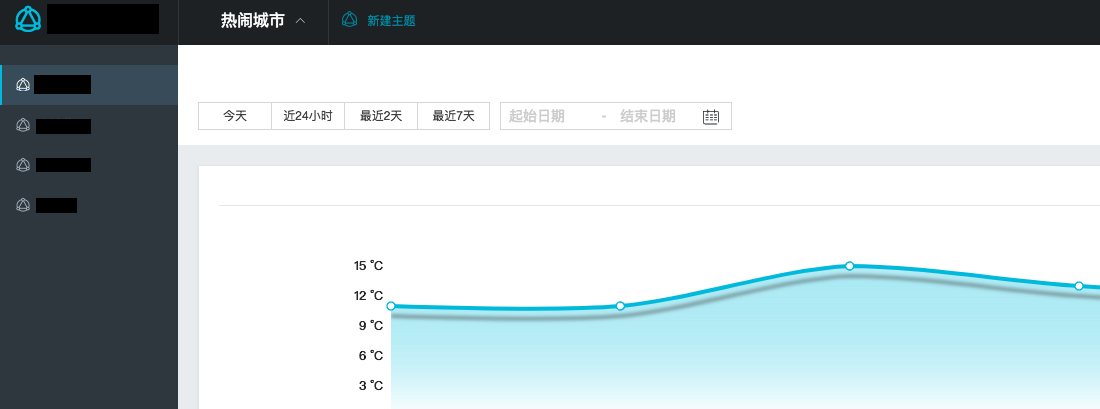
問題頁面如上,整個頁面利用React Router做路由切換。當使用者點選左邊選單欄進行進行路由切換的時候,雖然瀏覽器位址列裡URL資訊已經發生變更, 但是頁面並沒有進行重新整理。路由配置程式碼如下:
export default function RouterConfig() {
  const homePath = `/home`;
  const getComponentRoutes = () => {
    const routeArr = [];
    const pushRoute = path => {
      routeArr.push(<Route key={path} path={path} component={PastyContainer} />);
    };
    for (const item of sideData.common) {
      if (!_.isEmpty(item.children)) {
        for (const childrenItem of item.children) {
          pushRoute(childrenItem.path);
        }
      } else {
        pushRoute(item.path);
      }
    }
    return routeArr;
  };
  return (
    <Router history={history}>
      <TopBar>
        <Switch>
          <Route exact path={homePath} component={Home} />
          <Route path="*">
            <SideBar theme="dark" data={sideData.common}>
              <Switch>
                {getComponentRoutes()}
              </Switch>
            </SideBar>
          </Route>
        </Switch>
      </TopBar>
    </Router>
  );
}
2. React Route v4.0路由原理
想最終問題根源,想來了解一下React Route原理是不可避免的了。
2.1 React Route 的核心依賴History
history is a JavaScript library that lets you easily manage session history anywhere JavaScript runs. history abstracts away the differences in various environments and provides a minimal API that lets you manage the history stack, navigate, confirm navigation, and persist state between sessions.
簡而言之,React Route核心就是利用History的replace/push和listen的能力在前端完成路由的切換。這裡不做詳細介紹,更多關於History的介紹,可以參考其官方文件。
2.2 Link、Router、 Switch、 Route
Link, Router, Switch, Route是React-Route中最核心的幾個API了。
2.2.1 Link
其中Link能力類比html中的<a>標籤, 利用Link可以實現頁面跳轉。上圖中側邊欄中所有可盡心頁面跳轉都利用了該元件,其實現原理想必所有做過前端開發的人應該都能想到:通過監聽onClick事件,在listener中執行history.replace/push完成頁面跳轉。
2.2.2 Router
Router元件的是整個路由結構中頂層元件,其主要作用是通過監聽history.listen,捕獲路由變換,並將其置於React Context中,其核心程式碼如下:
class Router extends React.Component {
  getChildContext() {
    return {
      router: {
        ...this.context.router,
        history: this.props.history,
        route: {
          location: this.props.history.location,
          match: this.state.match
        }
      }
    }
  }
  computeMatch(pathname) {
    return {
      path: `/`,
      url: `/`,
      params: {},
      isExact: pathname === `/`
    }
  }
  componentWillMount() {
    this.unlisten = history.listen(() => {
      this.setState({
        match: this.computeMatch(history.location.pathname)
      })
    })
  }
  componentWillUnmount() {
    this.unlisten()
  }
  render() {
    const { children } = this.props
    return children ? React.Children.only(children) : null
  }
}
2.2.3 Route
這應該是整個React Router中最核心的功能了。基本作用就是從context中撈取pathname並與使用者定義的path進行匹配,如果匹配成功,則渲染響應元件。
class Route extends React.Component {
  getChildContext() {
    return {
      router: {
        ...this.context.router,
        route: {
          location: this.props.location || this.context.router.route.location,
          match: this.state.match
        }
      }
    }
  }
  computeMatch({ computedMatch, location, path, strict, exact }, router) {
  }

  componentWillReceiveProps(nextProps, nextContext) {
    this.setState({
      match: this.computeMatch(nextProps, nextContext.router)
    })
  }

  render() {
    const props = { match, location, history, staticContext }
    return (
      component ? ( // component prop gets first priority, only called if there`s a match
        match ? React.createElement(component, props) : null
      ) : render ? ( // render prop is next, only called if there`s a match
        match ? render(props) : null
      ) : children ? ( // children come last, always called
        typeof children === `function` ? (
          children(props)
        ) : !isEmptyChildren(children) ? (
          React.Children.only(children)
        ) : (
          null
        )
      ) : (
        null
      )
    )
  }
}

export default Route
2.2.3 Switch
這裡還用到了Switch方法,Switch的作用是渲染第一個子元件(<Route>, <Redirect>)
class Switch extends React.Component {
  render() {
    React.Children.forEach(children, element => {
      // 遍歷子元件的props, 只渲染低一個匹配到pathname的Route
      const { path: pathProp, exact, strict, from } = element.props
      const path = pathProp || from
      if (match == null) {
        child = element
        match = path ? matchPath(location.pathname, { path, exact, strict }) : route.match
      }
    })
    return match ? React.cloneElement(child, { location, computedMatch: match }) : null
  }
}
3. Mobx-React中的observer
The observer function / decorator can be used to turn ReactJS components into reactive components. It wraps the component`s render function in mobx.autorun to make sure that any data that is used during the rendering of a component forces a re-rendering upon change.
從程式碼層面來看, 主要針對ComponentDidMount, componentWillUnmount, componentDidUpdate(mixinLifecicleEvents)三個介面進行修改。同時如果使用者沒有重寫shouldComponentUpdate, 也會優化shouldeComponentUpdate
export function observer(arg1, arg2) {
  const target = componentClass.prototype || componentClass;
  mixinLifecycleEvents(target)
  componentClass.isMobXReactObserver = true;
  return componentClass;
}
function mixinLifecycleEvents(target) {
  patch(target, "componentWillMount", true);
  [
    "componentDidMount",
    "componentWillUnmount",
    "componentDidUpdate"
  ].forEach(function(funcName) {
    patch(target, funcName)
  });
  if (!target.shouldComponentUpdate) {
    // 如果沒有重寫, 則利用覆蓋
    target.shouldComponentUpdate = reactiveMixin.shouldComponentUpdate;
  }
}
那在詳細看一下,Mobx針對這幾個介面都做了哪些事情:
function patch(target, funcName, runMixinFirst = false) {
  const base = target[funcName];
  const mixinFunc = reactiveMixin[funcName];
  const f = !base
    ? mixinFunc
    : runMixinFirst === true
        ? function() {
          mixinFunc.apply(this, arguments);
          base.apply(this, arguments);
        }
        : function() {
          base.apply(this, arguments);
          mixinFunc.apply(this, arguments);
        }
  ;
  target[funcName] = f;
}

const reactiveMixin = {
  componentWillMount: function() {
    makePropertyObservableReference.call(this, "props")
    makePropertyObservableReference.call(this, "state")
    const initialRender = () => {
      reaction = new Reaction(`${initialName}#${rootNodeID}.render()`, () => {});
      reactiveRender.$mobx = reaction;
      this.render = reactiveRender;
      return reactiveRender();
    };
    const reactiveRender = () => {
      reaction.track(() => {
        rendering = extras.allowStateChanges(false, baseRender);
        return rendering;
    };
    this.render = initialRender;
  },

  componentWillUnmount: function() {
    this.render.$mobx && this.render.$mobx.dispose();
    this.__$mobxIsUnmounted = true;
  },

  componentDidMount: function() {
    if (isDevtoolsEnabled) {
      reportRendering(this);
    }
  },

  componentDidUpdate: function() {
    if (isDevtoolsEnabled) {
      reportRendering(this);
    }
  },

  shouldComponentUpdate: function(nextProps, nextState) {
    if (this.state !== nextState) {
      return true;
    }
    return isObjectShallowModified(this.props, nextProps);
  }
};- componentDidMount, componentDidUpdate裡面只是提供debug相關的report。
-
componentWillMount裡做兩件事情
- 首先會攔截pros/state的get/set, 通過mobx的Atom賦予state, props Observable的能力。
- 重寫render方法(this.render = initRender)
-
render
-
第一次 render 時:
- 初始化一個 Reaction
- 在 reaction.track 裡執行 baseRender,建立依賴關係
-
有資料修改時:
- 觸發 render 的執行 (由於在 reaction.track 裡執行,所以會重新建立依賴關係)
-
- shouldComponentUpdate類似PureRenderMixin, 只做shadow比對,若資料不發生變化,則不進行重新渲染。
4. 問題分析
瞭解了這些背景知識後,我們再來看一下當前這個問題:
首先我們通過history.listen(()=>{})觀察發現,使用者觸發Link點選事件時,路由變化被我們的回撥函式所捕獲。問題並不可能出現在Link 和 listen過程。
那麼React Router是在Router這個元件中建立history.listen回撥的。當Url發生變化,觸發history.listen註冊的回撥後,會通過修改state, 觸發Router Render過程,預設情況下,會觸發他的子元件Render過程。而當Route發生componentWillReceiveProps時,會通過Router的getChildContext方法,拿到變化的URL。
通過Debug我們發現,TopBar的render,Switch, Route的render過程都沒有觸發。而TopBar中有部分狀態託管在mobx model中,所有問題差不多可以定位到:因為TopBar外層封裝了observer,而observer又會重寫shouldComponentUpdate,shouldComponentUpdate攔截了後續render過程,導致沒有觸發到後續Route元件的shouldComponentUpdate過程。
5. 問題解決
其實,使用者在使用connect, observer這樣會重寫shouldComponentUpdate或者PureComponent都會遇到相同的問題,React Router Guide針對此問題做了詳細描述。總體解法思路:通過傳入props繞過shouldComponentUpdate觸發render。
對於Router來說,路由的變化會反應在location的變化,所有將location傳入props中,會是不錯的繞過shouldComponentUpdate觸發render的方式。那獲取location的方法目前有兩種:
-
Route如果匹配到路由,會注入location到待渲染元件的props中。所以我們可以直接將TopBar封裝到Route中:
const TopBarWithRoute = () => ( <TopBar> <Switch> <Route exact path={homePath} component={Home} /> <Route path="*"> <SideBar theme="dark" data={sideData.common}> <Switch> {componentRoutes()} </Switch> </SideBar> </Route> </Switch> </TopBar> ); return ( <Router history={history}> <Route component={TopBarWithRoute} /> </Router> ); -
React Router提供了一個Hoc元件withRouter,利用此元件可以將location注入到TopBar中:
const TopBarWithRouter = withRouter(TopBar);
return (
  <Router history={history}>
    <TopBarWithRouter>
      <Switch>
        <Route exact path={homePath} component={Home} />
        <Route path="*">
          <SideBar theme="dark" data={sideData.common}>
            <Switch>
              {componentRoutes()}
            </Switch>
          </SideBar>
        </Route>
      </Switch>
    </TopBarWithRouter>
  </Router>
);
6. 參考文章:
- history: https://github.com/ReactTraining/history
- react-router的實現原理: http://zhenhua-lee.github.io/react/history.html
- mobx原理:https://github.com/sorrycc/blog/issues/3
- blocked-update: https://github.com/ReactTraining/react-router/blob/master/packages/react-router/docs/guides/blocked-updates.md
相關文章
- 探究 position-sticky 失效問題
- 由一個emoji引發的思考
- JS語法: 由++[[]][+[]]+[+[]] = 10 ?引發的問題JS
- 記錄一個由於倉庫層錯誤導致軟刪除失效的問題
- 記錄開發過程一個路由問題路由
- vue系列:跳轉到同一個路由引數不同但是不觸發更新的問題Vue路由
- 由select for update鎖等待問題引發的深入思考
- PHP array_column 引發的一個小問題PHP
- 一個延時任務問題引發的思考
- oracle交換分割槽所引起的索引失效問題探究測試Oracle索引
- disconf問題引發對spring boot配置載入的探究Spring Boot
- laravel8路由問題+apache,/根路由報404Laravel路由Apache
- 從一道前端面試題引發的原理性探究前端面試題
- 一個朋友圈泛型問題引發的“案子”泛型
- 一個引數引發的PDB無法在DataGuard下同步的問題
- 由ASP.NET Core WebApi新增Swagger報錯引發的探究ASP.NETWebAPISwagger
- 由小機硬碟引發的事件(一)硬碟事件
- 一個由line-height引發的血案與思考
- 一個引發程式設計師們幹架的問題程式設計師
- 關於 http cache 的一個小問題以及引發的思考HTTP
- 記一個面試題引發的思考面試題
- 一個 Handler 面試題引發的血案!!!面試題
- 聊一聊MySQL索引失效的問題MySql索引
- 由作業題引發對C++引用的一些思考C++
- 探究 CSS 混合模式\濾鏡導致 CSS 3D 失效問題CSS模式3D
- 一場由postcss-bem引發的血案CSS
- 由sap一沖銷方法引發的思考
- 由整合ARouter引發的一些思考
- 一場由fork引發的超時,讓我們重新探討了Redis的抖動問題Redis
- 由VIP漂移引發的演算法異常問題調查和解決演算法
- 解決requests庫中session.verify引數失效的問題Session
- 由面試題“併發程式設計的三個問題”深入淺出Synchronied面試題程式設計
- css失效問題CSS
- JavaScript 社群由一個庫引發的“smoosh門”事件到底怎麼回事?JavaScript事件
- 一個vuepress配置問題,引發的js遞迴演算法思考VueJS遞迴演算法
- Mybatis 一級快取和引發的問題MyBatis快取
- Qt 之 WindowFlags 引發的有趣問題一則QT
- 由吃飯引發的思考