Node 主要用在開發 Web 應用。這決定了使用 Node,往往離不開 Web 應用框架。
Koa 就是一種簡單好用的 Web 框架。它的特點是優雅、簡潔、表達力強、自由度高。本身程式碼只有1000多行,所有功能都透過外掛實現,很符合 Unix 哲學。
本文從零開始,循序漸進,教會你如何使用 Koa 寫出自己的 Web 應用。每一步都有簡潔易懂的示例,希望讓大家一看就懂。
零、準備
首先,檢查 Node 版本。
$ node -v
v8.0.0
Koa 必須使用 7.6 以上的版本。如果你的版本低於這個要求,就要先升級 Node。
然後,克隆本文的配套示例庫。(如果不方便使用 Git,也可以下載 zip 檔案解壓。)
$ git clone https://github.com/ruanyf/koa-demos.git
接著,進入示例庫,安裝依賴。
$ cd koa-demos
$ npm install
所有示例原始碼,都在 demos 目錄下面。
一、基本用法
1.1 架設 HTTP 服務
只要三行程式碼,就可以用 Koa 架設一個 HTTP 服務。
// demos/01.js
const Koa = require('koa');
const app = new Koa();

app.listen(3000);
執行這個指令碼。
$ node demos/01.js
開啟瀏覽器,訪問 http://127.0.0.1:3000 。你會看到頁面顯示"Not Found",表示沒有發現任何內容。這是因為我們並沒有告訴 Koa 應該顯示什麼內容。

1.2 Context 物件
Koa 提供一個 Context 物件,表示一次對話的上下文(包括 HTTP 請求和 HTTP 回覆)。透過加工這個物件,就可以控制返回給使用者的內容。
Context.response.body屬性就是傳送給使用者的內容。請看下面的例子(完整的程式碼看這裡)。
// demos/02.js
const Koa = require('koa');
const app = new Koa();

const main = ctx => {
  ctx.response.body = 'Hello World';
};

app.use(main);
app.listen(3000);
上面程式碼中,main函式用來設定ctx.response.body。然後,使用app.use方法載入main函式。
你可能已經猜到了,ctx.response代表 HTTP Response。同樣地,ctx.request代表 HTTP Request。
執行這個 demo。
$ node demos/02.js
訪問 http://127.0.0.1:3000 ,現在就可以看到"Hello World"了。
1.3 HTTP Response 的型別
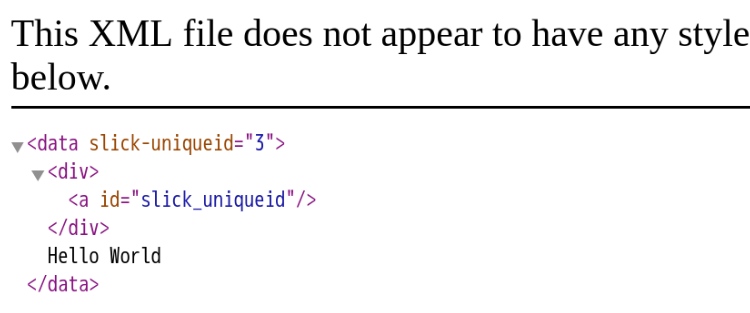
Koa 預設的返回型別是text/plain,如果想返回其他型別的內容,可以先用ctx.request.accepts判斷一下,客戶端希望接受什麼資料(根據 HTTP Request 的Accept欄位),然後使用ctx.response.type指定返回型別。請看下面的例子(完整程式碼看這裡)。
// demos/03.js
const main = ctx => {
  if (ctx.request.accepts('xml')) {
    ctx.response.type = 'xml';
    ctx.response.body = '<data>Hello World</data>';
  } else if (ctx.request.accepts('json')) {
    ctx.response.type = 'json';
    ctx.response.body = { data: 'Hello World' };
  } else if (ctx.request.accepts('html')) {
    ctx.response.type = 'html';
    ctx.response.body = '<p>Hello World</p>';
  } else {
    ctx.response.type = 'text';
    ctx.response.body = 'Hello World';
  }
};
執行這個 demo。
$ node demos/03.js
訪問 http://127.0.0.1:3000 ,現在看到的就是一個 XML 文件了。
1.4 網頁模板
實際開發中,返回給使用者的網頁往往都寫成模板檔案。我們可以讓 Koa 先讀取模板檔案,然後將這個模板返回給使用者。請看下面的例子(完整程式碼看這裡)。
// demos/04.js
const fs = require('fs');

const main = ctx => {
  ctx.response.type = 'html';
  ctx.response.body = fs.createReadStream('./demos/template.html');
};
執行這個 Demo。
$ node demos/04.js
訪問 http://127.0.0.1:3000 ,看到的就是模板檔案的內容了。

二、路由
2.1 原生路由
網站一般都有多個頁面。透過ctx.request.path可以獲取使用者請求的路徑,由此實現簡單的路由。請看下面的例子(完整程式碼看這裡)。
// demos/05.js
const main = ctx => {
  if (ctx.request.path !== '/') {
    ctx.response.type = 'html';
    ctx.response.body = '<a href="/">Index Page</a>';
  } else {
    ctx.response.body = 'Hello World';
  }
};
執行這個 demo。
$ node demos/05.js
訪問 http://127.0.0.1:3000/about ,可以看到一個連結,點選後就跳到首頁。

2.2 koa-route 模組
原生路由用起來不太方便,我們可以使用封裝好的koa-route模組。請看下面的例子(完整程式碼看這裡)。
// demos/06.js
const route = require('koa-route');

const about = ctx => {
  ctx.response.type = 'html';
  ctx.response.body = '<a href="/">Index Page</a>';
};

const main = ctx => {
  ctx.response.body = 'Hello World';
};

app.use(route.get('/', main));
app.use(route.get('/about', about));
上面程式碼中,根路徑/的處理函式是main,/about路徑的處理函式是about。
執行這個 demo。
$ node demos/06.js
訪問 http://127.0.0.1:3000/about ,效果與上一個例子完全相同。
2.3 靜態資源
如果網站提供靜態資源(圖片、字型、樣式表、指令碼......),為它們一個個寫路由就很麻煩,也沒必要。koa-static模組封裝了這部分的請求。請看下面的例子(完整程式碼看這裡)。
// demos/12.js
const path = require('path');
const serve = require('koa-static');

const main = serve(path.join(__dirname));
app.use(main);
執行這個 Demo。
$ node demos/12.js
訪問 http://127.0.0.1:3000/12.js,在瀏覽器裡就可以看到這個指令碼的內容。
2.4 重定向
有些場合,伺服器需要重定向(redirect)訪問請求。比如,使用者登陸以後,將他重定向到登陸前的頁面。ctx.response.redirect()方法可以發出一個302跳轉,將使用者導向另一個路由。請看下面的例子(完整程式碼看這裡)。
// demos/13.js
const redirect = ctx => {
  ctx.response.redirect('/');
  ctx.response.body = '<a href="/">Index Page</a>';
};

app.use(route.get('/redirect', redirect));
執行這個 demo。
$ node demos/13.js
訪問 http://127.0.0.1:3000/redirect ,瀏覽器會將使用者導向根路由。
三、中介軟體
3.1 Logger 功能
Koa 的最大特色,也是最重要的一個設計,就是中介軟體(middleware)。為了理解中介軟體,我們先看一下 Logger (列印日誌)功能的實現。
最簡單的寫法就是在main函式里面增加一行(完整程式碼看這裡)。
// demos/07.js
const main = ctx => {
  console.log(`${Date.now()} ${ctx.request.method} ${ctx.request.url}`);
  ctx.response.body = 'Hello World';
};
執行這個 Demo。
$ node demos/07.js
訪問 http://127.0.0.1:3000 ,命令列就會輸出日誌。
1502144902843 GET /
3.2 中介軟體的概念
上一個例子裡面的 Logger 功能,可以拆分成一個獨立函式(完整程式碼看這裡)。
// demos/08.js
const logger = (ctx, next) => {
  console.log(`${Date.now()} ${ctx.request.method} ${ctx.request.url}`);
  next();
}
app.use(logger);
像上面程式碼中的logger函式就叫做"中介軟體"(middleware),因為它處在 HTTP Request 和 HTTP Response 中間,用來實現某種中間功能。app.use()用來載入中介軟體。
基本上,Koa 所有的功能都是透過中介軟體實現的,前面例子裡面的main也是中介軟體。每個中介軟體預設接受兩個引數,第一個引數是 Context 物件,第二個引數是next函式。只要呼叫next函式,就可以把執行權轉交給下一個中介軟體。
執行這個 demo。
$ node demos/08.js
訪問 http://127.0.0.1:3000 ,命令列視窗會顯示與上一個例子相同的日誌輸出。
3.3 中介軟體棧
多箇中介軟體會形成一個棧結構(middle stack),以"先進後出"(first-in-last-out)的順序執行。
- 最外層的中介軟體首先執行。
- 呼叫
next函式,把執行權交給下一個中介軟體。- ...
- 最內層的中介軟體最後執行。
- 執行結束後,把執行權交回上一層的中介軟體。
- ...
- 最外層的中介軟體收回執行權之後,執行
next函式後面的程式碼。
請看下面的例子(完整程式碼看這裡)。
// demos/09.js
const one = (ctx, next) => {
  console.log('>> one');
  next();
  console.log('<< one');
}

const two = (ctx, next) => {
  console.log('>> two');
  next();
  console.log('<< two');
}

const three = (ctx, next) => {
  console.log('>> three');
  next();
  console.log('<< three');
}

app.use(one);
app.use(two);
app.use(three);
執行這個 demo。
$ node demos/09.js
訪問 http://127.0.0.1:3000 ,命令列視窗會有如下輸出。
>> one
>> two
>> three
<< three
<< two
<< one
如果中介軟體內部沒有呼叫next函式,那麼執行權就不會傳遞下去。作為練習,你可以將two函式里面next()這一行註釋掉再執行,看看會有什麼結果。
3.4 非同步中介軟體
迄今為止,所有例子的中介軟體都是同步的,不包含非同步操作。如果有非同步操作(比如讀取資料庫),中介軟體就必須寫成 async 函式。請看下面的例子(完整程式碼看這裡)。
// demos/10.js
const fs = require('fs.promised');
const Koa = require('koa');
const app = new Koa();

const main = async function (ctx, next) {
  ctx.response.type = 'html';
  ctx.response.body = await fs.readFile('./demos/template.html', 'utf8');
};

app.use(main);
app.listen(3000);
上面程式碼中,fs.readFile是一個非同步操作,必須寫成await fs.readFile(),然後中介軟體必須寫成 async 函式。
執行這個 demo。
$ node demos/10.js
訪問 http://127.0.0.1:3000 ,就可以看到模板檔案的內容。
3.5 中介軟體的合成
koa-compose模組可以將多箇中介軟體合成為一個。請看下面的例子(完整程式碼看這裡)。
// demos/11.js
const compose = require('koa-compose');

const logger = (ctx, next) => {
  console.log(`${Date.now()} ${ctx.request.method} ${ctx.request.url}`);
  next();
}

const main = ctx => {
  ctx.response.body = 'Hello World';
};

const middlewares = compose([logger, main]);
app.use(middlewares);
執行這個 demo。
$ node demos/11.js
訪問 http://127.0.0.1:3000 ,就可以在命令列視窗看到日誌資訊。
四、錯誤處理
4.1 500 錯誤
如果程式碼執行過程中發生錯誤,我們需要把錯誤資訊返回給使用者。HTTP 協定約定這時要返回500狀態碼。Koa 提供了ctx.throw()方法,用來丟擲錯誤,ctx.throw(500)就是丟擲500錯誤。請看下面的例子(完整程式碼看這裡)。
// demos/14.js
const main = ctx => {
  ctx.throw(500);
};
執行這個 demo。
$ node demos/14.js
訪問 http://127.0.0.1:3000,你會看到一個500錯誤頁"Internal Server Error"。
4.2 404錯誤
如果將ctx.response.status設定成404,就相當於ctx.throw(404),返回404錯誤。請看下面的例子(完整程式碼看這裡)。
// demos/15.js
const main = ctx => {
  ctx.response.status = 404;
  ctx.response.body = 'Page Not Found';
};
執行這個 demo。
$ node demos/15.js
訪問 http://127.0.0.1:3000 ,你就看到一個404頁面"Page Not Found"。
4.3 處理錯誤的中介軟體
為了方便處理錯誤,最好使用try...catch將其捕獲。但是,為每個中介軟體都寫try...catch太麻煩,我們可以讓最外層的中介軟體,負責所有中介軟體的錯誤處理。請看下面的例子(完整程式碼看這裡)。
// demos/16.js
const handler = async (ctx, next) => {
  try {
    await next();
  } catch (err) {
    ctx.response.status = err.statusCode || err.status || 500;
    ctx.response.body = {
      message: err.message
    };
  }
};

const main = ctx => {
  ctx.throw(500);
};

app.use(handler);
app.use(main);
執行這個 demo。
$ node demos/16.js
訪問 http://127.0.0.1:3000 ,你會看到一個500頁,裡面有報錯提示 {"message":"Internal Server Error"}。
4.4 error 事件的監聽
執行過程中一旦出錯,Koa 會觸發一個error事件。監聽這個事件,也可以處理錯誤。請看下面的例子(完整程式碼看這裡)。
// demos/17.js
const main = ctx => {
  ctx.throw(500);
};

app.on('error', (err, ctx) =>
  console.error('server error', err);
);
執行這個 demo。
$ node demos/17.js
訪問 http://127.0.0.1:3000 ,你會在命令列視窗看到"server error xxx"。
4.5 釋放 error 事件
需要注意的是,如果錯誤被try...catch捕獲,就不會觸發error事件。這時,必須呼叫ctx.app.emit(),手動釋放error事件,才能讓監聽函式生效。請看下面的例子(完整程式碼看這裡)。
// demos/18.js`
const handler = async (ctx, next) => {
  try {
    await next();
  } catch (err) {
    ctx.response.status = err.statusCode || err.status || 500;
    ctx.response.type = 'html';
    ctx.response.body = '<p>Something wrong, please contact administrator.</p>';
    ctx.app.emit('error', err, ctx);
  }
};

const main = ctx => {
  ctx.throw(500);
};

app.on('error', function(err) {
  console.log('logging error ', err.message);
  console.log(err);
});
上面程式碼中,main函式丟擲錯誤,被handler函式捕獲。catch程式碼塊裡面使用ctx.app.emit()手動釋放error事件,才能讓監聽函式監聽到。
執行這個 demo。
$ node demos/18.js
訪問 http://127.0.0.1:3000 ,你會在命令列視窗看到logging error。
五、Web App 的功能
5.1 Cookies
ctx.cookies用來讀寫 Cookie。請看下面的例子(完整程式碼看這裡)。
// demos/19.js
const main = function(ctx) {
  const n = Number(ctx.cookies.get('view') || 0) + 1;
  ctx.cookies.set('view', n);
  ctx.response.body = n + ' views';
}
執行這個 demo。
$ node demos/19.js
訪問 http://127.0.0.1:3000 ,你會看到1 views。重新整理一次頁面,就變成了2 views。再重新整理,每次都會計數增加1。
5.2 表單
Web 應用離不開處理表單。本質上,表單就是 POST 方法傳送到伺服器的鍵值對。koa-body模組可以用來從 POST 請求的資料體裡面提取鍵值對。請看下面的例子(完整程式碼看這裡)。
// demos/20.js
const koaBody = require('koa-body');

const main = async function(ctx) {
  const body = ctx.request.body;
  if (!body.name) ctx.throw(400, '.name required');
  ctx.body = { name: body.name };
};

app.use(koaBody());
執行這個 demo。
$ node demos/20.js
開啟另一個命令列視窗,執行下面的命令。
$ curl -X POST --data "name=Jack" 127.0.0.1:3000
{"name":"Jack"}

$ curl -X POST --data "name" 127.0.0.1:3000
name required
上面程式碼使用 POST 方法向伺服器傳送一個鍵值對,會被正確解析。如果傳送的資料不正確,就會收到錯誤提示。
2.3 檔案上傳
koa-body模組還可以用來處理檔案上傳。請看下面的例子(完整程式碼看這裡)。
// demos/21.js
const os = require('os');
const path = require('path');
const koaBody = require('koa-body');

const main = async function(ctx) {
  const tmpdir = os.tmpdir();
  const filePaths = [];
  const files = ctx.request.body.files || {};

  for (let key in files) {
    const file = files[key];
    const filePath = path.join(tmpdir, file.name);
    const reader = fs.createReadStream(file.path);
    const writer = fs.createWriteStream(filePath);
    reader.pipe(writer);
    filePaths.push(filePath);
  }

  ctx.body = filePaths;
};

app.use(koaBody({ multipart: true }));
執行這個 demo。
$ node demos/21.js
開啟另一個命令列視窗,執行下面的命令,上傳一個檔案。注意,/path/to/file要更換為真實的檔案路徑。
$ curl --form [email protected]/path/to/file http://127.0.0.1:3000
["/tmp/file"]
六、參考連結
(完)