Android開發筆記(一百二十四)自定義相簿
畫廊Gallery
Gallery是一個早期的畫廊控制元件,左右滑動手勢可展示內嵌的圖片列表,類似於一個平面的萬花筒。雖然Android現在將Gallery標記為Deprecation(表示已廢棄),建議開發者採用HorizontalScrollView或者ViewPager來代替,但是Gallery用做自定義相簿來輪播圖片其實是個挺好的選擇,所以下面我們還是簡單介紹它的用法,並結合其它控制元件加深對影像開發的理解。Gallery的常用屬性說明如下:
spacing : 指定圖片之間的間隔大小。
unselectedAlpha : 指定未選定圖片的透明度。取值為0到1,0表示完全透明,1表示完全不透明。
Gallery的常用方法說明如下:
setSpacing : 設定圖片之間的間隔大小。
setUnselectedAlpha : 設定未選定圖片的透明度。
setAdapter : 設定影像檢視的介面卡。
getSelectedItemId : 獲取當前選中的影像id。0表示第一個影像。
setSelection : 設定當前選中第幾個影像。
setOnItemClickListener : 設定單項的點選監聽器。
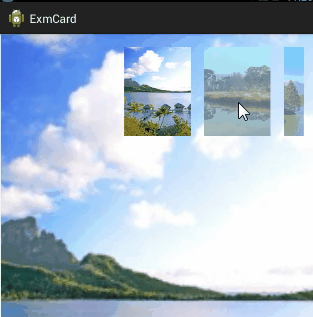
現在我們結合Gallery與ImageView來觀看畫廊的相簿效果,首先放置一個FrameLayout佈局,裡面放入一個Gallery控制元件與一個ImageView控制元件,其中ImageView控制元件要充滿整個螢幕,Gallery控制元件可放在螢幕上方或下方;然後監聽Gallery控制元件的單項點選事件,點選指定圖片項時,便給ImageView控制元件填充該圖片,也就是點小圖看大圖。
下面是Gallery與ImageView結合使用的效果截圖:
下面是Gallery與ImageView結合使用的程式碼例子:
import com.example.exmcard.adapter.GalleryAdapter;
import com.example.exmcard.util.MetricsUtil;

import android.app.Activity;
import android.os.Bundle;
import android.view.View;
import android.widget.AdapterView;
import android.widget.AdapterView.OnItemClickListener;
import android.widget.Gallery;
import android.widget.ImageView;

@SuppressWarnings("deprecation")
public class GalleryActivity extends Activity implements OnItemClickListener {

	private ImageView iv_gallery;
	private Gallery gl_gallery;

	// 圖片陣列
	private int[] mImageRes = {
			R.drawable.scene1, R.drawable.scene2,
			R.drawable.scene3, R.drawable.scene4,
			R.drawable.scene5, R.drawable.scene6
			};
	private int dip_pad;

	@Override
	protected void onCreate(Bundle savedInstanceState) {
		super.onCreate(savedInstanceState);
		setContentView(R.layout.activity_gallery);
		dip_pad = MetricsUtil.dip2px(this, 20);

		iv_gallery = (ImageView) findViewById(R.id.iv_gallery);
		iv_gallery.setImageResource(mImageRes[0]);

		gl_gallery = (Gallery) findViewById(R.id.gl_gallery);
		gl_gallery.setPadding(dip_pad, dip_pad, dip_pad, dip_pad);
		gl_gallery.setSpacing(dip_pad);
		gl_gallery.setUnselectedAlpha(0.5f);
		gl_gallery.setAdapter(new GalleryAdapter(this, mImageRes));
		gl_gallery.setOnItemClickListener(this);
	}

	@Override
	public void onItemClick(AdapterView<?> parent, View view, int position, long id) {
		iv_gallery.setImageResource(mImageRes[position]);
	}

}
影像切換ImageSwitcher
可能大家已經發現,前面Gallery與ImageView在切換大圖時比較生硬,前後兩張圖片閃一下就切過去,使用者體驗不夠友好。那有沒有辦法讓圖片切換自然些呢,比如說通過漸變動畫的方式?答案肯定是有的,就是把ImageView換成ImageSwitcher,通過ImageSwitcher控制元件來實現圖片的切換動畫。ImageSwitcher實質是個檢視動畫師ViewAnimator,用於處理前後影像的變換動畫;與之對應的是,TextSwitcher用於處理前後文字的變換動畫;另外ViewFlipper也是從ViewAnimator派生而來,則是用於處理兩個頁面檢視的變換動畫。有關ViewFlipper的詳細介紹參見《Android開發筆記(二十一)橫幅輪播頁》。ImageSwitcher的常用方法說明如下:
setFactory : 設定一個檢視工廠。該檢視工廠物件從ViewFactory派生而來,內部需要重寫makeView方法來返回檢視工廠裡的具體檢視。對於ImageSwitcher來說,檢視工廠應當返回的當然是ImageView物件了。
setImageResource : 設定當前影像的資源ID。該方法與下面的setImageDrawable和setImageURI為三選一操作,呼叫了其中一個方法,就無需呼叫另外兩個方法。
setImageDrawable : 設定當前影像的Drawable物件。
setImageURI : 設定當前影像的URI地址。
setInAnimation : 設定當前影像的進入動畫。
setOutAnimation : 設定前一個影像的退出動畫。
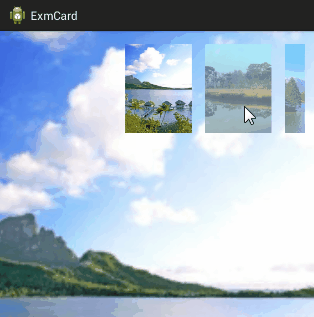
按照ImageSwitcher的上述方法,我們便能實現前後兩個影像的切換動畫(如淡入淡出動畫)。可是還沒有實現左右滑動切換圖片的功能,既然Gallery上的小圖能夠左右滑動,那麼我們希望ImageSwitcher的大圖也能夠左右滑動,這時要藉助於手勢事件來實現滑動切換功能。首先定義一個GestureDetector物件;然後呼叫ImageSwitcher的setOnTouchListener方法設定觸控監聽器OnTouchListener,在該監聽器的onTouch方法中讓GestureDetector物件接管事件處理;最後重寫GestureDetector物件的手勢監聽器OnGestureListener,主要是在onFling方法中增加對左滑和右滑的處理邏輯判斷。
下面是Gallery與ImageSwitcher結合使用的效果截圖:
下面是Gallery與ImageSwitcher結合使用的程式碼例子:
import android.annotation.SuppressLint;
import android.app.Activity;
import android.content.Context;
import android.os.Bundle;
import android.view.GestureDetector;
import android.view.MotionEvent;
import android.view.View;
import android.view.View.OnTouchListener;
import android.view.ViewGroup.LayoutParams;
import android.view.animation.AnimationUtils;
import android.widget.AdapterView;
import android.widget.Gallery;
import android.widget.ImageSwitcher;
import android.widget.AdapterView.OnItemClickListener;
import android.widget.ImageView;
import android.widget.ImageView.ScaleType;
import android.widget.ViewSwitcher.ViewFactory;

import com.example.exmcard.adapter.GalleryAdapter;
import com.example.exmcard.util.MetricsUtil;

@SuppressWarnings("deprecation")
public class SwitcherActivity extends Activity implements
		OnTouchListener, OnItemClickListener {

	private ImageSwitcher is_switcher;
	private Gallery gl_switcher;

	// 圖片陣列
	private int[] mImageRes = {
			R.drawable.scene1, R.drawable.scene2,
			R.drawable.scene3, R.drawable.scene4,
			R.drawable.scene5, R.drawable.scene6
			};
	private int dip_pad;

	private GestureDetector mGesture;
	private float mFlipGap = 20f;

	@Override
	protected void onCreate(Bundle savedInstanceState) {
		super.onCreate(savedInstanceState);
		setContentView(R.layout.activity_switcher);
		dip_pad = MetricsUtil.dip2px(this, 20);

		is_switcher = (ImageSwitcher) findViewById(R.id.is_switcher);
		is_switcher.setFactory(new ViewFactoryImpl());
		is_switcher.setImageResource(mImageRes[0]);
		mGesture = new GestureDetector(this, new GestureListener(this));
		is_switcher.setOnTouchListener(this);

		gl_switcher = (Gallery) findViewById(R.id.gl_switcher);
		gl_switcher.setPadding(dip_pad, dip_pad, dip_pad, dip_pad);
		gl_switcher.setSpacing(dip_pad);
		gl_switcher.setUnselectedAlpha(0.5f);
		gl_switcher.setAdapter(new GalleryAdapter(this, mImageRes));
		gl_switcher.setOnItemClickListener(this);
	}

	@Override
	public void onItemClick(AdapterView<?> parent, View view, int position, long id) {
		is_switcher.setInAnimation(AnimationUtils.loadAnimation(this, android.R.anim.fade_in));
		is_switcher.setOutAnimation(AnimationUtils.loadAnimation(this, android.R.anim.fade_out));
		is_switcher.setImageResource(mImageRes[position]);
	}

	public class ViewFactoryImpl implements ViewFactory {

		@Override
		public View makeView() {
			ImageView iv = new ImageView(SwitcherActivity.this);
			iv.setBackgroundColor(0xFFFFFFFF);
			iv.setScaleType(ScaleType.FIT_XY);
			iv.setLayoutParams(new ImageSwitcher.LayoutParams(
					LayoutParams.MATCH_PARENT, LayoutParams.MATCH_PARENT));
			return iv;
		}

	}

	@SuppressLint("ClickableViewAccessibility")
	@Override
	public boolean onTouch(View v, MotionEvent event) {
		mGesture.onTouchEvent(event);
		return true;
	}

	private class GestureListener implements GestureDetector.OnGestureListener {
		private Context mContext;
		private GestureListener(Context context) {
			mContext = context;
		}

		@Override
		public final boolean onDown(MotionEvent event) {
			return true;
		}

		@Override
		public final boolean onFling(MotionEvent e1, MotionEvent e2, float velocityX, float velocityY) {
			if (e1.getX() - e2.getX() > mFlipGap) {
				is_switcher.setInAnimation(AnimationUtils.loadAnimation(mContext,
                        R.anim.push_left_in));
				is_switcher.setOutAnimation(AnimationUtils.loadAnimation(mContext,
                        R.anim.push_left_out));
				int next_pos = (int) (gl_switcher.getSelectedItemId()+1);
				if (next_pos >= mImageRes.length) {
					next_pos = 0;
				}
				is_switcher.setImageResource(mImageRes[next_pos]);
				gl_switcher.setSelection(next_pos);
				return true;
			}
			if (e1.getX() - e2.getX() < -mFlipGap) {
				is_switcher.setInAnimation(AnimationUtils.loadAnimation(mContext,
                        R.anim.push_right_in));
				is_switcher.setOutAnimation(AnimationUtils.loadAnimation(mContext,
                        R.anim.push_right_out));
				int pre_pos = (int) (gl_switcher.getSelectedItemId()-1);
				if (pre_pos < 0) {
					pre_pos = mImageRes.length-1;
				}
				is_switcher.setImageResource(mImageRes[pre_pos]);
				gl_switcher.setSelection(pre_pos);
				return true;
			}
			return false;
		}

		@Override
		public final void onLongPress(MotionEvent event) {
		}

		@Override
		public final boolean onScroll(MotionEvent e1, MotionEvent e2, float distanceX, float distanceY) {
			return false;
		}

		@Override
		public final void onShowPress(MotionEvent event) {
		}

		@Override
		public boolean onSingleTapUp(MotionEvent event) {
			return false;
		}

	}

}
調色盤Palette
Palette是Android在5.0中引入的調色盤控制元件,它用於分析一個點陣圖物件的整體色調,最後給出樣品的色彩RGB值,這樣開發者就可以根據具體圖片動態設定整個頁面的背景色,從而實現統一的頁面風格。Palette在android-support-v7-palette.jar中定義,同時需要最新的android-support-v4.jar支援。使用之前先在sdk的“sdk\extras\android\support\v7\palette\libs”目錄中找到jar包並在自己的工程中引用,如果在執行過程中報錯“Caused by: java.lang.NoClassDefFoundError: android.support.v4.graphics.ColorUtils”,則是因為Palette呼叫了v4包中新加的類ColorUtils,解決辦法是把最新的android-support-v4.jar匯入到你的工程。
Palette的常用方法主要是兩個:
from : 從指定的Bitmap物件生成一個調色盤建造者物件Palette.Builder。然後呼叫該Builder物件的generate方法即開始色調分析,generate方法的引數是個PaletteAsyncListener監聽器,監聽器的onGenerated方法就是完成分析之後的回撥處理。
getVibrantSwatch : 獲得Palette物件的樣品。該方法在onGenerated中呼叫,返回值是Palette.Swatch樣品物件,呼叫該樣品物件的getRgb方法即可獲得樣品的色彩值。
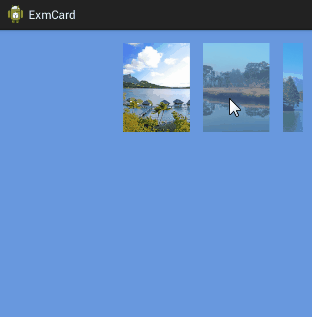
下面是Gallery與Palette結合使用的效果截圖:
下面是Gallery與Palette結合使用的程式碼例子:
import com.example.exmcard.adapter.GalleryAdapter;
import com.example.exmcard.util.MetricsUtil;

import android.app.Activity;
import android.graphics.Bitmap;
import android.graphics.drawable.BitmapDrawable;
import android.graphics.drawable.Drawable;
import android.os.Bundle;
import android.support.v7.graphics.Palette;
import android.support.v7.graphics.Palette.PaletteAsyncListener;
import android.view.View;
import android.widget.AdapterView;
import android.widget.Gallery;
import android.widget.ImageView;
import android.widget.AdapterView.OnItemClickListener;

@SuppressWarnings("deprecation")
public class PaletteActivity extends Activity implements
		OnItemClickListener, PaletteAsyncListener {

	private ImageView iv_palette;
	private Gallery gl_palette;

	// 圖片陣列
	private int[] mImageRes = {
			R.drawable.scene1, R.drawable.scene2,
			R.drawable.scene3, R.drawable.scene4,
			R.drawable.scene5, R.drawable.scene6
			};
	private int dip_pad;

	@Override
	protected void onCreate(Bundle savedInstanceState) {
		super.onCreate(savedInstanceState);
		setContentView(R.layout.activity_palette);
		dip_pad = MetricsUtil.dip2px(this, 20);

		iv_palette = (ImageView) findViewById(R.id.iv_palette);
		showBackground(mImageRes[0]);

		gl_palette = (Gallery) findViewById(R.id.gl_palette);
		gl_palette.setPadding(dip_pad, dip_pad, dip_pad, dip_pad);
		gl_palette.setSpacing(dip_pad);
		gl_palette.setUnselectedAlpha(0.5f);
		gl_palette.setAdapter(new GalleryAdapter(this, mImageRes));
		gl_palette.setOnItemClickListener(this);
	}

	private void showBackground(int res_id) {
		Drawable drawable = getResources().getDrawable(res_id);
		Bitmap bitmap = ((BitmapDrawable)drawable).getBitmap();
		Palette.Builder builder = Palette.from(bitmap);
		builder.generate(this);
	}

	@Override
	public void onItemClick(AdapterView<?> parent, View view, int position, long id) {
		showBackground(mImageRes[position]);
	}

	@Override
	public void onGenerated(Palette palette) {
		Palette.Swatch swatch = palette.getVibrantSwatch();
		if (swatch != null) {
			iv_palette.setBackgroundColor(swatch.getRgb());
		}
	}

}
卡片檢視CardView
CardView也是Android在5.0中新引入的卡片檢視控制元件,顧名思義它擁有一個卡片式的圓角邊框,邊框外緣有一圈陰影,邊框內緣有一圈空白。該控制元件的實現原理並不複雜,事實上早期便有許多人自己寫了類似卡片效果的控制元件,只不過後來Android順應民意推出了原生的卡片檢視。使用CardView之前,要把“sdk\extras\android\support\v7\cardview”匯入為一個庫工程,並引用到自己的工程中。如果在app執行的時候報錯:“Caused by: java.lang.NoClassDefFoundError: android.support.v7.cardview.R$styleable”,這是因為CardView原始碼中引用了android.support.v7.cardview.R.styleable,而開發者自己的工程包名不是android.support.v7.cardview,所以就會找不到這個R$styleable。
解決步驟如下:
1、要引用整個android-support-v7-cardview工程,不能直接把android-support-v7-cardview.jar複製到自己工程的libs目錄。
2、把project.properties裡面的“target=android-19”改為“target=android-21”,注意庫工程和自己的工程都要改。
3、庫工程和自己的工程都Clean Project,然後再編譯執行。
CardView的常用屬性說明如下(因為引用的是庫工程,所以CardView節點的屬性要像自定義控制元件一樣對待,即先在根節點定義一個名稱空間app指向res-auto,然後再使用app:屬性名稱來定義屬性值,不可直接使用android:屬性名稱):
cardBackgroundColor : 指定卡片的背景顏色。
cardCornerRadius : 指定卡片的圓角半徑。
cardElevation : 指定卡片內容距離陰影邊緣的間隔。
contentPadding : 指定卡片邊緣陰影的高程,即陰影的寬度。
CardView的常用方法說明如下:
setCardBackgroundColor : 設定卡片的背景顏色。
setRadius : 設定卡片的圓角半徑。
setContentPadding : 設定卡片內容距離陰影邊緣的間隔。
setCardElevation : 設定卡片邊緣陰影的高程,即陰影的寬度。
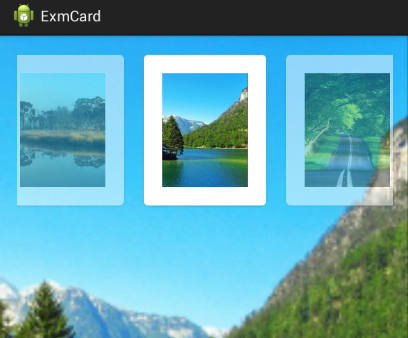
下面是Gallery與CardView結合使用的效果截圖:
下面是Gallery與CardView結合使用的程式碼例子:
import com.example.exmcard.util.MetricsUtil;

import android.content.Context;
import android.support.v7.widget.CardView;
import android.view.View;
import android.view.ViewGroup;
import android.view.ViewGroup.LayoutParams;
import android.widget.BaseAdapter;
import android.widget.Gallery;
import android.widget.ImageView;

@SuppressWarnings("deprecation")
public class CardAdapter extends BaseAdapter {

	private Context mContext;
	private int[] mImageRes;
	private int dip_pad;
	private int dip_radius;

	public CardAdapter(Context context, int[] imageRes) {
		mContext = context;
		mImageRes = imageRes;
		dip_pad = MetricsUtil.dip2px(mContext, 20);
		dip_radius = MetricsUtil.dip2px(mContext, 5);
	}

	@Override
	public int getCount() {
		return mImageRes.length;
	}

	@Override
	public Object getItem(int position) {
		return mImageRes[position];
	}

	@Override
	public long getItemId(int position) {
		return position;
	}

	@Override
	public View getView(int position, View convertView, ViewGroup parent) {
		CardView card = new CardView(mContext);
		//這裡不能使用LinearLayout.LayoutParams。否則會報錯“java.lang.ClassCastException: android.widget.LinearLayout$LayoutParams cannot be cast to android.widget.Gallery$LayoutParams”
		card.setLayoutParams(new Gallery.LayoutParams(LayoutParams.WRAP_CONTENT, LayoutParams.WRAP_CONTENT));
		card.setRadius(dip_radius);
		card.setContentPadding(dip_pad, dip_pad, dip_pad, dip_pad);
		card.setCardElevation(3f);
		//card.setCardBackgroundColor(Color.GREEN);

		ImageView iv = new ImageView(mContext);
		iv.setImageResource(mImageRes[position]);
		iv.setLayoutParams(new Gallery.LayoutParams(120, 160));
		iv.setScaleType(ImageView.ScaleType.FIT_XY);
		card.addView(iv);

		return card;
	}

}
下面是使用CardView的佈局檔案:
<LinearLayout xmlns:android="http://schemas.android.com/apk/res/android"
    xmlns:app="http://schemas.android.com/apk/res-auto"
    android:layout_width="match_parent"
    android:layout_height="match_parent"
    android:orientation="horizontal"
    android:padding="5dp" >

    <LinearLayout
        android:layout_width="0dp"
        android:layout_height="wrap_content"
        android:layout_weight="1"
        android:gravity="center_horizontal|top"
        android:orientation="vertical" >

        <android.support.v7.widget.CardView
            android:id="@+id/cv_one"
            android:layout_width="wrap_content"
            android:layout_height="wrap_content"
            android:gravity="center_horizontal|top"
            app:cardCornerRadius="20dp" >

            <ImageView
                android:layout_width="wrap_content"
                android:layout_height="wrap_content"
                android:scaleType="fitCenter"
                android:src="@drawable/scene1" />
        </android.support.v7.widget.CardView>
    </LinearLayout>

    <LinearLayout
        android:layout_width="0dp"
        android:layout_height="wrap_content"
        android:layout_weight="1"
        android:gravity="center_horizontal|top"
        android:orientation="vertical" >

        <android.support.v7.widget.CardView
            android:id="@+id/cv_two"
            android:layout_width="wrap_content"
            android:layout_height="wrap_content"
            android:gravity="center_horizontal|top" >

            <LinearLayout
                android:layout_width="match_parent"
                android:layout_height="wrap_content"
                android:orientation="vertical" >

                <ImageView
                    android:layout_width="wrap_content"
                    android:layout_height="wrap_content"
                    android:scaleType="fitCenter"
                    android:src="@drawable/scene2" />

                <TextView
                    android:layout_width="match_parent"
                    android:layout_height="wrap_content"
                    android:gravity="center"
                    android:text="風景如畫"
                    android:textColor="#000000"
                    android:textSize="17sp" />
            </LinearLayout>
        </android.support.v7.widget.CardView>
    </LinearLayout>

</LinearLayout>
點選下載本文用到的自定義相簿的工程程式碼
點此檢視Android開發筆記的完整目錄
相關文章
- Android開發筆記(一百一十八)自定義懸浮窗Android筆記
- android開發筆記之內建圖片到相簿Android筆記
- 使用Photos自定義相簿
- Android開發筆記(一百二十六)自定義音樂播放器Android筆記播放器
- Android開發筆記(一百二十五)自定義視訊播放器Android筆記播放器
- Android開發之自定義SpinnerAndroid
- ios開發筆記--狀態列的自定義,隱藏iOS筆記
- Android開發之自定義View(一)AndroidView
- Android開發之自定義View(二)AndroidView
- 使用PhotosKit自定義多選相簿
- Android 自定義本地圖片載入庫,仿微信相簿Android地圖
- iOS開發筆記 | 自定義具有內邊距的labeliOS筆記
- Android開發筆記Android筆記
- Android Studio NDK開發:自定義庫Android
- Android開發自定義View之滑動按鈕與自定義屬性AndroidView
- STREAMS筆記(8) rule - 自定義筆記
- 【Android開發點滴】自定義Toast樣式AndroidAST
- Android個人開發筆記Android筆記
- FineUIMvc隨筆(4)自定義回發引數與自定義回發UIMVC
- 自定義 push 和 pop 實現有趣的相簿翻開效果(上)
- android短視訊開發,自定義下拉選單Android
- Android開發教程:自定義ViewGroup方法總結AndroidView
- Android 開發學習筆記Android筆記
- C語言筆記——自定義型別C語言筆記型別
- dojo使用筆記: 自定義ConfirmDialog筆記
- iOS-對圖片操作---新增到自定義相簿iOS
- Android應用開發筆記(一)Android筆記
- 開發asp.net自定義控制元件(asp.net學習筆記三) (轉)ASP.NET控制元件筆記
- 開發asp.net自定義控制元件(asp.net學習筆記四) (轉)ASP.NET控制元件筆記
- 開發asp.net自定義控制元件(asp.net學習筆記五) (轉)ASP.NET控制元件筆記
- Vue 3自定義指令開發Vue
- Java自定義註解開發Java
- Android開發進階——自定義View的使用及其原理探索AndroidView
- Android進階:自定義視訊播放器開發(上)Android播放器
- Android進階:自定義視訊播放器開發(下)Android播放器
- Android開發教程 - 使用Data Binding(八)使用自定義InterfaceAndroid
- Android設定選項開發及自定義Preference樣式Android
- iOS學習筆記--PresentedVC自定義彈窗iOS筆記