Spring Boot學習5:spring-boot web容器
1傳統Servlet容器
1.1Eclipse Jetty:是一個嵌入式的容器,最新版本jetty9.0。支援的功能如下:
非同步http server
標準的servlet容器
websocket
http/2 server
asynchronous Client(http/1.1, http/2, websocket) Java7開始才有AIO
OSGI,JNDI,JMX,JASPI,AJP support
1.2 Apache Tomcat:
1.2.1 標準實現:
Servlet
JSP
Expression Language
WebSocket
1.2.2 Apache Tomcat
1)核心元件Components
Engine
Host
管理主機
Context:是tomcat運維中重要的一塊
和Application同等級別,類似於ServletContext
我們可以檢視Tomcat的配置檔案server.xml
注意:Engin中有Host,Host中有Context,Tomcat8.5中Host並沒有配置Context,後面的版本建議在Host中配置Context(見Context.xml)
2)靜態資源處理
檢視web.xml配置檔案servlet節點
<servlet>
<servlet-name>default</servlet-name> <!--定義了defualt的servlet,可以到配置檔案中查詢對應的對映Servlet-->
<servlet-class>org.apache.catalina.servlets.DefaultServlet</servlet-class>
<init-param>
<param-name>debug</param-name> <!--是否開啟debug-->
<param-value>0</param-value>
</init-param>
<init-param>
<param-name>listings</param-name> <!--是否展示選單列表-->
<param-value>false</param-value>
</init-param>
<load-on-startup>1</load-on-startup>
</servlet>
例子:在Idea中建立專案web application
啟動專案,訪問:http://localhost:8080/tomcat-test/
頁面預設返回index.jsp頁面
在webapp中建立index.html靜態檔案,重啟訪問:http://localhost:8080/tomcat-test/index.html
頁面返回index.html內容,其實任何一個請求都會走ServletContext
3)歡迎頁面
檢視web.xml配置檔案
<welcome-file-list>
<welcome-file>index.html</welcome-file>
<welcome-file>index.htm</welcome-file>
<welcome-file>index.jsp</welcome-file>
</welcome-file-list>
4)JSP處理
5)類載入
例子:
package com.segmentfault.lesson6;
public class Demo {
public static void main(String[] args) {
//檢視載入本類的所有的ClassLoader
ClassLoader classLoader = Thread.currentThread().getContextClassLoader();
System.out.println(classLoader.getClass().getName());
while(true){
classLoader = classLoader.getParent();
if(classLoader!=null){
System.out.println(classLoader.getClass().getName());
}
else{
break;
}
}
//獲取當前程式的SystemClassLoader
ClassLoader systemClassLoader = ClassLoader.getSystemClassLoader();
System.out.println(systemClassLoader.getClass().getName());
}
}
列印結果:
sun.misc.Launcher$AppClassLoader
sun.misc.Launcher$ExtClassLoader
sun.misc.Launcher$AppClassLoader
例子:建立一個Listener的Servlet類
檢視ServletContext的classloader過程
package com.segmentfault.lesson6;
import javax.servlet.ServletContext;
import javax.servlet.ServletContextEvent;
import javax.servlet.ServletContextListener;
public class ServletContextListenerImpl implements ServletContextListener {
@Override
public void contextInitialized(ServletContextEvent servletContextEvent) {
ServletContext sc = servletContextEvent.getServletContext();
ClassLoader classLoader = sc.getClassLoader();
System.out.println(classLoader.getClass().getName());
while(true){
classLoader = classLoader.getParent();
if(classLoader!=null){
System.out.println(classLoader.getClass().getName());
}else{
break;
}
}
}
@Override
public void contextDestroyed(ServletContextEvent servletContextEvent) {
}
}
控制檯列印結果:
org.apache.catalina.loader.ParallelWebappClassLoader
java.net.URLClassLoader
sun.misc.Launcher$AppClassLoader
sun.misc.Launcher$ExtClassLoader
6)聯結器
在tomcat的server.xml配置中:
<!-- A "Connector" represents an endpoint by which requests are received
and responses are returned. Documentation at :
Java HTTP Connector: /docs/config/http.html
Java AJP Connector: /docs/config/ajp.html
APR (HTTP/AJP) Connector: /docs/apr.html
Define a non-SSL/TLS HTTP/1.1 Connector on port 8080
-->
<Connector connectionTimeout="20000" port="8080" protocol="HTTP/1.1" redirectPort="8443"/>
埠(port)
協議(Protocol)
連線池(Thread Pool)
超時時間(Timeout)
等等。。。
我們可以檢視Connector類的原始碼(匯入tomcat的原始碼)
可以看到裡面的port,
/**
* Coyote Protocol handler class name.
* Defaults to the Coyote HTTP/1.1 protocolHandler.
*/
protected String protocolHandlerClassName =
"org.apache.coyote.http11.Http11NioProtocol";
/**
* @return the Coyote protocol handler in use.
*/
public String getProtocol() {
if (("org.apache.coyote.http11.Http11NioProtocol".equals(getProtocolHandlerClassName()) &&
(!AprLifecycleListener.isAprAvailable() || !AprLifecycleListener.getUseAprConnector())) ||
"org.apache.coyote.http11.Http11AprProtocol".equals(getProtocolHandlerClassName()) &&
AprLifecycleListener.getUseAprConnector()) {
return "HTTP/1.1";
} else if (("org.apache.coyote.ajp.AjpNioProtocol".equals(getProtocolHandlerClassName()) &&
(!AprLifecycleListener.isAprAvailable() || !AprLifecycleListener.getUseAprConnector())) ||
"org.apache.coyote.ajp.AjpAprProtocol".equals(getProtocolHandlerClassName()) &&
AprLifecycleListener.getUseAprConnector()) {
return "AJP/1.3";
}
return getProtocolHandlerClassName();
}
從這裡也可以看出,我們的很多屬性都是可以設定的,執行的時候顯示的資訊: Starting ProtocolHandler ["http-nio-8888"],其中的nio就是協議,所以任何的顯示都是有根據的。
7)JDBC資料來源
8)JNDI(Java Naming and Directory Interface
<Resource name="jdbc/UserDatabase" 目錄的名稱
auth="Container" 認證方式:容器內部
type="org.apache.catalina.UserDatabase" 介面名稱
<!--type="javax.sql.DataSource" -->
maxTotal="100" 最大連線數
maxIdle="30" 所謂的Idle就是不活動連線數
maxWaitMillis="10000" 最大等待時間10000毫秒
username="javauser" password="javadude" 賬號密碼
driverClassName="com.mysql.jdbc.Driver" 驅動名稱
url="jdbc:mysql://localhost:3306/javatest" 資料庫連線
description="User database that can be updated and saved"
factory="org.apache.catalina.users.MemoryUserDatabaseFactory"
pathname="conf/tomcat-users.xml" />
使用Eclipse工具
例子:配置tomcat中的Context.xml檔案,配置資料庫資訊
7.1)首先建立資料庫testdemo,並建立user表
create database testdemo;
mysql> create table user(id int primary key auto_increment,
-> name varchar(100));
7.2)修改Server中的Context.xml
<?xml version="1.0" encoding="UTF-8"?>
<!--
Licensed to the Apache Software Foundation (ASF) under one or more
contributor license agreements. See the NOTICE file distributed with
this work for additional information regarding copyright ownership.
The ASF licenses this file to You under the Apache License, Version 2.0
(the "License"); you may not use this file except in compliance with
the License. You may obtain a copy of the License at
http://www.apache.org/licenses/LICENSE-2.0
Unless required by applicable law or agreed to in writing, software
distributed under the License is distributed on an "AS IS" BASIS,
WITHOUT WARRANTIES OR CONDITIONS OF ANY KIND, either express or implied.
See the License for the specific language governing permissions and
limitations under the License.
--><!-- The contents of this file will be loaded for each web application --><Context>
<!-- Default set of monitored resources. If one of these changes, the -->
<!-- web application will be reloaded. -->
<WatchedResource>WEB-INF/web.xml</WatchedResource>
<WatchedResource>${catalina.base}/conf/web.xml</WatchedResource>
<!-- Uncomment this to disable session persistence across Tomcat restarts -->
<!--
<Manager pathname="" />
-->
<Resource name="jdbc/TestDB" auth="Container" type="javax.sql.DataSource"
username="root" password="root" driverClassName="com.mysql.jdbc.Driver"
url="jdbc:mysql://localhost:3306/"
/>
</Context>
7.3)配置web.xml
<?xml version="1.0" encoding="UTF-8"?>
<web-app xmlns="http://xmlns.jcp.org/xml/ns/javaee"
xmlns:xsi="http://www.w3.org/2001/XMLSchema-instance"
xsi:schemaLocation="http://xmlns.jcp.org/xml/ns/javaee http://xmlns.jcp.org/xml/ns/javaee/web-app_3_1.xsd"
version="3.1">
<listener>
<listener-class>com.segmentfault.lesson6.ServletContextListenerImpl</listener-class>
</listener>
<resource-ref>
<res-ref-name>jdbc/testdemo</res-ref-name>
<res-type>javax.sql.DataSource</res-type>
<res-auth>Container</res-auth>
</resource-ref>
<env-entry>
<env-entry-name>Bean</env-entry-name>
<env-entry-type>java.lang.String</env-entry-type>
<env-entry-value>hello</env-entry-value>
</env-entry>
</web-app>
7.4)編寫java測試程式碼
package com.spring.servlet;
import java.io.IOException;
import java.io.PrintWriter;
import java.io.Writer;
import java.sql.Connection;
import java.sql.ResultSet;
import java.sql.SQLException;
import java.sql.Statement;
import javax.naming.Context;
import javax.naming.InitialContext;
import javax.naming.NamingException;
import javax.servlet.ServletException;
import javax.servlet.http.HttpServlet;
import javax.servlet.http.HttpServletRequest;
import javax.servlet.http.HttpServletResponse;
import javax.sql.DataSource;
public class JdbcServlet extends HttpServlet{
private DataSource dataSource;
@Override
public void init() throws ServletException {
try {
Context context = new InitialContext();
Context envContext = (Context) context.lookup("java:comp/env");
dataSource = (DataSource) envContext.lookup("jdbc/TestDB");
String bean = (String) envContext.lookup("Bean");
System.out.println(bean);
} catch (NamingException e) {
e.printStackTrace();
}
}
@Override
protected void service(HttpServletRequest arg0, HttpServletResponse resp) throws ServletException, IOException {
Writer writer = resp.getWriter();
try {
Connection connection = dataSource.getConnection();
Statement statement = connection.createStatement();
ResultSet resultSet = statement.executeQuery("show databases;");
while(resultSet.next()) {
writer.write(resultSet.getString(1));
System.out.println(resultSet.getString(1));
}
} catch (SQLException e) {
// TODO Auto-generated catch block
e.printStackTrace();
}
}
}
執行後:
控制檯列印:
hello
information_schema
mysql
performance_schema
test
testdemo
這個其實就是依賴反轉的原理和鼻祖
執行:報錯
Caused by: java.sql.SQLException: No suitable driver
顯然,沒有驅動,將驅動包複製到專案中,並引用進來
另外,如果出現許可權安全問題
在url後加上?useSSL=false
2 Spring Boot嵌入式Web容器
1)使用IDEA軟體
開啟applicationContext.xml配置server.port,並查詢原始碼的地方
org.springframework.boot.autoconfigure.web.ServerProperties
對應的配置
{
"sourceType": "org.springframework.boot.autoconfigure.web.ServerProperties",
"name": "server.port",
"description": "Server HTTP port.",
"type": "java.lang.Integer"
},
然後我們可以找到getPort的地方:
這個customize方法中,設定了port,address,contextPath, SSL,timeout等等
@Override
public void customize(ConfigurableEmbeddedServletContainer container) {
if (getPort() != null) {
container.setPort(getPort());
}
if (getAddress() != null) {
container.setAddress(getAddress());
}
if (getContextPath() != null) {
container.setContextPath(getContextPath());
}
if (getDisplayName() != null) {
container.setDisplayName(getDisplayName());
}
if (getSession().getTimeout() != null) {
container.setSessionTimeout(getSession().getTimeout());
}
container.setPersistSession(getSession().isPersistent());
container.setSessionStoreDir(getSession().getStoreDir());
if (getSsl() != null) {
container.setSsl(getSsl());
}
if (getJspServlet() != null) {
container.setJspServlet(getJspServlet());
}
if (getCompression() != null) {
container.setCompression(getCompression());
}
container.setServerHeader(getServerHeader());
if (container instanceof TomcatEmbeddedServletContainerFactory) {
getTomcat().customizeTomcat(this,
(TomcatEmbeddedServletContainerFactory) container);
}
if (container instanceof JettyEmbeddedServletContainerFactory) {
getJetty().customizeJetty(this,
(JettyEmbeddedServletContainerFactory) container);
}
if (container instanceof UndertowEmbeddedServletContainerFactory) {
getUndertow().customizeUndertow(this,
(UndertowEmbeddedServletContainerFactory) container);
}
container.addInitializers(new SessionConfiguringInitializer(this.session));
container.addInitializers(new InitParameterConfiguringServletContextInitializer(
getContextParameters()));
}
其中,方法customize是介面EmbeddedServletContainerCustomizer的方法,這個是嵌入式servlet容器引擎
public interface EmbeddedServletContainerCustomizer {
/**
* Customize the specified {@link ConfigurableEmbeddedServletContainer}.
* @param container the container to customize
*/
void customize(ConfigurableEmbeddedServletContainer container);
}
我們來看一下嵌入式引擎的connector
查詢到Connector,檢視原始碼中的setProtocol程式碼
@Deprecated
public void setProtocol(String protocol) {
boolean aprConnector = AprLifecycleListener.isAprAvailable() &&
AprLifecycleListener.getUseAprConnector();
if ("HTTP/1.1".equals(protocol) || protocol == null) {
if (aprConnector) {
setProtocolHandlerClassName("org.apache.coyote.http11.Http11AprProtocol");
} else {
setProtocolHandlerClassName("org.apache.coyote.http11.Http11NioProtocol");
}
} else if ("AJP/1.3".equals(protocol)) {
if (aprConnector) {
setProtocolHandlerClassName("org.apache.coyote.ajp.AjpAprProtocol");
} else {
setProtocolHandlerClassName("org.apache.coyote.ajp.AjpNioProtocol");
}
} else {
setProtocolHandlerClassName(protocol);
}
}
可以看到,這個setProtocol已經是過時的方法了,建議使用構造器的方法進行初始化
public Connector(String protocol) {
setProtocol(protocol);
// Instantiate protocol handler
ProtocolHandler p = null;
try {
Class<?> clazz = Class.forName(protocolHandlerClassName);
p = (ProtocolHandler) clazz.getConstructor().newInstance();
} catch (Exception e) {
log.error(sm.getString(
"coyoteConnector.protocolHandlerInstantiationFailed"), e);
} finally {
this.protocolHandler = p;
}
if (Globals.STRICT_SERVLET_COMPLIANCE) {
uriCharset = StandardCharsets.ISO_8859_1;
} else {
uriCharset = StandardCharsets.UTF_8;
}
}
預設的Protocol是
/**
* The class name of default protocol used.
*/
public static final String DEFAULT_PROTOCOL = "org.apache.coyote.http11.Http11NioProtocol";
那麼,我們可以在哪裡修改這個protocol呢?
重寫:EmbeddedServletContainerCustomizer的customize方法
注入:
private List<TomcatConnectorCustomizer> tomcatConnectorCustomizers = new ArrayList<TomcatConnectorCustomizer>();
並將connector設定對應的port和protocol,並加入到tomcat嵌入式servlet工廠中
程式碼實現:
package com.segmentfault.springbootlesson6;
import org.apache.catalina.Context;
import org.apache.catalina.connector.Connector;
import org.apache.coyote.http11.Http11Nio2Protocol;
import org.springframework.boot.SpringApplication;
import org.springframework.boot.autoconfigure.SpringBootApplication;
import org.springframework.boot.context.embedded.ConfigurableEmbeddedServletContainer;
import org.springframework.boot.context.embedded.EmbeddedServletContainerCustomizer;
import org.springframework.boot.context.embedded.tomcat.TomcatConnectorCustomizer;
import org.springframework.boot.context.embedded.tomcat.TomcatContextCustomizer;
import org.springframework.boot.context.embedded.tomcat.TomcatEmbeddedServletContainerFactory;
import org.springframework.context.annotation.Bean;
import org.springframework.web.bind.annotation.GetMapping;
import org.springframework.web.bind.annotation.RestController;
@SpringBootApplication
@RestController
public class SpringBootLesson6Application {
public static void main(String[] args) {
SpringApplication.run(SpringBootLesson6Application.class, args);
}
@GetMapping("/hello")
public String index(){
return "hello,world";
}
@Bean
public EmbeddedServletContainerCustomizer embeddedServletContainerCustomizer(){
return new EmbeddedServletContainerCustomizer(){
@Override
public void customize(ConfigurableEmbeddedServletContainer container) {
if(container instanceof TomcatEmbeddedServletContainerFactory){
TomcatEmbeddedServletContainerFactory factory = TomcatEmbeddedServletContainerFactory.class.cast(container);
factory.addContextCustomizers(new TomcatContextCustomizer() {
@Override
public void customize(Context context) {
context.setPath("/spring-boot");
}
});
factory.addConnectorCustomizers(new TomcatConnectorCustomizer() {
@Override
public void customize(Connector connector) {
connector.setPort(8888);
//這個方法已經過時的
connector.setProtocol(Http11Nio2Protocol.class.getName());
}
});
}
}
};
}
}
其中測試:可以看到控制檯中列印
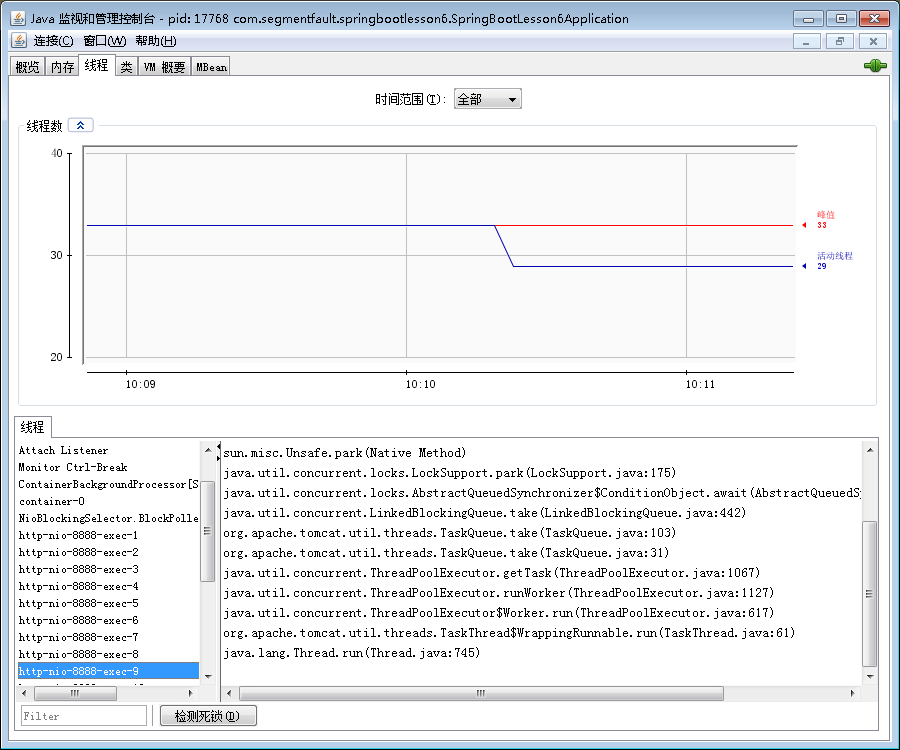
2018-02-12 10:05:44.971 INFO 17768 --- [ main] s.b.c.e.t.TomcatEmbeddedServletContainer : Tomcat started on port(s): 8888 (http)
然後開啟jconsole,檢視該java程式中的http協議
同樣的,我們也可以手寫修改context
factory.addContextCustomizers(new TomcatContextCustomizer() {
@Override
public void customize(Context context) {
context.setPath("/spring-boot");
}
});
並建立一個介面:
@GetMapping("/hello")
public String index(){
return "hello,world";
}
訪問:http://localhost:8888/spring-boot/hello
返回hello,world
3 Q&A
1)jndi在實際開發中有什麼用?
jndi告訴我們,不要直接使用new的方式生成物件,而是用get的方法從容器中取。
如果設定了密碼,我們可以使用jndi的方式,到指定的路徑取密碼,而不用直接配置密碼
jndi對應spring的上下文,和classloader不同。是以虛擬路徑的方式如 jdbc/testDB等
資源以樹形結構的方式儲存資源
2)微服務和j2ee
微服務強調的是無狀態
j2ee強調有狀態
3)嵌入式的tomcat是怎麼搭配叢集的?
因為強調的是無狀態,所以叢集容易搭建,類似於克隆
無狀態,每個機器上不儲存使用者資訊
1.1Eclipse Jetty:是一個嵌入式的容器,最新版本jetty9.0。支援的功能如下:
非同步http server
標準的servlet容器
websocket
http/2 server
asynchronous Client(http/1.1, http/2, websocket) Java7開始才有AIO
OSGI,JNDI,JMX,JASPI,AJP support
1.2 Apache Tomcat:
1.2.1 標準實現:
Servlet
JSP
Expression Language
WebSocket
1.2.2 Apache Tomcat
1)核心元件Components
Engine
Host
管理主機
Context:是tomcat運維中重要的一塊
和Application同等級別,類似於ServletContext
我們可以檢視Tomcat的配置檔案server.xml
注意:Engin中有Host,Host中有Context,Tomcat8.5中Host並沒有配置Context,後面的版本建議在Host中配置Context(見Context.xml)
2)靜態資源處理
檢視web.xml配置檔案servlet節點
<servlet>
<servlet-name>default</servlet-name> <!--定義了defualt的servlet,可以到配置檔案中查詢對應的對映Servlet-->
<servlet-class>org.apache.catalina.servlets.DefaultServlet</servlet-class>
<init-param>
<param-name>debug</param-name> <!--是否開啟debug-->
<param-value>0</param-value>
</init-param>
<init-param>
<param-name>listings</param-name> <!--是否展示選單列表-->
<param-value>false</param-value>
</init-param>
<load-on-startup>1</load-on-startup>
</servlet>
例子:在Idea中建立專案web application
啟動專案,訪問:http://localhost:8080/tomcat-test/
頁面預設返回index.jsp頁面
在webapp中建立index.html靜態檔案,重啟訪問:http://localhost:8080/tomcat-test/index.html
頁面返回index.html內容,其實任何一個請求都會走ServletContext
3)歡迎頁面
檢視web.xml配置檔案
<welcome-file-list>
<welcome-file>index.html</welcome-file>
<welcome-file>index.htm</welcome-file>
<welcome-file>index.jsp</welcome-file>
</welcome-file-list>
4)JSP處理
5)類載入
例子:
package com.segmentfault.lesson6;
public class Demo {
public static void main(String[] args) {
//檢視載入本類的所有的ClassLoader
ClassLoader classLoader = Thread.currentThread().getContextClassLoader();
System.out.println(classLoader.getClass().getName());
while(true){
classLoader = classLoader.getParent();
if(classLoader!=null){
System.out.println(classLoader.getClass().getName());
}
else{
break;
}
}
//獲取當前程式的SystemClassLoader
ClassLoader systemClassLoader = ClassLoader.getSystemClassLoader();
System.out.println(systemClassLoader.getClass().getName());
}
}
列印結果:
sun.misc.Launcher$AppClassLoader
sun.misc.Launcher$ExtClassLoader
sun.misc.Launcher$AppClassLoader
例子:建立一個Listener的Servlet類
檢視ServletContext的classloader過程
package com.segmentfault.lesson6;
import javax.servlet.ServletContext;
import javax.servlet.ServletContextEvent;
import javax.servlet.ServletContextListener;
public class ServletContextListenerImpl implements ServletContextListener {
@Override
public void contextInitialized(ServletContextEvent servletContextEvent) {
ServletContext sc = servletContextEvent.getServletContext();
ClassLoader classLoader = sc.getClassLoader();
System.out.println(classLoader.getClass().getName());
while(true){
classLoader = classLoader.getParent();
if(classLoader!=null){
System.out.println(classLoader.getClass().getName());
}else{
break;
}
}
}
@Override
public void contextDestroyed(ServletContextEvent servletContextEvent) {
}
}
控制檯列印結果:
org.apache.catalina.loader.ParallelWebappClassLoader
java.net.URLClassLoader
sun.misc.Launcher$AppClassLoader
sun.misc.Launcher$ExtClassLoader
6)聯結器
在tomcat的server.xml配置中:
<!-- A "Connector" represents an endpoint by which requests are received
and responses are returned. Documentation at :
Java HTTP Connector: /docs/config/http.html
Java AJP Connector: /docs/config/ajp.html
APR (HTTP/AJP) Connector: /docs/apr.html
Define a non-SSL/TLS HTTP/1.1 Connector on port 8080
-->
<Connector connectionTimeout="20000" port="8080" protocol="HTTP/1.1" redirectPort="8443"/>
埠(port)
協議(Protocol)
連線池(Thread Pool)
超時時間(Timeout)
等等。。。
我們可以檢視Connector類的原始碼(匯入tomcat的原始碼)
可以看到裡面的port,
/**
* Coyote Protocol handler class name.
* Defaults to the Coyote HTTP/1.1 protocolHandler.
*/
protected String protocolHandlerClassName =
"org.apache.coyote.http11.Http11NioProtocol";
/**
* @return the Coyote protocol handler in use.
*/
public String getProtocol() {
if (("org.apache.coyote.http11.Http11NioProtocol".equals(getProtocolHandlerClassName()) &&
(!AprLifecycleListener.isAprAvailable() || !AprLifecycleListener.getUseAprConnector())) ||
"org.apache.coyote.http11.Http11AprProtocol".equals(getProtocolHandlerClassName()) &&
AprLifecycleListener.getUseAprConnector()) {
return "HTTP/1.1";
} else if (("org.apache.coyote.ajp.AjpNioProtocol".equals(getProtocolHandlerClassName()) &&
(!AprLifecycleListener.isAprAvailable() || !AprLifecycleListener.getUseAprConnector())) ||
"org.apache.coyote.ajp.AjpAprProtocol".equals(getProtocolHandlerClassName()) &&
AprLifecycleListener.getUseAprConnector()) {
return "AJP/1.3";
}
return getProtocolHandlerClassName();
}
從這裡也可以看出,我們的很多屬性都是可以設定的,執行的時候顯示的資訊: Starting ProtocolHandler ["http-nio-8888"],其中的nio就是協議,所以任何的顯示都是有根據的。
7)JDBC資料來源
8)JNDI(Java Naming and Directory Interface
<Resource name="jdbc/UserDatabase" 目錄的名稱
auth="Container" 認證方式:容器內部
type="org.apache.catalina.UserDatabase" 介面名稱
<!--type="javax.sql.DataSource" -->
maxTotal="100" 最大連線數
maxIdle="30" 所謂的Idle就是不活動連線數
maxWaitMillis="10000" 最大等待時間10000毫秒
username="javauser" password="javadude" 賬號密碼
driverClassName="com.mysql.jdbc.Driver" 驅動名稱
url="jdbc:mysql://localhost:3306/javatest" 資料庫連線
description="User database that can be updated and saved"
factory="org.apache.catalina.users.MemoryUserDatabaseFactory"
pathname="conf/tomcat-users.xml" />
使用Eclipse工具
例子:配置tomcat中的Context.xml檔案,配置資料庫資訊
7.1)首先建立資料庫testdemo,並建立user表
create database testdemo;
mysql> create table user(id int primary key auto_increment,
-> name varchar(100));
7.2)修改Server中的Context.xml
<?xml version="1.0" encoding="UTF-8"?>
<!--
Licensed to the Apache Software Foundation (ASF) under one or more
contributor license agreements. See the NOTICE file distributed with
this work for additional information regarding copyright ownership.
The ASF licenses this file to You under the Apache License, Version 2.0
(the "License"); you may not use this file except in compliance with
the License. You may obtain a copy of the License at
http://www.apache.org/licenses/LICENSE-2.0
Unless required by applicable law or agreed to in writing, software
distributed under the License is distributed on an "AS IS" BASIS,
WITHOUT WARRANTIES OR CONDITIONS OF ANY KIND, either express or implied.
See the License for the specific language governing permissions and
limitations under the License.
--><!-- The contents of this file will be loaded for each web application --><Context>
<!-- Default set of monitored resources. If one of these changes, the -->
<!-- web application will be reloaded. -->
<WatchedResource>WEB-INF/web.xml</WatchedResource>
<WatchedResource>${catalina.base}/conf/web.xml</WatchedResource>
<!-- Uncomment this to disable session persistence across Tomcat restarts -->
<!--
<Manager pathname="" />
-->
<Resource name="jdbc/TestDB" auth="Container" type="javax.sql.DataSource"
username="root" password="root" driverClassName="com.mysql.jdbc.Driver"
url="jdbc:mysql://localhost:3306/"
/>
</Context>
7.3)配置web.xml
<?xml version="1.0" encoding="UTF-8"?>
<web-app xmlns="http://xmlns.jcp.org/xml/ns/javaee"
xmlns:xsi="http://www.w3.org/2001/XMLSchema-instance"
xsi:schemaLocation="http://xmlns.jcp.org/xml/ns/javaee http://xmlns.jcp.org/xml/ns/javaee/web-app_3_1.xsd"
version="3.1">
<listener>
<listener-class>com.segmentfault.lesson6.ServletContextListenerImpl</listener-class>
</listener>
<resource-ref>
<res-ref-name>jdbc/testdemo</res-ref-name>
<res-type>javax.sql.DataSource</res-type>
<res-auth>Container</res-auth>
</resource-ref>
<env-entry>
<env-entry-name>Bean</env-entry-name>
<env-entry-type>java.lang.String</env-entry-type>
<env-entry-value>hello</env-entry-value>
</env-entry>
</web-app>
7.4)編寫java測試程式碼
package com.spring.servlet;
import java.io.IOException;
import java.io.PrintWriter;
import java.io.Writer;
import java.sql.Connection;
import java.sql.ResultSet;
import java.sql.SQLException;
import java.sql.Statement;
import javax.naming.Context;
import javax.naming.InitialContext;
import javax.naming.NamingException;
import javax.servlet.ServletException;
import javax.servlet.http.HttpServlet;
import javax.servlet.http.HttpServletRequest;
import javax.servlet.http.HttpServletResponse;
import javax.sql.DataSource;
public class JdbcServlet extends HttpServlet{
private DataSource dataSource;
@Override
public void init() throws ServletException {
try {
Context context = new InitialContext();
Context envContext = (Context) context.lookup("java:comp/env");
dataSource = (DataSource) envContext.lookup("jdbc/TestDB");
String bean = (String) envContext.lookup("Bean");
System.out.println(bean);
} catch (NamingException e) {
e.printStackTrace();
}
}
@Override
protected void service(HttpServletRequest arg0, HttpServletResponse resp) throws ServletException, IOException {
Writer writer = resp.getWriter();
try {
Connection connection = dataSource.getConnection();
Statement statement = connection.createStatement();
ResultSet resultSet = statement.executeQuery("show databases;");
while(resultSet.next()) {
writer.write(resultSet.getString(1));
System.out.println(resultSet.getString(1));
}
} catch (SQLException e) {
// TODO Auto-generated catch block
e.printStackTrace();
}
}
}
執行後:
控制檯列印:
hello
information_schema
mysql
performance_schema
test
testdemo
這個其實就是依賴反轉的原理和鼻祖
執行:報錯
Caused by: java.sql.SQLException: No suitable driver
顯然,沒有驅動,將驅動包複製到專案中,並引用進來
另外,如果出現許可權安全問題
在url後加上?useSSL=false
2 Spring Boot嵌入式Web容器
1)使用IDEA軟體
開啟applicationContext.xml配置server.port,並查詢原始碼的地方
org.springframework.boot.autoconfigure.web.ServerProperties
對應的配置
{
"sourceType": "org.springframework.boot.autoconfigure.web.ServerProperties",
"name": "server.port",
"description": "Server HTTP port.",
"type": "java.lang.Integer"
},
然後我們可以找到getPort的地方:
這個customize方法中,設定了port,address,contextPath, SSL,timeout等等
@Override
public void customize(ConfigurableEmbeddedServletContainer container) {
if (getPort() != null) {
container.setPort(getPort());
}
if (getAddress() != null) {
container.setAddress(getAddress());
}
if (getContextPath() != null) {
container.setContextPath(getContextPath());
}
if (getDisplayName() != null) {
container.setDisplayName(getDisplayName());
}
if (getSession().getTimeout() != null) {
container.setSessionTimeout(getSession().getTimeout());
}
container.setPersistSession(getSession().isPersistent());
container.setSessionStoreDir(getSession().getStoreDir());
if (getSsl() != null) {
container.setSsl(getSsl());
}
if (getJspServlet() != null) {
container.setJspServlet(getJspServlet());
}
if (getCompression() != null) {
container.setCompression(getCompression());
}
container.setServerHeader(getServerHeader());
if (container instanceof TomcatEmbeddedServletContainerFactory) {
getTomcat().customizeTomcat(this,
(TomcatEmbeddedServletContainerFactory) container);
}
if (container instanceof JettyEmbeddedServletContainerFactory) {
getJetty().customizeJetty(this,
(JettyEmbeddedServletContainerFactory) container);
}
if (container instanceof UndertowEmbeddedServletContainerFactory) {
getUndertow().customizeUndertow(this,
(UndertowEmbeddedServletContainerFactory) container);
}
container.addInitializers(new SessionConfiguringInitializer(this.session));
container.addInitializers(new InitParameterConfiguringServletContextInitializer(
getContextParameters()));
}
其中,方法customize是介面EmbeddedServletContainerCustomizer的方法,這個是嵌入式servlet容器引擎
public interface EmbeddedServletContainerCustomizer {
/**
* Customize the specified {@link ConfigurableEmbeddedServletContainer}.
* @param container the container to customize
*/
void customize(ConfigurableEmbeddedServletContainer container);
}
我們來看一下嵌入式引擎的connector
查詢到Connector,檢視原始碼中的setProtocol程式碼
@Deprecated
public void setProtocol(String protocol) {
boolean aprConnector = AprLifecycleListener.isAprAvailable() &&
AprLifecycleListener.getUseAprConnector();
if ("HTTP/1.1".equals(protocol) || protocol == null) {
if (aprConnector) {
setProtocolHandlerClassName("org.apache.coyote.http11.Http11AprProtocol");
} else {
setProtocolHandlerClassName("org.apache.coyote.http11.Http11NioProtocol");
}
} else if ("AJP/1.3".equals(protocol)) {
if (aprConnector) {
setProtocolHandlerClassName("org.apache.coyote.ajp.AjpAprProtocol");
} else {
setProtocolHandlerClassName("org.apache.coyote.ajp.AjpNioProtocol");
}
} else {
setProtocolHandlerClassName(protocol);
}
}
可以看到,這個setProtocol已經是過時的方法了,建議使用構造器的方法進行初始化
public Connector(String protocol) {
setProtocol(protocol);
// Instantiate protocol handler
ProtocolHandler p = null;
try {
Class<?> clazz = Class.forName(protocolHandlerClassName);
p = (ProtocolHandler) clazz.getConstructor().newInstance();
} catch (Exception e) {
log.error(sm.getString(
"coyoteConnector.protocolHandlerInstantiationFailed"), e);
} finally {
this.protocolHandler = p;
}
if (Globals.STRICT_SERVLET_COMPLIANCE) {
uriCharset = StandardCharsets.ISO_8859_1;
} else {
uriCharset = StandardCharsets.UTF_8;
}
}
預設的Protocol是
/**
* The class name of default protocol used.
*/
public static final String DEFAULT_PROTOCOL = "org.apache.coyote.http11.Http11NioProtocol";
那麼,我們可以在哪裡修改這個protocol呢?
重寫:EmbeddedServletContainerCustomizer的customize方法
注入:
private List<TomcatConnectorCustomizer> tomcatConnectorCustomizers = new ArrayList<TomcatConnectorCustomizer>();
並將connector設定對應的port和protocol,並加入到tomcat嵌入式servlet工廠中
程式碼實現:
package com.segmentfault.springbootlesson6;
import org.apache.catalina.Context;
import org.apache.catalina.connector.Connector;
import org.apache.coyote.http11.Http11Nio2Protocol;
import org.springframework.boot.SpringApplication;
import org.springframework.boot.autoconfigure.SpringBootApplication;
import org.springframework.boot.context.embedded.ConfigurableEmbeddedServletContainer;
import org.springframework.boot.context.embedded.EmbeddedServletContainerCustomizer;
import org.springframework.boot.context.embedded.tomcat.TomcatConnectorCustomizer;
import org.springframework.boot.context.embedded.tomcat.TomcatContextCustomizer;
import org.springframework.boot.context.embedded.tomcat.TomcatEmbeddedServletContainerFactory;
import org.springframework.context.annotation.Bean;
import org.springframework.web.bind.annotation.GetMapping;
import org.springframework.web.bind.annotation.RestController;
@SpringBootApplication
@RestController
public class SpringBootLesson6Application {
public static void main(String[] args) {
SpringApplication.run(SpringBootLesson6Application.class, args);
}
@GetMapping("/hello")
public String index(){
return "hello,world";
}
@Bean
public EmbeddedServletContainerCustomizer embeddedServletContainerCustomizer(){
return new EmbeddedServletContainerCustomizer(){
@Override
public void customize(ConfigurableEmbeddedServletContainer container) {
if(container instanceof TomcatEmbeddedServletContainerFactory){
TomcatEmbeddedServletContainerFactory factory = TomcatEmbeddedServletContainerFactory.class.cast(container);
factory.addContextCustomizers(new TomcatContextCustomizer() {
@Override
public void customize(Context context) {
context.setPath("/spring-boot");
}
});
factory.addConnectorCustomizers(new TomcatConnectorCustomizer() {
@Override
public void customize(Connector connector) {
connector.setPort(8888);
//這個方法已經過時的
connector.setProtocol(Http11Nio2Protocol.class.getName());
}
});
}
}
};
}
}
其中測試:可以看到控制檯中列印
2018-02-12 10:05:44.971 INFO 17768 --- [ main] s.b.c.e.t.TomcatEmbeddedServletContainer : Tomcat started on port(s): 8888 (http)
然後開啟jconsole,檢視該java程式中的http協議
同樣的,我們也可以手寫修改context
factory.addContextCustomizers(new TomcatContextCustomizer() {
@Override
public void customize(Context context) {
context.setPath("/spring-boot");
}
});
並建立一個介面:
@GetMapping("/hello")
public String index(){
return "hello,world";
}
訪問:http://localhost:8888/spring-boot/hello
返回hello,world
3 Q&A
1)jndi在實際開發中有什麼用?
jndi告訴我們,不要直接使用new的方式生成物件,而是用get的方法從容器中取。
如果設定了密碼,我們可以使用jndi的方式,到指定的路徑取密碼,而不用直接配置密碼
jndi對應spring的上下文,和classloader不同。是以虛擬路徑的方式如 jdbc/testDB等
資源以樹形結構的方式儲存資源
2)微服務和j2ee
微服務強調的是無狀態
j2ee強調有狀態
3)嵌入式的tomcat是怎麼搭配叢集的?
因為強調的是無狀態,所以叢集容易搭建,類似於克隆
無狀態,每個機器上不儲存使用者資訊
相關文章
- spring-boot學習筆記之ConditionalSpringboot筆記
- Spring-boot整合AOP及AOP相關學習Springboot
- Spring Boot學習3:web篇(中)-Spring boot Rest學習Spring BootWebREST
- Spring Boot學習4:web篇(下)-Spring boot (Servlet,Jsp)學習Spring BootWebServletJS
- Spring-Boot快速上手Springboot
- spring-boot整合kindeditorSpringboot
- Spring-Boot整合RedisSpringbootRedis
- spring-boot啟動Springboot
- spring-boot 中使用 FastDFSSpringbootAST
- Spring-boot國際化Springboot
- spring-boot參考文章Springboot
- 【spring-boot】自定義starterSpringboot
- spring-boot 整合 spring-securitySpringboot
- spring-boot 整合 spring-sessionSpringbootSession
- Spring-Boot:5分鐘掌握SpringBoot開發Spring Boot
- spring-boot記錄sql探索SpringbootSQL
- spring-boot mybatis 連線MySQLSpringbootMyBatisMySql
- spring-boot快速入門學習筆記-整合JPA mybatis rabbitmq mongodb redisSpringboot筆記MyBatisMQMongoDBRedis
- spring-boot入門程式詳解Springboot
- spring-boot登陸過濾功能Springboot
- Spring-boot模組化程式設計Springboot程式設計
- spring-boot - 編寫自己的starterSpringboot
- spring boot學習Spring Boot
- Spring Boot 學習Spring Boot
- Spring Boot學習6:Spring Boot JDBCSpring BootJDBC
- spring boot學習(5): 程式exit code自定義Spring Boot
- Spring Boot 學習筆記(5):日誌配置Spring Boot筆記
- 使用gradle管理spring-boot專案GradleSpringboot
- spring-boot 統一異常捕獲Springboot
- 一個簡單的spring-boot例子Springboot
- spring-boot 同時配置Oracle和MySQLSpringbootOracleMySql
- Spring Boot學習(一)——Spring Boot介紹Spring Boot
- Spring boot學習(三) Spring boot整合mybatisSpring BootMyBatis
- spring-boot-admin對spring-boot專案進行監控Springboot
- [maven][spring boot] mvn spring-boot:run啟動時,指定pom檔案MavenSpring Boot
- Spring boot學習(二) Spring boot基礎配置Spring Boot
- Spring boot學習(四)Spring boot整合DruidSpring BootUI
- Spring boot學習(一)開啟Spring boot之旅Spring Boot