前言
現在有很多線上服務的驗證,我曾經就寫過一篇 如何在ASP.NET中建立OpenID, 這裡我再介紹如何使用Windows Live ID在ASP.NET應用程式中驗證使用者的身份,說穿了這也是一種特殊驗證模型,也就是說當在您的網站中使用Windows Live ID登入時,此使用者首先會重定向到Windows Live登入頁,然後通過驗證的使用者Windows Live將該使用者再重定向到您的網站,並提供一個使用者ID。
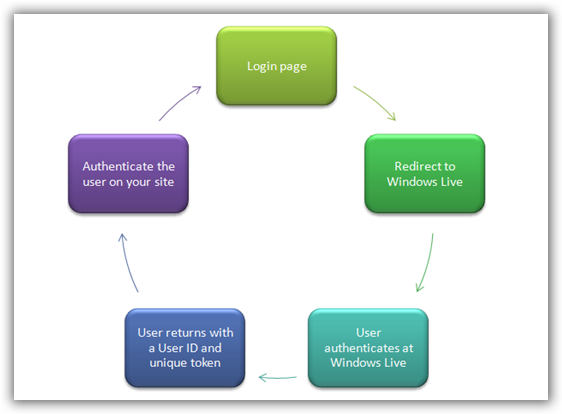
使用Windows Live ID
要開始使用的Windows Live ID ,首先你需要申請一個應用程式ID。轉到:https://msm.live.com/app/default.aspx 註冊應用程式ID,其實微軟針對此應用還有一個指南--->http://msdn.microsoft.com/en-us/library/cc287659.aspx
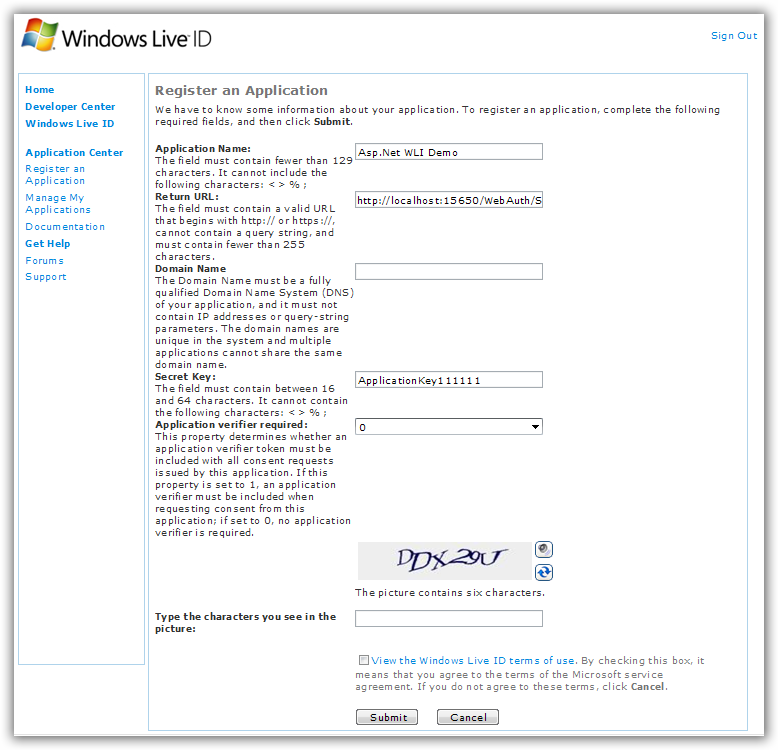
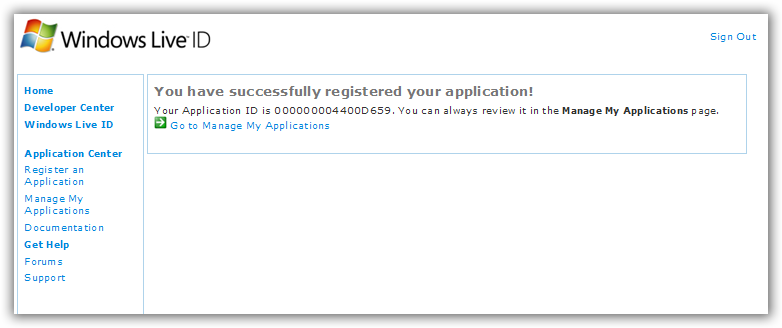
上面這個登錄檔格要填的我都填了,其中要注意的是 返回的URL,這個頁面主要是處理與 Windows Live ID的溝通,如我現在VS的啟動頁是:
http://localhost:15650/WebAuth/Sample/webauth-handler.aspx
下載並安裝Windows Live ID Web身份驗證的SDK
呵呵,老樣子,微軟已經為ASP.NET開發者已經提供了非常容易實現的示例模板。這裡下載:http://www.microsoft.com/downloads/details.aspx?FamilyId=E565FC92-D5F6-4F5F-8713-4DD1C90DE19F&displaylang=en, 準確點可以看該文:http://livesino.net/archives/302.live。預設安裝路徑在:C:\Program Files\Windows Live ID\WebAuth。
整合到您的網站
首先用Visual Studio2008或者2005建立一個Asp.Net網站,然後將安裝的示例模板中的App_Code資料夾中的WindowsLiveLogin.cs(C:\Program Files\Windows Live ID\WebAuth\Sample\App_Code\WindowsLiveLogin.cs)新增到我們的App_Code資料夾中。這裡我直接用微軟的示例,不自己新建網站了。
然後在web.config檔案中配置剛申請一個應用程式ID 000000004400D659,
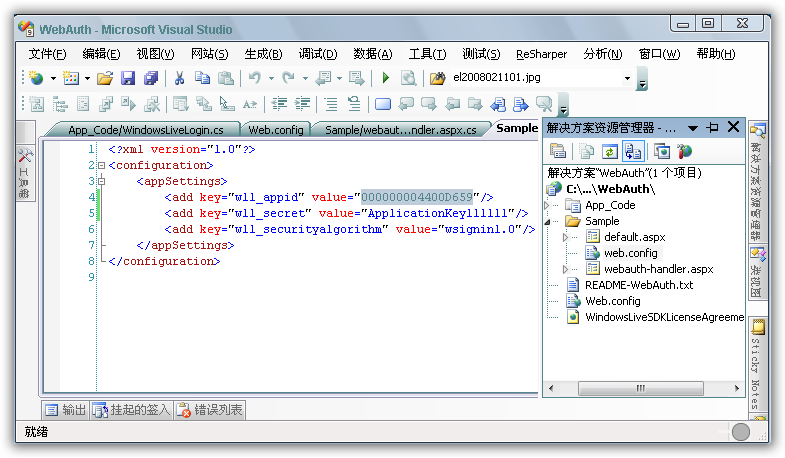
Default.aspx頁面中的HTML的程式碼如下:
Default.aspx檔案的程式碼隱藏檔案程式碼如下:
Default.aspx將作為網站的一個登入頁。 使用者點選登入按鈕,將被重定向到的Windows Live 登入頁面。 當他微軟進行身份驗證後,微軟會重新回到我們的處理程式頁上,所以,我們現在將建立一個新的aspx頁,並將其命名webauth-handler.aspx。 還記得,當我們在註冊申請Windows Live 時提供的返回URL的網頁嗎。
webauth-handler.aspx頁面將作為處理Windows Live重定向回到您的網站使用者的網頁。 而且微軟Windows Live將提供一個驗證特定值給您使用。 我們可以簡單地刪除所有的標記,下面是webauth-handler.aspx程式碼隱藏類的程式碼:
1: using System;
2: using System.Web;
3: using System.IO;
4: using WindowsLive;
5:
6: /// <summary>
7: /// This page handles the login, logout and clearcookie Web Auth
8: /// actions. When you create a Windows Live application, you must
9: /// specify the URL of this handler page.
10: /// </summary>
11: public partial class HandlerPage : System.Web.UI.Page
12: {
13: const string LoginPage = "default.aspx";
14: const string LogoutPage = LoginPage;
15: const string LoginCookie = "webauthtoken";
16: static DateTime ExpireCookie = DateTime.Now.AddYears(-10);
17: static DateTime PersistCookie = DateTime.Now.AddYears(10);
18:
19: // Initialize the WindowsLiveLogin module.
20: static WindowsLiveLogin wll = new WindowsLiveLogin(true);
21:
22: protected void Page_Load(object sender, EventArgs e)
23: {
24: HttpRequest req = HttpContext.Current.Request;
25: HttpResponse res = HttpContext.Current.Response;
26:
27: // Extract the 'action' parameter from the request, if any.
28: string action = req["action"];
29:
30: /*
31: If action is 'logout', clear the login cookie and redirect
32: to the logout page.
33:
34: If action is 'clearcookie', clear the login cookie and
35: return a GIF as response to signify success.
36:
37: By default, try to process a login. If login was
38: successful, cache the user token in a cookie and redirect
39: to the site's main page. If login failed, clear the cookie
40: and redirect to the main page.
41: */
42:
43: if (action == "logout")
44: {
45: HttpCookie loginCookie = new HttpCookie(LoginCookie);
46: loginCookie.Expires = ExpireCookie;
47: res.Cookies.Add(loginCookie);
48: res.Redirect(LogoutPage);
49: res.End();
50: }
51: else if (action == "clearcookie")
52: {
53: HttpCookie loginCookie = new HttpCookie(LoginCookie);
54: loginCookie.Expires = ExpireCookie;
55: res.Cookies.Add(loginCookie);
56:
57: string type;
58: byte[] content;
59: wll.GetClearCookieResponse(out type, out content);
60: res.ContentType = type;
61: res.OutputStream.Write(content, 0, content.Length);
62:
63: res.End();
64: }
65: else
66: {
67: WindowsLiveLogin.User user = wll.ProcessLogin(req.Form);
68:
69: HttpCookie loginCookie = new HttpCookie(LoginCookie);
70: if (user != null)
71: {
72: loginCookie.Value = user.Token;
73:
74: if (user.UsePersistentCookie)
75: {
76: loginCookie.Expires = PersistCookie;
77: }
78: }
79: else
80: {
81: loginCookie.Expires = ExpireCookie;
82: }
83:
84: res.Cookies.Add(loginCookie);
85: res.Redirect(LoginPage);
86: res.End();
87: }
88: }
89: }
第一次登入測試
當以上操作都完成後,現在應該可以使用Windows Live ID登入了,我們首頁瀏覽登入頁面Default.Aspx:
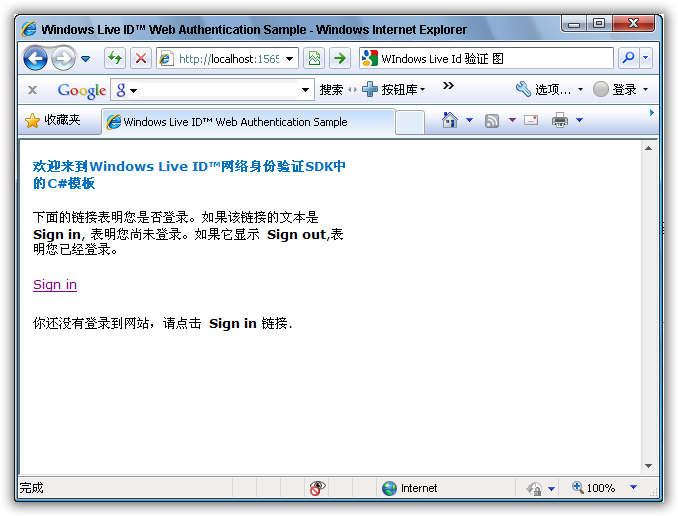
點Sign In連結後,將重定向到Windows Live的登入頁面:
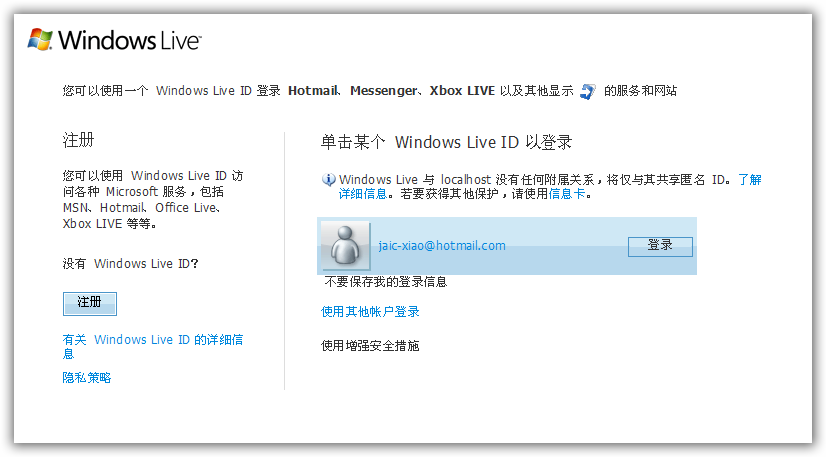
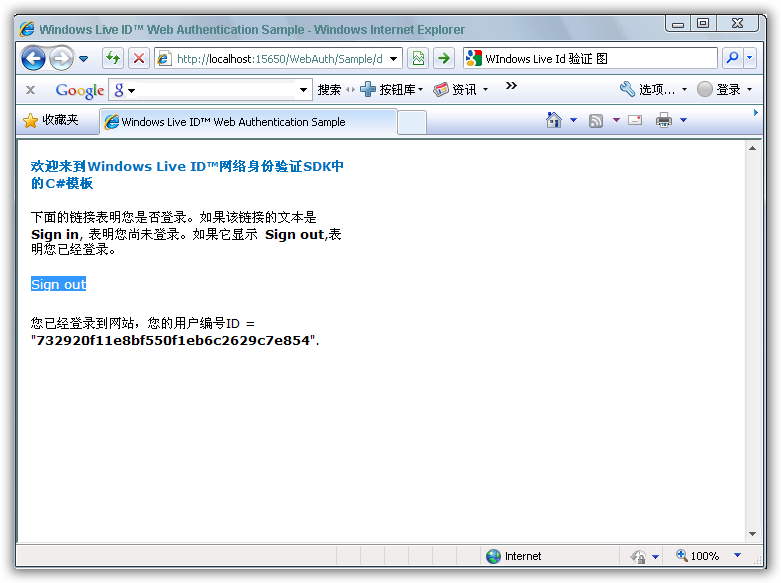
當Windows Live ID驗證通過,Widnows Live將返回到我們的登入頁面,下面這個頁面現在將顯示歡迎您的資訊和您的使用者ID :
完畢!