Spring review--動態代理和AOP程式碼的演化
客戶端程式碼,首先通過容器例項化applicationContext.xml裡面的Bean,然後呼叫add方法。
<span style="font-size:14px;"><span style="font-size:14px;">public class Client {

	public static void main(String[] args) {
		BeanFactory factory =new ClassPathXmlApplicationContext("classpath:applicationContext.xml");
		UserManager userManager =(UserManager)factory.getBean("userManager");
	 	userManager.addUser("wm", "123");
	}

}
</span></span>
SecurityHandler, 採用動態代理的時候,把具體的執行委託給了代理類進行執行。採用AOP了之後,設定切入點,觸發切入條件後,執行擴充套件操作,然後回撥,繼續執行之前的業務邏輯。
<span style="font-size:14px;"><span style="font-size:14px;">@Aspect
public class SecurityHandler  {

	//將橫切性關注點 模組化,刪除動態代理,定義Aspect
	/*private Object targetObject;
	public Object  createProxyInstance(Object targetObject){
		this.targetObject=targetObject;
		return Proxy.newProxyInstance(targetObject.getClass().getClassLoader(),
							   targetObject.getClass().getInterfaces(),
							   this);
	}

	@Override
	public Object invoke(Object proxy, Method method, Object[] args)
			throws Throwable {
		checkSecurity();

		//呼叫目標方法
		Object ret = method.invoke(targetObject , args);
		return ret;
	}*/

	//定義PointCut,PointCut的名稱為addMethod(),此方法沒有返回值和引數。該方法就是標識,不進行呼叫。
	@Pointcut("execution(* add*(..))")
	private void addMethod(){};


	/**
	 * 定義Advice,表示我們的Advice應用到哪些pointcut訂閱的JoinPoint上
	 */
	@Before("addMethod()")
	public void checkSecurity(){
		System.out.println("------checkSecurity()-------");
	}

}</span></span>
UserManager,執行真正業務邏輯,需要實現的介面。
<span style="font-size:14px;"><span style="font-size:14px;">public interface UserManager {

	public void addUser(String name,String password);
	public void delUser(int userId);
	public String findUserById(int userId);
	public void modifyUser(int userId,String userName,String password);

}
</span></span>UserManagerImpl,執行執行真正業務邏輯的具體實現。
<span style="font-size:14px;"><span style="font-size:14px;">public class UserManagerImpl implements UserManager {

	@Override
	public void addUser(String name, String password) {
		System.out.println("---UserManagerImpl.addUser()-----------");

	}

	@Override
	public void delUser(int userId) {
		System.out.println("---UserManagerImpl.delUser()-----------");

	}

	@Override
	public String findUserById(int userId) {
		System.out.println("---UserManagerImpl.findUserById()-----------");
		return "wm";
	}

	@Override
	public void modifyUser(int userId, String userName, String password) {
		System.out.println("---UserManagerImpl.modifyUser()-----------");

	}

}</span></span><span style="font-size:14px;"><span style="font-size:14px;"><?xml version="1.0" encoding="UTF-8"?>
<beans xmlns="http://www.springframework.org/schema/beans"
xmlns:xsi="http://www.w3.org/2001/XMLSchema-instance"
xmlns:aop="http://www.springframework.org/schema/aop"
xmlns:tx="http://www.springframework.org/schema/tx"
xsi:schemaLocation="http://www.springframework.org/schema/beans http://www.springframework.org/schema/beans/spring-beans-2.0.xsd
http://www.springframework.org/schema/aop http://www.springframework.org/schema/aop/spring-aop-2.0.xsd
http://www.springframework.org/schema/tx http://www.springframework.org/schema/tx/spring-tx-2.0.xsd"
default-autowire="byName">
<aop:aspectj-autoproxy/>
<bean id="userManager" class="com.bjpowernode.spring.UserManagerImpl"/>
<bean id="securityHandler" class="com.bjpowernode.spring.SecurityHandler"/>
</beans>
</span></span>UserManagerImplProxy,開始使用的代理類,代理類跟被代理者都通過實現UserManager介面。新增Aop之後,代理類就不起作用了,就註釋掉了。
<span style="font-size:14px;"><span style="font-size:14px;">/*package com.bjpowernode.spring;

public class UserManagerImplProxy implements UserManager {

	private UserManager UserManager;

	public UserManagerImplProxy(UserManager userManager) {
		this.UserManager = userManager;
	}

	@Override
	public void addUser(String name, String password) {
		// TODO Auto-generated method stub

	}

	@Override
	public void delUser(int userId) {
		// TODO Auto-generated method stub

	}

	@Override
	public String findUserById(int userId) {
		// TODO Auto-generated method stub
		return null;
	}

	@Override
	public void modifyUser(int userId, String userName, String password) {
		// TODO Auto-generated method stub

	}

}
*/</span></span>
Spring配置AOP有多種形式,上面的配置方式是annotation方式,還可以採用xml配置方式。
SecurityHandler可以簡化成如下程式碼:
<span style="font-size:14px;">public class SecurityHandler  {

	public void addAddMethod(){

	}
	public void checkSecurity(){
		System.out.println("------checkSecurity()-------");
	}

}</span>
<span style="font-size:14px;"><?xml version="1.0" encoding="UTF-8"?>
<beans xmlns="http://www.springframework.org/schema/beans"
	     xmlns:xsi="http://www.w3.org/2001/XMLSchema-instance"
	     xmlns:aop="http://www.springframework.org/schema/aop"
	     xmlns:tx="http://www.springframework.org/schema/tx"
	     xsi:schemaLocation="http://www.springframework.org/schema/beans http://www.springframework.org/schema/beans/spring-beans-2.0.xsd
           http://www.springframework.org/schema/aop http://www.springframework.org/schema/aop/spring-aop-2.0.xsd
           http://www.springframework.org/schema/tx http://www.springframework.org/schema/tx/spring-tx-2.0.xsd"
           default-autowire="byName">


	<bean id="userManager" class="com.bjpowernode.spring.UserManagerImpl"/>
	<bean id="securityHandler" class="com.bjpowernode.spring.SecurityHandler"/>

	<aop:config>
		<aop:aspect id="securityAspect" ref="securityHandler">
			<aop:pointcut id="addAddMethod" expression="execution(* add*(..))"/>
			<aop:before method="checkSecurity" pointcut-ref="addAddMethod"/>
		</aop:aspect>
	</aop:config>

</beans> </span>
Aop執行結果:
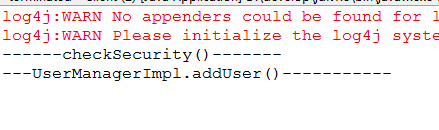
xml裡面對錶達式的配置多樣,常用的如下。某些包下面的類和某些包下面刪除和新增操作的類的Aop的配置:
<span style="font-size:14px;">execution(* com.bjpowernode.spring.*.* (..))</span><span style="font-size:14px;">execution(* com.bjpowernode.spring.*.add*(..)|| </span><span style="font-size: 14px; font-family: Arial, Helvetica, sans-serif;">com.bjpowernode.spring.*.del*(..))</span>相關文章
- spring aop原理 JDK動態代理和CGLIB動態代理SpringJDKCGLib
- Spring AOP裡的靜態代理和動態代理,你真的瞭解嘛?Spring
- Spring AOP --JDK動態代理方式SpringJDK
- 深入理解Spring AOP的動態代理Spring
- 從動態代理到Spring AOP(上)Spring
- 從動態代理到Spring AOP(中)Spring
- Java動態代理(AOP)Java
- AOP之動態代理
- AOP之靜態代理VS動態代理
- Spring原始碼-AOP(六)-AOP代理的建立Spring原始碼
- 淺析Spring中AOP的實現原理——動態代理Spring
- JAVA_動態代理AOP切面程式設計Java程式設計
- Spring AOP 自動建立代理Spring
- 淺析DispatchProxy動態代理AOP
- 死磕Spring之AOP篇 - Spring AOP自動代理(三)建立代理物件Spring物件
- 菜鳥學SSH(十四)——Spring容器AOP的實現原理——動態代理Spring
- 死磕Spring之AOP篇 - Spring AOP自動代理(一)入口Spring
- Spring 動態代理Spring
- spring動態代理Spring
- spring上 -基於註解配置bean,動態代理,AOP筆記SpringBean筆記
- 靜態代理和動態代理
- Java代理(jdk靜態代理、動態代理和cglib動態代理)JavaJDKCGLib
- Java中的靜態代理和動態代理Java
- .NET Core 實現動態代理做AOP(面向切面程式設計)程式設計
- java靜態代理和動態代理Java
- AOP - 自己寫 JDK 動態代理增強 beanJDKBean
- 死磕Spring之AOP篇 - 初識JDK、CGLIB兩種動態代理SpringJDKCGLib
- 【Spring AOP】AOP 底層實現原理 —— 動態代理類的建立(JDK、CGlib)、工廠如何加工原始物件SpringJDKCGLib物件
- 死磕Spring之AOP篇 - Spring AOP自動代理(二)篩選合適的通知器Spring
- Spring的JDK動態代理如何實現的(原始碼解析)SpringJDK原始碼
- Spring原始碼剖析5:JDK和cglib動態代理原理詳解Spring原始碼JDKCGLib
- Spring AOP代理執行解析Spring
- guava eventbus不支援spring的aop代理GuavaSpring
- Spring動態代理的生成-如何判斷是使用JDK動態代理還是CGlib代理SpringJDKCGLib
- 通過 Spring AOP 註解實現自動代理Spring
- Day67 Spring AOP(面向切面程式設計) 和代理設計模式Spring程式設計設計模式
- 你必須會的 JDK 動態代理和 CGLIB 動態代理JDKCGLib
- FastHook——巧妙利用動態代理實現非侵入式AOPASTHook