Maven構建springBoot Demo案例
一.簡介
springBoot的理念是讓你不需要在專案中進行大量的配置就能讓專案快速執行起來。使用springBoot輕易的就可以建立一個獨立執行的,基於Spring準生產級別的框架專案,而不用或者很少的Spring配置。
二.開發環境
eclipse版本:4.6.1
maven版本:3.3.3
JDK版本:1.8.0_111
SpringBoot版本:1.4.3
三.專案結構
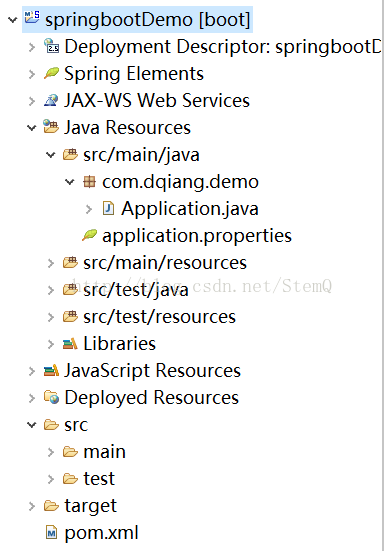
圖
四.操作步驟
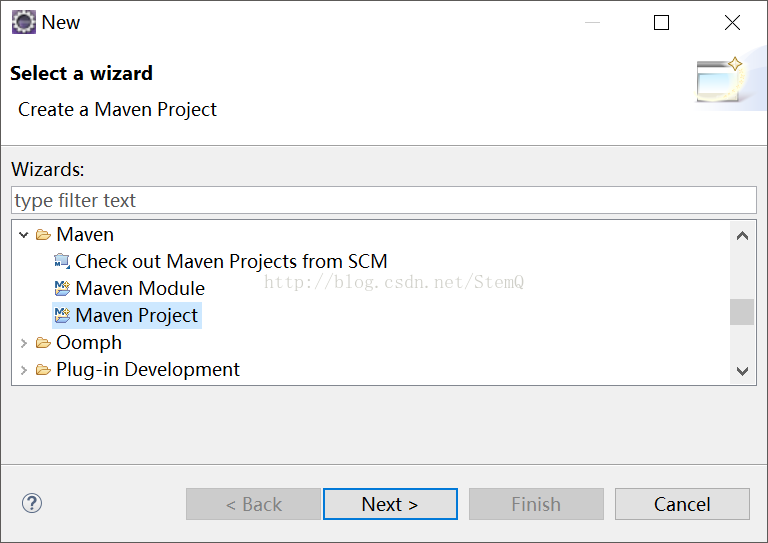
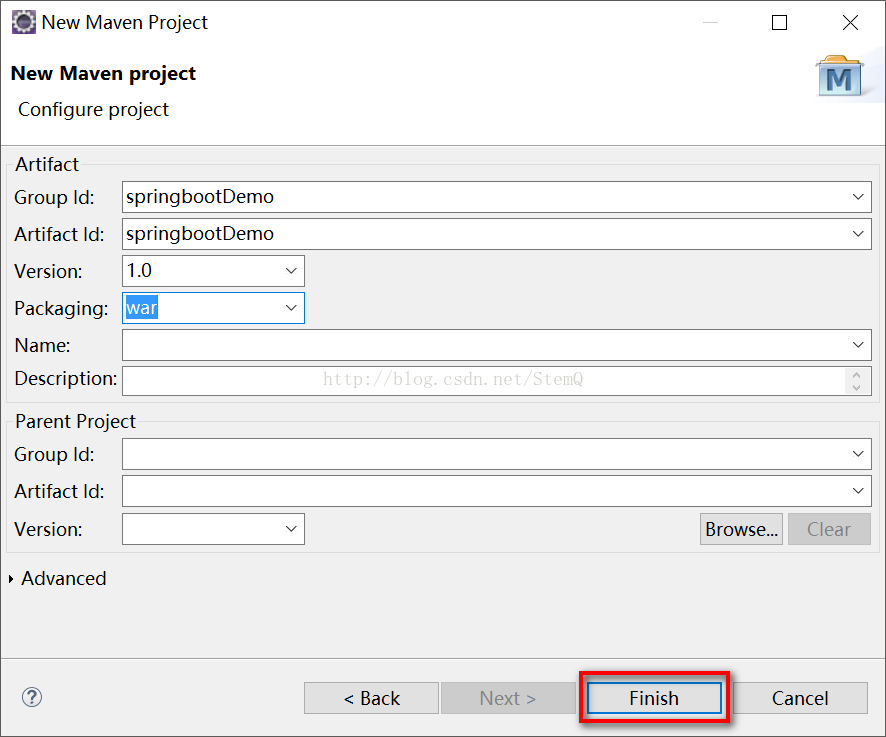
1.新建一個Maven專案
圖

圖
圖
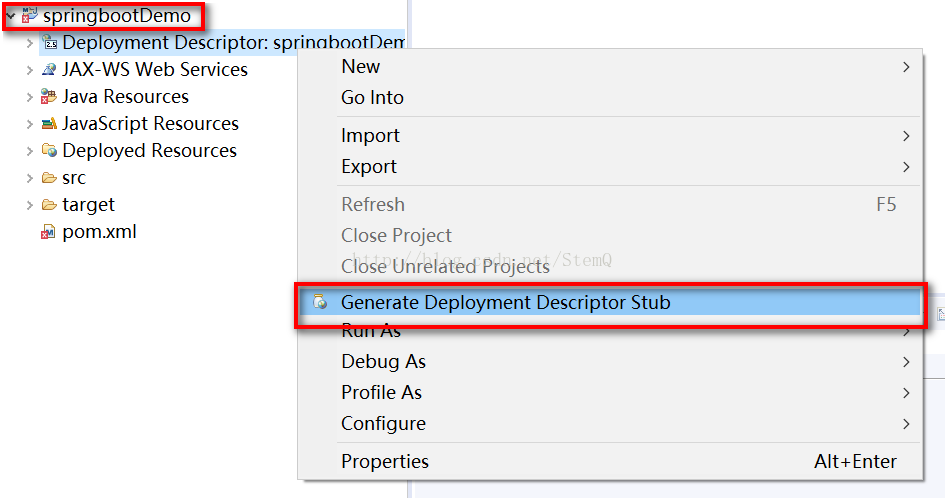
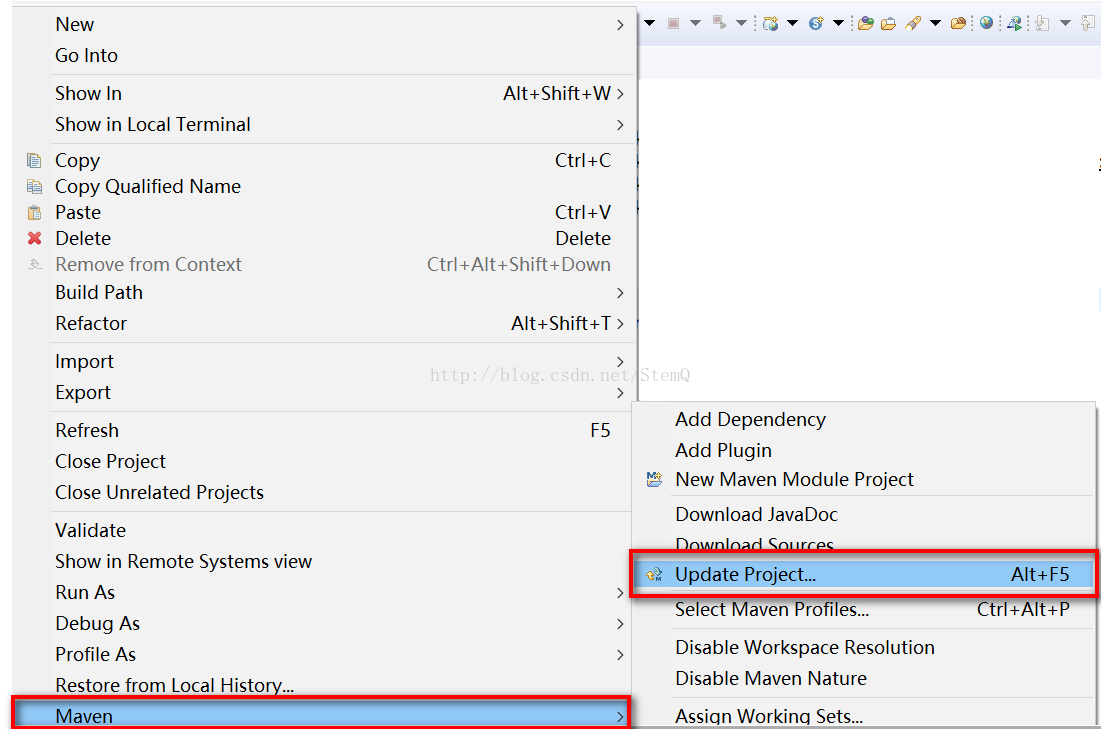
2.建立完成後,如果專案報紅色,(1).需要對專案右鍵-》屬性-》Generate Deloyment Desriptor Stub。(2).專案右鍵-》Maven-》Update Project

圖
圖
圖
五.檔案清單
專案建好後,修改以下檔案。
pom.xml
<project xmlns="http://maven.apache.org/POM/4.0.0" xmlns:xsi="http://www.w3.org/2001/XMLSchema-instance"
	xsi:schemaLocation="http://maven.apache.org/POM/4.0.0 http://maven.apache.org/xsd/maven-4.0.0.xsd">
	<modelVersion>4.0.0</modelVersion>
	<groupId>springbootDemo</groupId>
	<artifactId>springbootDemo</artifactId>
	<version>1.0</version>
	<packaging>war</packaging>
	<parent>
		<groupId>org.springframework.boot</groupId>
		<artifactId>spring-boot-starter-parent</artifactId>
		<version>1.4.3.RELEASE</version>
		<relativePath />
	</parent>

	<properties>
		<project.build.sourceEncoding>UTF-8</project.build.sourceEncoding>
		<java.version>1.8</java.version>
	</properties>

	<dependencies>
		<dependency>
			<groupId>org.springframework.boot</groupId>
			<artifactId>spring-boot-starter-web</artifactId>
		</dependency>
	</dependencies>

	<build>
		<plugins>
			<plugin>
				<groupId>org.springframework.boot</groupId>
				<artifactId>spring-boot-maven-plugin</artifactId>
			</plugin>
		</plugins>
	</build>
</project>說明:新增spring-boot-starter-web依賴,會自動新增Tomcat和Spring MVC的依賴,那麼Spring Boot會對Tomcat和Spring MVC進行自動配置。
Application.java
package com.dqiang.demo;

import org.springframework.boot.SpringApplication;
import org.springframework.boot.autoconfigure.SpringBootApplication;
import org.springframework.web.bind.annotation.RequestMapping;
import org.springframework.web.bind.annotation.RestController;

/**
 * @author StemQ
 * @version v1.0
 * Blog:http://blog.csdn.net/stemq
 * Web:www.dqiang.com
 */
@SpringBootApplication
@RestController
public class Application {
	@RequestMapping("/")
	public String greeting() {
		return "Hello World!";
	}

	public static void main(String[] args) {
		SpringApplication.run(Application.class, args);
	}
}
說明:@SpringBootApplication是Spring Boot的核心註解,也是一個組合註解。主要組合了@Configuration、@EnableAutoConfiguration、@ComponentScan。如果不使用組合註解@SpringBootApplication則可以直接使用@Configuration、@EnableAutoConfiguration、@ComponentScan。
application.properties
#tomcat\u7AEF\u53E3\u4FEE\u6539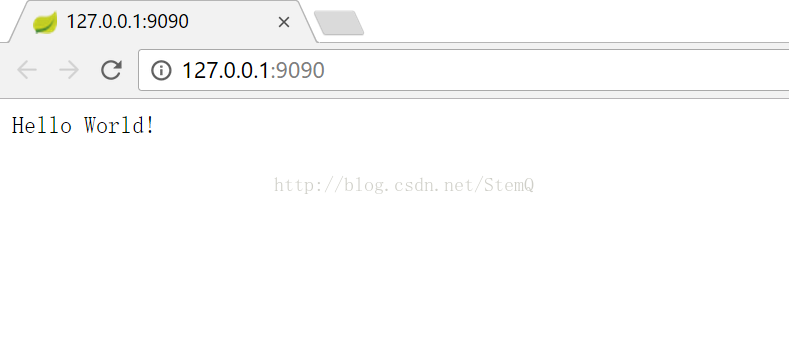
server.port=9090說明:此檔案可以不配置,預設springBoot整合的Tomcat啟動埠是8080,因為我係統有別的環境佔用8080埠,所以將專案的執行埠修改為9090
六.執行
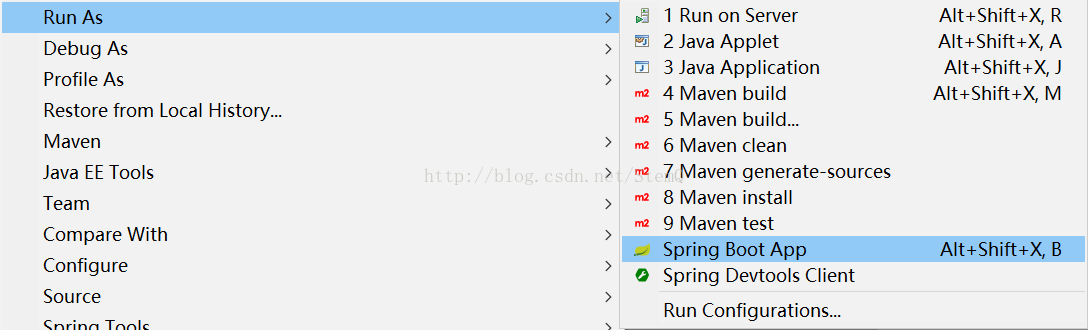
1.專案右鍵-》Run As-》Spring Boot App
圖
2.訪問
圖
七.Demo下載
相關文章
- 【SpringBoot Demo】MySQL + JPA + Hibernate + Springboot + Maven DemoSpring BootMySqlMaven
- Maven 構建 Java 專案MavenJava
- Maven構建多模組工程Maven
- Maven Web專案構建MavenWeb
- HongHu雲架構 - maven的構建架構Maven
- springboot gradle demo (使用 Gradle 構建的 Spring Boot專案)Spring BootGradle
- 使用Maven構建Java專案MavenJava
- Maven構建引入本地jar包MavenJAR
- 【Maven】構建可執行JarMavenJAR
- HelloWorld:通過demo,構建黑盒模型模型
- 構建dubbo分散式平臺-maven構建根專案分散式Maven
- maven 學習總結(三)——使用Maven構建專案Maven
- 使用Maven外掛構建SpringBoot專案,生成Docker映象push到DockerHub上MavenSpring BootDocker
- SpringBoot開發案例構建分散式日誌處理系統Spring Boot分散式
- eclipse 使用 maven 構建專案EclipseMaven
- 使用maven外掛構建docker映象MavenDocker
- 沒有JDK和Maven,用Docker也能構建Maven工程JDKMavenDocker
- maven 使用maven profile實現多環境可移植構建Maven
- 從零構建Java專案(Maven+SpringBoot+Git) #02 奧斯丁專案JavaMavenSpring BootGit
- 你竟然沒用 Maven 構建專案?Maven
- aliyun阿里雲Maven倉庫地址——加速你的maven構建阿里Maven
- maven 學習總結(八)——使用Maven構建多模組專案Maven
- SpringBoot開發案例從0到1構建分散式秒殺系統Spring Boot分散式
- springboot-多模組構建Spring Boot
- 如何構建SpringBoot MongoDb RestfulApiSpring BootMongoDBRESTAPI
- maven 學習總結(二)——Maven專案構建過程練習Maven
- 首次使用ideal構建maven專案webIdeaMavenWeb
- (十) 構建dubbo分散式平臺-maven構建ant-utils工具專案分散式Maven
- (四)構建dubbo分散式平臺-maven程式碼結構分散式Maven
- SpringBoot簡單DemoSpring Boot
- Gradle構建SpringBoot專案GradleSpring Boot
- SpringBoot淺析——專案構建Spring Boot
- Maven配置阿里雲代理加速構建專案Maven阿里
- 使用maven構建java9 service例項MavenJava
- 基於maven構建多模組化的SSM框架MavenSSM框架
- Jenkins和maven自動化構建java程式JenkinsMavenJava
- 構建dubbo分散式平臺-maven構建ant-framework核心程式碼Base封裝分散式MavenFramework封裝
- 【構建】start.sh指令碼中變數被maven profile構建過程替換指令碼變數Maven