UEFI實戰——寫一個自己的Shell命令
說明
本文在UDK2015的基礎上,寫一個Shell命令,並在Shell下執行。
UEFI下的Shell有兩個版本,一個是Shellver 1的版本,對應EdkShellPkg;另一個是Shell Ver 2的版本,對應ShellPkg。
目前UDK2015中已經沒有EdkShellPkg的原始碼了,需要另外下載。
所以本文以ShellPkg中的原始碼為基礎。
光一個Shell沒有辦法直接執行,本文將Shell依附在OVMF上,因此本文編譯使用的是OvmfPkgX64.dsc。
使用OVMF的好處是可以通過qemu來執行,另外一個好處是,OvmfPkgX64.dsc已經包含了ShellPKg.dsc,因此不需要額外做什麼操作。
關於OVMF的編譯可以參考UEFI實戰——OVMF基礎。
新增原始碼
前面已經講到,Shell的原始碼位於ShellPkg目錄下:
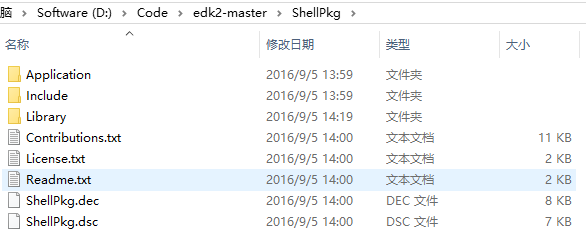
其中:
Application包含的是Shell本身,以及一些簡單的應用示例。這些應用——包括Shell本身——都可以在Shell下直接執行。
Include包含一些必須的標頭檔案。
Library包含了Shell所需的基本庫和Shell下可以執行的命令:

在Shell Ver 2中,Shell命令都包含了庫中。比如上面的UefiShellNetwork1CommandsLib,它內部就包含了ifconfig和ping兩個命令。
在Shell Ver 2中,各個命令按照功能劃分在不同的目錄下。
本文就要按照上面的形式,來建立一個自己的Lib,並在其中實現命令。
建立OemLib

這裡需要說明的是inf和uni檔案:
inf用於編譯,表示的是一個模組。
uni是一個字串的檔案,用於顯示Shell命令中的一些幫助命令或者錯誤資訊。
之後需要將inf檔案新增到ShellPkg.dsc中:

這樣才能編譯到OVMF中去。
具體的程式碼
#include "UefiShellOemCommandLib.h"

CONST CHAR16 gShellOemFileName[] = L"ShellCommand";
EFI_HANDLE gShellOemHiiHandle = NULL;

/**
  Return the file name of the help text file if not using HII.

  @return The string pointer to the file name.
**/
CONST CHAR16*
EFIAPI
ShellCommandGetManFileNameOem (
  VOID
  )
{
  return gShellOemFileName;
}

/**
  Constructor for the Shell xxx Command library.

  Install the handlers for xxx UEFI Shell command.

  @param ImageHandle            The image handle of the process.
  @param SystemTable            The EFI System Table pointer.

  @retval EFI_SUCCESS           The Shell command handlers were installed sucessfully.
  @retval EFI_UNSUPPORTED       The Shell level required was not found.
**/
EFI_STATUS
EFIAPI
ShellOemCommandLibConstructor (
  IN EFI_HANDLE        ImageHandle,
  IN EFI_SYSTEM_TABLE  *SystemTable
  )
{
  gShellOemHiiHandle = NULL;

  //
  // check our bit of the profiles mask
  //
  if ((PcdGet8 (PcdShellProfileMask) & BIT3) == 0) {
    return EFI_SUCCESS;
  }

  gShellOemHiiHandle = HiiAddPackages (
                          &gShellOemHiiGuid, gImageHandle,			// gShellOemHiiGuid需要在ShellLibHiiGuid.h和ShellPkg.dec中定義,並宣告在UefiShellOemCommandLib.inf
                          UefiShellOemCommandLibStrings, NULL		// UefiShellOemCommandLibStrings就對應到UefiShellOemCommandLib.uni
                          );
  if (gShellOemHiiHandle == NULL) {
    return EFI_DEVICE_ERROR;
  }
  //
  // Install our Shell command handler
  //
  ShellCommandRegisterCommandName (
     L"helloworld", ShellCommandRunHelloWorld, ShellCommandGetManFileNameOem, 0,
     L"helloworld", TRUE , gShellOemHiiHandle, STRING_TOKEN (STR_GET_HELP_OEM)	// STR_GET_HELP_OEM在UefiShellOemCommandLib.uni中定義
     );

  return EFI_SUCCESS;
}

/**
  Destructor for the library.  free any resources.

  @param ImageHandle            The image handle of the process.
  @param SystemTable            The EFI System Table pointer.
**/
EFI_STATUS
EFIAPI
ShellOemCommandLibDestructor (
  IN EFI_HANDLE        ImageHandle,
  IN EFI_SYSTEM_TABLE  *SystemTable
  )
{
  if (gShellOemHiiHandle != NULL) {
    HiiRemovePackages (gShellOemHiiHandle);
  }
  return EFI_SUCCESS;
}
其它檔案的程式碼略。
執行結果
執行qemu,在開啟qemu視窗後按鍵,會進行UEFI的Front Page。

選擇Boot Manager,進入Shell,執行helloworld的結果:

以上的例子可以在https://code.csdn.net/jiangwei0512/bios_git.git這個git倉庫中找到,具體的程式碼可能有些許差異。
20180614更新:
程式碼更新到了https://gitee.com/jiangwei0512/vUDK2017。
具體見ShellPkg\Library\UefiShellBeniCommandLib\目錄下的程式碼。
相關文章
- 15_編寫第一個自己的Linux的命令Linux
- 10 個實戰及面試常用 Shell 指令碼編寫面試指令碼
- 手寫一個自己的PromisePromise
- 自己寫一個ProviderIDE
- shell命令(一)
- shell前一個命令結果作為下一個命令引數
- 釋出一個自己的composer擴充套件[實戰系列]套件
- 寫一個簡單的 Linux Shell (C++)LinuxC++
- 自己寫一個mvc框架吧(一)MVC框架
- [譯] 教程 — 用 C 寫一個 Shell
- 分享一個自己寫的C# SqlHelperC#SQL
- 自己寫一個vue的loading外掛Vue
- 實戰:如何編寫一個 OpenTelemetry Extensions
- Flutter實戰(一)寫一個天氣查詢的APPFlutterAPP
- Shell——實戰
- 自己寫一個Babel外掛Babel
- 自己寫的簡單的一個部落格
- 寫給自己看的 Git 命令指北Git
- 實現一個自己的mvvmMVVM
- shell——一鍵部署服務實戰
- 自己寫一個mvc框架吧(五)MVC框架
- 自己寫一個mvc框架吧(四)MVC框架
- 自己寫一個mvc框架吧(二)MVC框架
- 自己寫一個mvc框架吧(三)MVC框架
- Flutter實戰1 --- 寫一個天氣查詢的APPFlutterAPP
- Flutter實戰2 — 寫一個天氣查詢的APPFlutterAPP
- Flutter實戰(二)寫一個天氣查詢的APPFlutterAPP
- Flutter實戰2 --- 寫一個天氣查詢的APPFlutterAPP
- Shell:如何寫一個多選選單的指令碼指令碼
- 論如何自己寫一個Python的模板語言Python
- 自己實現一個java的arraylistJava
- 關於一個前端開發常見shell命令的操作前端
- Flutter+Mobx實戰,寫一個App應用FlutterAPP
- 分享自己寫的一個 Python 的 JSON 轉 Model 庫PythonJSON
- 如何自己寫一個網路爬蟲爬蟲
- 自己動手寫一個持久層框架框架
- 自己手寫一個SpringMVC框架(簡化)SpringMVC框架
- 不如自己寫一個 schema 類庫吧
- Netty 實戰:如何編寫一個麻小俱全的 web 容器NettyWeb