cocos2d-x畫素級觸控處理
最近研究了一下畫素級的觸控處理,有時候我們用一個不規則的圖形作為一個按鈕,這個不規則的圖形是一張矩形的png圖片,很可能圖片的實際有效的顯示內容只佔整個png圖片的很小一部分,剩下的大部分都是png圖片的透明區域,我們想把這部分透明區域過濾掉,實現一個觸控到真實的內容才會有按鈕響應的效果。
剛開始試圖通過CCSprite直接獲取到紋理的畫素資訊,但是cocos2d-x並沒有給我們提供直接通過CCSprite獲取畫素資訊的介面,研究了幾個網上的Demo,發現通過使用RenderTexture重繪可以實現這一效果,下面把程式碼貼出來。
#include "HelloWorldScene.h"
#include "SimpleAudioEngine.h"

using namespace cocos2d;
using namespace CocosDenshion;

CCScene* HelloWorld::scene()
{
    // 'scene' is an autorelease object
    CCScene *scene = CCScene::create();

    // 'layer' is an autorelease object
    HelloWorld *layer = HelloWorld::create();

    // add layer as a child to scene
    scene->addChild(layer);

    // return the scene
    return scene;
}

bool HelloWorld::init()
{
    if (!CCLayer::init()){
        return false;
    }

    this->setTouchEnabled(true);

    this->m_imgMan = CCSprite::create("man.png");
    this->m_imgMan->setPosition(ccp(400, 200));
    this->addChild(this->m_imgMan, 1);

    this->m_pRenderTexture = CCRenderTexture::create(this->m_imgMan->getContentSize().width, this->m_imgMan->getContentSize().height, kCCTexture2DPixelFormat_RGBA8888);
    this->m_pRenderTexture->ignoreAnchorPointForPosition(true);
    this->m_pRenderTexture->setPosition(ccp(400, 200));
    this->m_pRenderTexture->setAnchorPoint(CCPointZero);
    this->addChild(this->m_pRenderTexture, 0, 1);


    return true;
}

bool HelloWorld::ccTouchBegan(cocos2d::CCTouch *pTouch, cocos2d::CCEvent *pEvent) {

    bool isTouched = false;

    CCPoint touchPoint = pTouch->getLocationInView();
    CCPoint glPoint = CCDirector::sharedDirector()->convertToGL(touchPoint);


    if (this->m_imgMan->boundingBox().containsPoint(glPoint)) {

        ccColor4B color4B = {0, 0, 0, 0};

        CCPoint nodePos = this->m_imgMan->convertTouchToNodeSpace(pTouch);
        unsigned int x = nodePos.x;
        unsigned int y = this->m_imgMan->getContentSize().height - nodePos.y;

        CCPoint point = this->m_imgMan->getPosition();
        //開始準備繪製
        this->m_pRenderTexture->begin();
        //繪製使用的臨時精靈,與原圖是同一圖片
        CCSprite* pTempSpr = CCSprite::createWithSpriteFrame(this->m_imgMan->displayFrame());
        pTempSpr->setPosition(ccp(pTempSpr->getContentSize().width / 2, pTempSpr->getContentSize().height / 2));
        //繪製
        pTempSpr->visit();
        //結束繪製
        this->m_pRenderTexture->end();
        //通過畫布拿到這張畫布上每個畫素點的資訊,封裝到CCImage中
        CCImage* pImage = this->m_pRenderTexture->newCCImage();
        //獲取畫素資料
        unsigned char* data_ = pImage->getData();
        unsigned int *pixel = (unsigned int *)data_;
        pixel = pixel + (y * (int)pTempSpr->getContentSize().width) * 1 + x * 1;
        //R通道
        color4B.r = *pixel & 0xff;
        //G通道
        color4B.g = (*pixel >> 8) & 0xff;
        //B通過
        color4B.b = (*pixel >> 16) & 0xff;
        //Alpha通道,我們有用的就是Alpha
        color4B.a = (*pixel >> 24) & 0xff;

        CCLOG("當前點選的點的: alpha = %d", color4B.a);

        if (color4B.a > 50) {
            isTouched = true;
        } else {
            isTouched = false;
        }

        //繪製完成後清理畫布的內容
        this->m_pRenderTexture->clear(0, 0, 0, 0);
    }


    if (this->m_pLabTips) {
        this->m_pLabTips->removeFromParentAndCleanup(true);
        this->m_pLabTips = NULL;
    }

    return isTouched;
}


void HelloWorld::ccTouchEnded(cocos2d::CCTouch *pTouch, cocos2d::CCEvent *pEvent) {

    if (this->m_pLabTips) {
        this->m_pLabTips->removeFromParentAndCleanup(true);
        this->m_pLabTips = NULL;
    }

    this->m_pLabTips = CCLabelTTF::create("點選到非透明的畫素點", "Courier", 30);
    this->m_pLabTips->setAnchorPoint(CCPointZero);
    this->m_pLabTips->setPosition(ccp(300.0f, 100.0f));
    this->m_pLabTips->setColor(ccYELLOW);
    this->addChild(this->m_pLabTips, 1);

}

void HelloWorld::registerWithTouchDispatcher() {
    CCDirector::sharedDirector()->getTouchDispatcher()->addTargetedDelegate(this, CCLayer::getTouchPriority(), false);
}
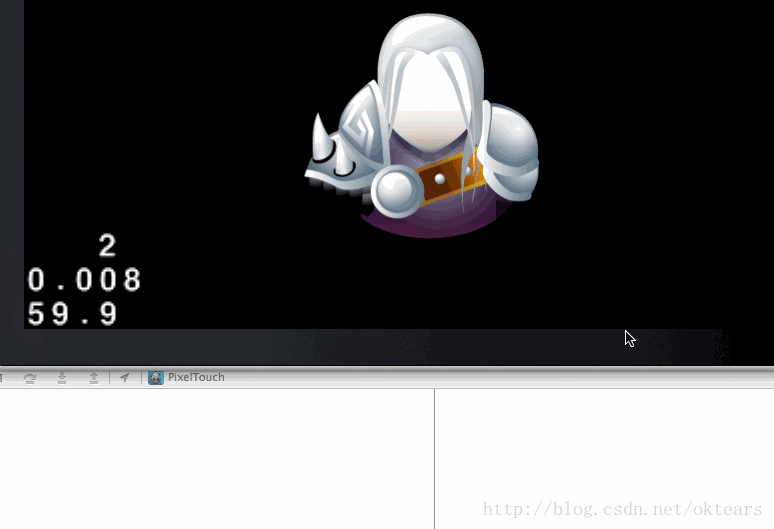
這裡我們把alpha通道的值小於50的畫素點都視為同名的點,當點選到了透明的黑色區域時,螢幕上不顯示任何文字,點選到有色區域時,觀察列印日誌資訊:
實現的原理:我通過點選的時候把圖片進行重繪,重繪的過程中,可以通過RenderTexture也就是畫布,把整個畫布上的畫素點資訊全部拿到,我讓繪製的內容和畫布的大小是一樣的,所以就能保證畫布上的每一個畫素點就是我想要繪製的圖片的畫素點,然後通過判斷畫素點的alpha通道值,來確定這個點是否是透明色的,如果是透明色則不做觸控響應。
本文由CC原創總結,如需轉載請註明出處:http://blog.csdn.net/oktears/article/details/37993871
轉自:http://blog.csdn.net/oktears/article/details/37993871
相關文章
- 影像行畫素處理
- 影象中的畫素處理
- webgl 影像處理2---影像畫素處理Web
- Android 觸控事件處理機制Android事件
- 畫素畫動畫教程:超級馬里奧動畫
- android 處理多點觸控手勢Android
- 觸控板觸控式螢幕禁止手指縮放,這麼處理才行
- Python-OpenCV 處理影象(三):影象畫素點操作PythonOpenCV
- wx-caman——基於 CamanJS 的微信小程式 Canvas 畫素級濾鏡處理庫JS微信小程式Canvas
- 裝置畫素、獨立畫素和css畫素CSS
- Python 影像處理 OpenCV (2):畫素處理與 Numpy 操作以及 Matplotlib 顯示影像PythonOpenCV
- [Python影象處理] 二.OpenCV+Numpy庫讀取與修改畫素PythonOpenCV
- canvas畫素畫板Canvas
- 掌握web開發基礎系列--物理畫素、邏輯畫素、css畫素WebCSS
- Android粒子篇之Bitmap畫素級操作Android
- 阿里達摩院首款車載AI處理器:處理200萬畫素,同步6路攝像頭阿里AI
- 什麼是物理畫素、虛擬畫素、邏輯畫素、裝置畫素,什麼又是 PPI, DPI, DPR 和 DIP
- 用 CSS 做畫素畫CSS
- 畫素畫——明暗基礎
- 裝置畫素和css畫素簡單介紹CSS
- opencv 修改畫素OpenCV
- 移動前端適配—邏輯畫素和物理畫素前端
- 如何妙筆勾檀妝:畫素級語義理解
- Android事件傳遞、多點觸控及滑動衝突的處理Android事件
- 如何在觸控式螢幕組態軟體上實時監控農村汙水處理PLC
- cocos2d-x遊戲中音樂音效的處理遊戲
- cocos2d-x學習筆記番外篇05:如何快速遮蔽觸控薦筆記
- HDU 5317 RGCDQ (素因子分解+預處理)GC
- 【風農翻譯】開始畫畫素畫 #2
- 【風農翻譯】開始畫畫素畫 #1
- 【風農翻譯】開始畫畫素畫 #3
- 【風農翻譯】開始畫畫素畫 #8
- 【風農翻譯】開始畫畫素畫 #7
- 【風農翻譯】開始畫畫素畫 #5
- 【風農翻譯】開始畫畫素畫 #4
- 【風農翻譯】開始畫畫素畫 #6
- Android觸控事件傳遞機制及viewpager巢狀fragment衝突處理Android事件Viewpager巢狀Fragment
- 華為P9支援壓感觸控 首發麒麟955處理器