原文地址:
http://www.cnblogs.com/JimmyBright/p/7307486.html
通常應用程式上線都會經過開發環境、測試環境、生產環境三個階段,三個環境通常會對應有三個不同的後端api地址或者其他的配置項。下面主要記錄怎麼把不同的配置項釋出到不同的執行環境裡邊。
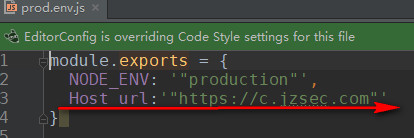
開啟vue專案找到config目錄,vue-cli生成的專案下有 dev.env.js index.js prod.env.js test.env.js四個檔案
假設三個環境對應三個不同的介面訪問的url字首。


在需要訪問介面地址的地方
alert(process.env.Host_url)

這樣還並不能取到不同環境下的Host_url
點開config下的index.js
 1 // see http://vuejs-templates.github.io/webpack for documentation.
 2 var path = require('path')
 3 module.exports = {
 4   build: {
 5     env: require('./prod.env'),
 6     index: path.resolve(__dirname, '../dist/index.html'),
 7     assetsRoot: path.resolve(__dirname, '../dist'),
 8     assetsSubDirectory: 'static',
 9     assetsPublicPath: '/',
10     productionSourceMap: true,
11     // Gzip off by default as many popular static hosts such as
12     // Surge or Netlify already gzip all static assets for you.
13     // Before setting to `true`, make sure to:
14     // npm install --save-dev compression-webpack-plugin
15     productionGzip: false,
16     productionGzipExtensions: ['js', 'css'],
17     // Run the build command with an extra argument to
18     // View the bundle analyzer report after build finishes:
19     // `npm run build --report`
20     // Set to `true` or `false` to always turn it on or off
21     bundleAnalyzerReport: process.env.npm_config_report
22   },
23   dev: {
24     env: require('./dev.env'),
25     port: 8080,
26     autoOpenBrowser: true,
27     assetsSubDirectory: 'static',
28     assetsPublicPath: '/',
29     proxyTable: {},
30     // CSS Sourcemaps off by default because relative paths are "buggy"
31     // with this option, according to the CSS-Loader README
32     // (https://github.com/webpack/css-loader#sourcemaps)
33     // In our experience, they generally work as expected,
34     // just be aware of this issue when enabling this option.
35     cssSourceMap: false
36   }
37 }
修改第五行就可以了。
例如將專案釋出到開發環境,第五行改成
 env: require('./dev.env'),
然後在控制檯執行:npm run build
dist下面的專案釋出之後就能取到開發環境的url
同理:
在測試環境釋出,就需要將第五行改成
 env: require('./test.env'),
執行:npm run build
在生產環境釋出就需要將第五行改成:
env: require('./prod.env'),
執行:npm run build

至於為什麼這樣改就可以了,需要稍微理解一下程式碼的執行順序就明白了。O(∩_∩)O