Android開發之再探底部選單TabLayout與BottomNavigation實現方式
前文中已經對主流的底部選單實現進行了詳細說明,但隨著Android版本的升級,Google又推出了更方便的實現方式,此文就來一探究竟。
一、利用TabLayout來實現
TabLayout 我在Android開發之TabLayout實現頂部選單一文中是用來做頂部選單的。確實,Google設計出來本意是做頂部選單的,但是也可以作為底部選單來使用。注意與前文比較,只需要稍微修改一下Activity的佈局:
<LinearLayout xmlns:android="http://schemas.android.com/apk/res/android"
    xmlns:app="http://schemas.android.com/apk/res-auto"
    android:layout_width="match_parent"
    android:layout_height="match_parent"
    android:orientation="vertical">


    <android.support.v4.view.ViewPager
        android:id="@+id/vp_view"
        android:layout_width="match_parent"
        android:layout_height="wrap_content"
        android:layout_weight="1" /> //佔用上面,留出位置給TabLayout

    <android.support.design.widget.TabLayout
        android:id="@+id/tabs"
        android:layout_width="match_parent"
        android:layout_height="48dp"
        android:background="#1FBCD2"
        //這兩句話一起使用 因為底部選單一般個數不多,使用這種方式,可以等分且居中
        app:tabGravity="fill"
        app:tabMode="fixed"
        //因為預設指示器在下面,不合適使用在底部選單所以直接設定其高度為0
        app:tabIndicatorHeight="0dp"
        app:tabSelectedTextColor="#FFFFFF"
        app:tabTextColor="#000000"></android.support.design.widget.TabLayout>

</LinearLayout>
其餘地方不用變化,稍微修改一下底部選單的個數就可以了,我這裡就保留了4個,重複的程式碼我就不貼了,可以參考Android開發之TabLayout實現頂部選單
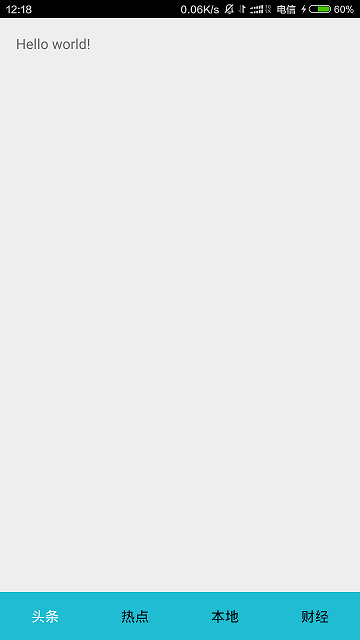
效果圖:

TabLayout Bottom.png
注意:這種方式實現起來確實比較簡單,不用再自己關聯ViewPager與底部選單的聯動。但是這種方式不太好定製指示器的位置,預設指示器在下方,按道理底部選單的時候應該在上方。我看了很多stackoverflow上面同樣的problem,試了都不太好使。如果哪位大俠能比較優雅地解決,可以私信我~~ 偷偷告訴你,在github上有個開源專案 FlycoTabLayout
二、利用Bottom navigation設計思路來實現
最近 Google 在Material Design設計規範中加入底部導航欄(Bottom navigation),真是千呼萬喚始出來啊,因為Google 給出的設計規範之前一直所提倡的是導航欄等相關要素應置於檢視頂部,蘋果提倡在底部,這次不知怎麼的,妥協了~然並卵,谷歌並沒有提供對應的控制元件來實現,用的比較多的還是github上的一個開源專案 Bottom Bar
相關文章
- Android開發之TabLayout實現頂部選單AndroidTabLayout
- Android開發之ViewPager+Fragment+FragmentTabHost實現底部選單AndroidViewpagerFragment
- Android開發之TabLayoutAndroidTabLayout
- Android UI 開發之實現底部切換標籤AndroidUI
- Android使用(TabLayout+ViewPager+fragment)與(FragmentTabHost+ViewPager+Fragment)實現底部狀態列切換AndroidTabLayoutViewpagerFragment
- 安卓開發:安卓底部選單欄的實現,RadioGroup 和Fragment安卓Fragment
- 再探C++的單件實現 (轉)C++
- android短影片開發,點選兩次實現不同點選效果的實現方式Android
- Android開發之無侵入式修改TabLayout tabIndicator寬度AndroidTabLayoutIndicator
- android 之 Spinner 下拉選單實現級聯Android
- 純css實現固定在網頁底部選單導航CSS網頁
- Android開發之GridView實現彈出式選擇器AndroidView
- Android開發之Menu:OptionMenu(選項選單)、ContextMenu(上下文選單)、SubMenu(子選單)AndroidContext
- Android底部彈窗的正確開啟方式Android
- C++ Qt開發:Tab與Tree元件實現分頁選單C++QT元件
- Android BottomNavigationView,底部導航欄的簡單實現AndroidNavigationView
- Android業務元件化之現狀分析與探討Android元件化
- UI介面微信底部(ViewPager實現Tab,左右滑動+底部點選)UIViewpager
- Android開發之FastJson概述與簡單使用AndroidASTJSON
- Android開發技巧——PagerAdapter再簡單的包AndroidAPT
- Android中Design庫之TabLayoutAndroidTabLayout
- Android混合開發之WebViewJavascriptBridge實現JS與java安全互動AndroidWebViewJavaScriptJS
- Android開發之DrawerLayout實現抽屜效果Android
- ToolBar、TabLayout、Fragment+ViewPager的開發實踐TabLayoutFragmentViewpager
- Android列表實現單選、多選、全選、取消、刪除Android
- android的左右側滑選單實現Android
- Tablayout實現導航欄TabLayout
- android Material Design 學習之十:底部Tab的兩種實現AndroidMaterial Design
- 專案實踐-MD設計-底部選單欄(一)
- Android開發之SwipeRefreshLayout實現下拉重新整理Android
- Android應用開發—TabLayout定製化Tab樣式AndroidTabLayout
- 開源低程式碼平臺開發實踐一:低程式碼開發探討與技術選型
- 滑鼠懸浮導航選單底部出現動畫橫線動畫
- Android開發之ViewPager簡單使用AndroidViewpager
- vue使用element元件實現選單的摺疊與展開Vue元件
- 語音交友app開發,點選按鈕出現彈窗的實現方式APP
- iOS開發之TabBar再次點選實現重新整理iOStabBar
- iOS開發之UITableView聯動實現城市選擇器iOSUIView