Automated Migration:
Entity framework 4.3 has introduced Automated Migration so that you don't have to process database migration manually in the code file, for each change you make in your domain classes. You just need to run a command in Package Manger Console to accomplish this.
Let's see how you can use the automated migration.
As you know, you don't have a database when you start writing your Code-First application. For example, we start writing an application with Student and Course entity classes. Before running the application, which does not have its database created yet, you have to enable automated migration by running the 'enable-migrations' command in Package Manager Console, as shown below:
First, open the package manager console from Tools → Library Package Manager → Package Manager Console and then run "enable-migrations –EnableAutomaticMigration:$true" command (make sure that the default project is the project where your context class is)
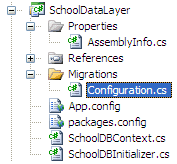
Once the command runs successfully, it creates an internal sealed Configuration class in the Migration folder in your project:
If you open this and see the class shown below, then you will find AutomaticMigrationsEnabled = true in the constructor.
internal sealed class Configuration : DbMigrationsConfiguration<SchoolDataLayer.SchoolDBContext>
    {
        public Configuration()
        {
            AutomaticMigrationsEnabled = true;
        }

        protected override void Seed(SchoolDataLayer.SchoolDBContext context)
        {
            //  This method will be called after migrating to the latest version.

            //  You can use the DbSet<T>.AddOrUpdate() helper extension method
            //  to avoid creating duplicate seed data. E.g.
            //
            //    context.People.AddOrUpdate(
            //      p => p.FullName,
            //      new Person { FullName = "Andrew Peters" },
            //      new Person { FullName = "Brice Lambson" },
            //      new Person { FullName = "Rowan Miller" }
            //    );
            //
        }
    }
You also need to set the database initializer in the context class with the new DB initialization strategy MigrateDatabaseToLatestVersion, as shown below:
public class SchoolDBContext: DbContext
{
    public SchoolDBContext(): base("SchoolDBConnectionString")
    {
        Database.SetInitializer(new MigrateDatabaseToLatestVersion<SchoolDBContext, SchoolDataLayer.Migrations.Configuration>("SchoolDBConnectionString"));

    }

    public DbSet<Student> Students { get; set; }
    public DbSet<Course> Courses { get; set; }

    protected override void OnModelCreating(DbModelBuilder modelBuilder)
    {

        base.OnModelCreating(modelBuilder);
    }

}
As you can see in the code shown above, we have passed the Configuration class name, which was created by command, along with the context class name.
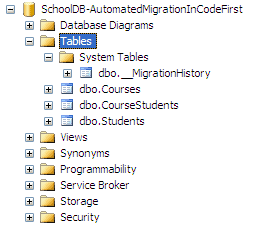
Now you are set for automated migration. It will automatically take care of migration, when you change the model. Run the application and look at the created database:
You will find that it has created one system table __MigrationHistory along with other tables. This is where automated migration maintains the history of database changes.
Now let's add a Standard entity class. Run the application again and you will see that it has automatically created a Standard table.
Wait a minute, this works if you add a new entity class or remove an entity class, but what about adding or removing properties from the entity class? To try that, let's remove the Description property from Standard class and run the application.
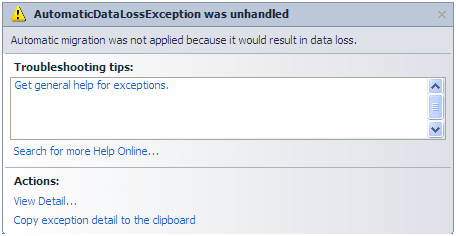
Oops…. an error message will appear:
This is because you will lose data in description column, if you remove it from the Standard class. So to handle this kind of scenario, you have to set AutomaticMigrationDataLossAllowed = true in the configuration class constructor, along with AutomaticMigrationsEnabled = true.
Note: You can find more information about parameters that we can pass to the enable-migrations command using the "get-help enable-migrations" command. For more detailed help use "get-help enable-migrations –detailed"
Thus, migration can be handled automatically.


