閱讀目錄
本文版權歸mephisto和部落格園共有,歡迎轉載,但須保留此段宣告,並給出原文連結,謝謝合作。
文章是哥(mephisto)寫的,SourceLink
序
上一篇,我們對hive的資料匯出,以及叢集Hive資料的遷移進行描述。瞭解到了基本的hive匯出操作。這裡,我們將對hive的CLI及JDBC這些實用性很強的兩個方便進行簡要的介紹。
下面我們開始介紹hive的CLI和JDBC。
Hive CLI(old CLI)
一:說明
在0.11之前只有Hive CLI,他需要安裝Hive Client才能使用。是一個重量級的命令列工具。連線的伺服器是HiveServer1。
二:語法:
usage: hive
 -d,--define <key=value>          Variable subsitution to apply to hive
                                  commands. e.g. -d A=B or --define A=B
 -e <quoted-query-string>         SQL from command line
 -f <filename>                    SQL from files
 -H,--help                        Print help information
 -h <hostname>                    Connecting to Hive Server on remote host
    --hiveconf <property=value>   Use value for given property
    --hivevar <key=value>         Variable subsitution to apply to hive
                                  commands. e.g. --hivevar A=B
 -i <filename>                    Initialization SQL file
 -p <port>                        Connecting to Hive Server on port number
 -S,--silent                      Silent mode in interactive shell
 -v,--verbose                     Verbose mode (echo executed SQL to the
                                  console)
三:官網例子1
$HIVE_HOME/bin/hive -e 'select a.col from tab1 a'四:官網例子2
執行指令碼檔案
$HIVE_HOME/bin/hive -f /home/my/hive-script.sql
Beeline CLI(new CLI)
一:介紹
為了使得CLI輕量化,後來Hive做出了Beeline和HiveServer2。Beeline是一個基於JDBC的SQLLine CLI。
二:官網例子
bin/beeline
!connect jdbc:hive2://localhost:10000 scott tiger org.apache.hive.jdbc.HiveDriver
三:實戰
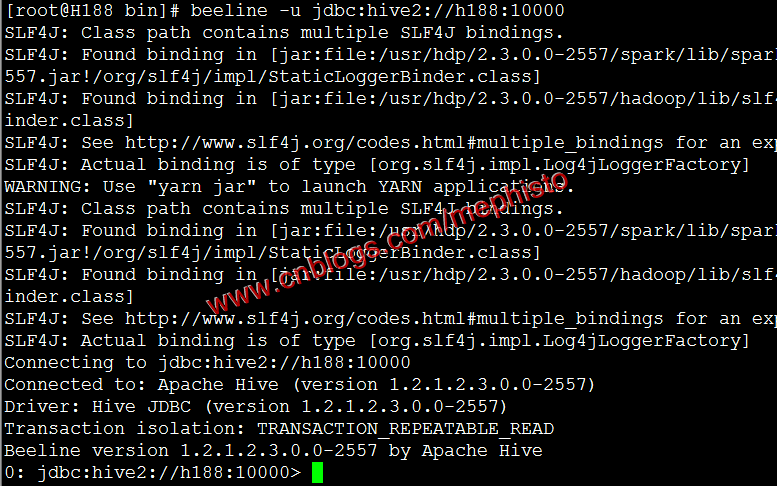
hiveserver2的預設埠是10000。
beeline -u jdbc:hive2://h188:10000
檢視有哪些表。
show tables;
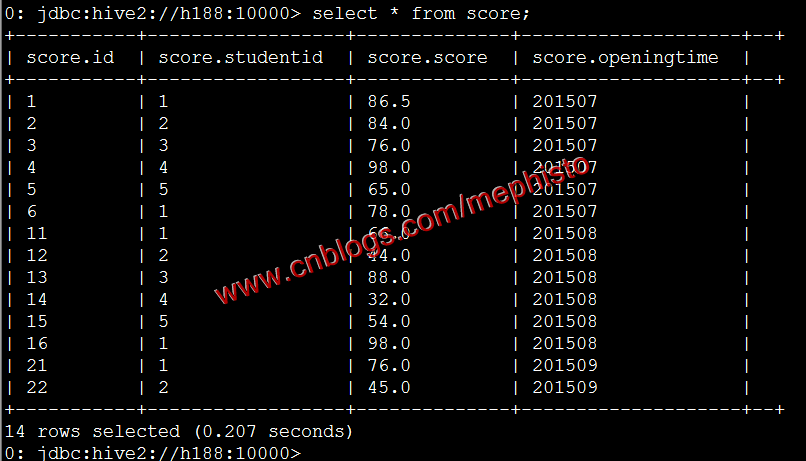
這裡可以看到我們在上面幾篇測試的時候的表score,score1,score2,我們查下score的資料。
select * from score;
JDBC
一:介紹
我們可以在程式碼中通過jdbc連線hive。這樣在實際運用場景中就很方便,很原有的非分散式計算的開發方式基本類似,具有很強的適用性。
二:新建工程
新建工程com.per.hive
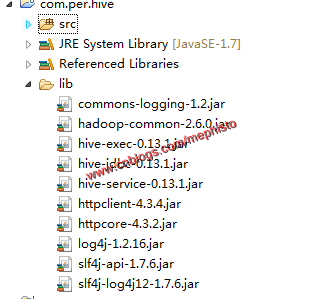
三:引入包
版本根據自己使用hadoop叢集而定
commons-logging-1.2.jar
hadoop-common-2.6.0.jar
hive-exec-0.13.1.jar
hive-jdbc-0.13.1.jar
hive-service-0.13.1.jar
httpclient-4.3.4.jar
httpcore-4.3.2.jar
log4j-1.2.16.jar
slf4j-api-1.7.6.jar
slf4j-log4j12-1.7.6.jar
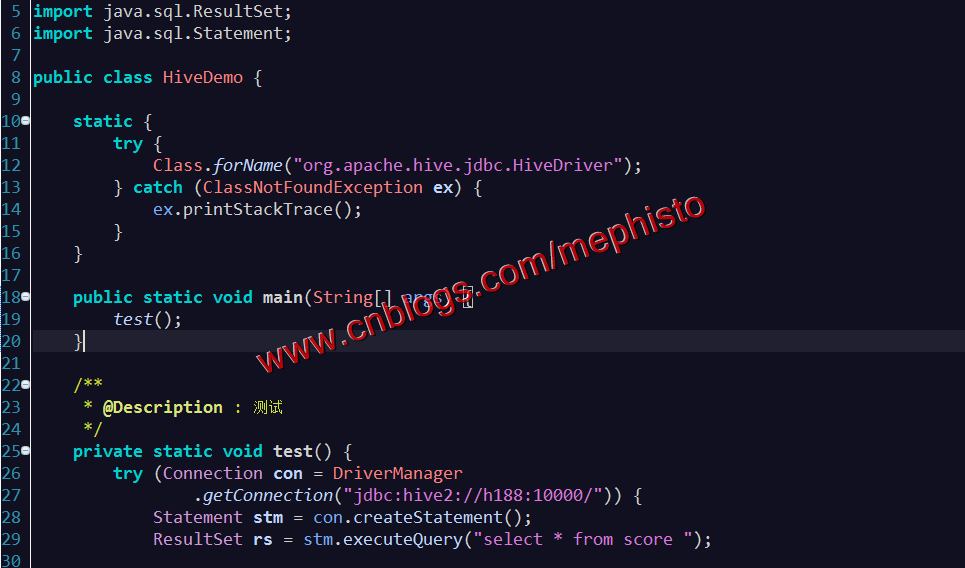
四:新增類HiveDemo
新增HiveDriver
    static {
        try {
            Class.forName("org.apache.hive.jdbc.HiveDriver");
        } catch (ClassNotFoundException ex) {
            ex.printStackTrace();
        }
    }
新增test()方法
   /**
     * @Description : 測試
     */
    private static void test() {
        try (Connection con = DriverManager
                .getConnection("jdbc:hive2://h188:10000/")) {
            Statement stm = con.createStatement();
            ResultSet rs = stm.executeQuery("select * from score ");

            while (rs.next()) {
                String info = rs.getString(1);
                info += " " + rs.getString(2);
                info += " " + rs.getString(3);
                info += " " + rs.getString(4);

                System.out.println(info);
            }

        } catch (Exception ex) {
            ex.printStackTrace();
        }
    }
呼叫
    public static void main(String[] args) {
        test();
    }
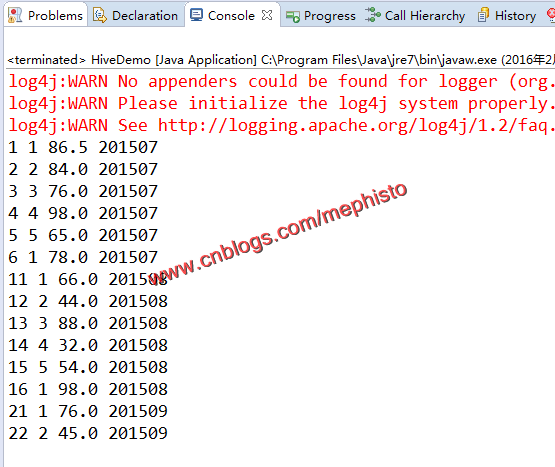
五:執行
執行,檢視結果,可以看見,程式執行的結果與我們在Beeline命令列檢視的結果一致。
這樣我們的Hive的CLI和JDBC告一段落。
--------------------------------------------------------------------
到此,本章節的內容講述完畢。
Demo下載
https://github.com/sinodzh/HadoopExample/tree/master/2016/com.per.hive
系列索引
本文版權歸mephisto和部落格園共有,歡迎轉載,但須保留此段宣告,並給出原文連結,謝謝合作。
文章是哥(mephisto)寫的,SourceLink
