物聯網(IoT)技術方興未艾,智慧手環,智慧血壓計,智慧眼鏡甚至智慧鞋墊都開始進入我們的生活,各種智慧裝置層出不窮,世界已經到了一個“人有多大膽,地有多大產”的時代,不玩兒點物聯網都不好意思和人打招呼了。
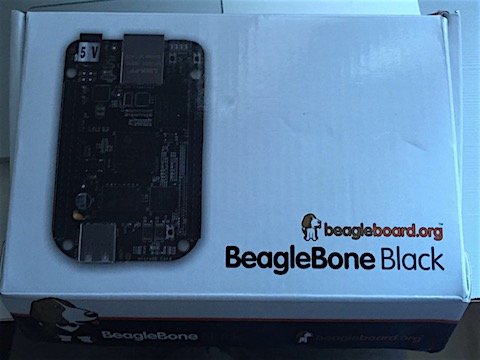
之前玩兒過開源硬體Arduino,這次再找個功能強勁的Beagle Bone Black(BBB)。 大家可能知道名氣更大的樹莓派,BBB也是類似的單片計算機開發板,就在名片大小的一塊板子上整合了計算機的大多數常見功能,在上面可以執行Linix 作業系統,通過HDMI連上顯示器,插上USB滑鼠鍵盤就是一臺完整計算機了。此外還可以配備一些外設Cape,比如觸控式螢幕、音訊擴充套件、串列埠擴充套件板等等。

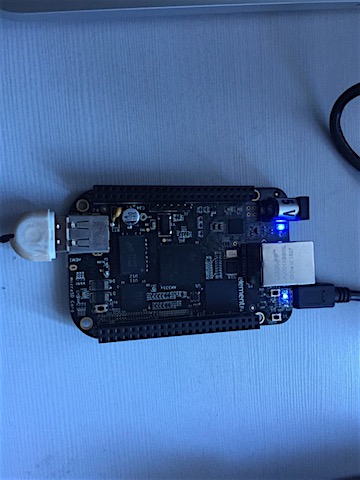
如果你感興趣,我大淘寶應該都可以買得到,我這邊沒有視訊線,只能通過SSH連線到上面了。開箱後通過資料線連線到電腦上,如果板子沒問題的話,靠近網路卡口的小LED燈會閃爍。從右到左一次編號為USR0~3. USR 0 是心跳頻率的閃爍,USR 2閃爍表示CPU活動。其他兩個 USR1 當訪問SD卡時閃爍, 我沒有安裝SD卡,所以也不會亮。USR 3當訪問 eMMC時閃爍。

設定 Beagle Bone Black
首先在本機上安裝相關驅動, 下面是驅動列表,我用的是Macbook Pro,安裝下表中下載安裝Max OS X對應的那兩個就行了,安裝很快,需要重啟一下。
| Operating System | USB Drivers | Comments |
|---|---|---|
| Windows (64-bit) | 64-bit installer |
If in doubt, try the 64-bit installer first.
|
| Windows (32-bit) | 32-bit installer | |
| Mac OS X | Network Serial |
Install both sets of drivers. |
| Linux | mkudevrule.sh | Driver installation isn't required, but you might find a few udev rules helpful. |
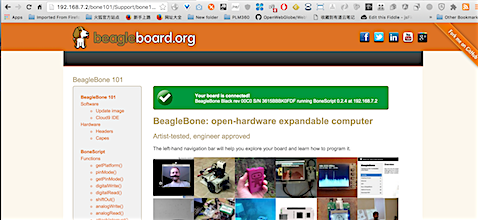
驅動安裝完畢並重啟機器後,就可以通過瀏覽器連結到BBB了。 BBB已經內建了Linux作業系統並且安裝了Node.JS,還提供了BoneScript庫,所以我們可以直接用Javascript來操縱硬體。JavaScript還能幹這事?是的,我們可以開啟Chrome瀏覽器(IE不行的),開啟地址 http://192.168.7.2, 就會進入到執行在BBB上的網站,其中介紹了BoneScript,也有簡單的例子直接可以執行,立刻就可以體驗通過JavaScript來實現前面提到的LED燈的開關等例項。

為Beagle Bone Black啟動WIFI
下面我想在BBB上執行一個我自己的node.js程式,一般都需要下載一些npm包,所以需要先讓BBB連線網際網路。BBB上已經帶了網路卡介面,不過插網線還是有些麻煩,用WIFI應該會更方便些。要放BBB訪問WIFI需要一個小硬體,我手頭剛好有一個,就是前些年炒的很火的360隨身WIFI,上圖中BBB上插的那個白色的就是。哈哈,想不到這東西當鑰匙鏈當擺設很多年,今天排上了用場。
BBB的系統預設沒沒有啟用WIFI功能,需要SSH登入上去更改一下。首先在Mac 的終端視窗中通過SSH登入到BBB。 BBB的IP地址的192.168.7.2, 其中預設安裝了Debian Linux系統,使用者名稱和密碼是 debian/temppwd
Restored session: Wed Mar 9 15:13:18 CST 2016
daniels-MacBook-Pro:webglbim danieldu$ ssh debian@192.168.7.2
The authenticity of host '192.168.7.2 (192.168.7.2)' can't be established.
ECDSA key fingerprint is SHA256:426KRGxj0OmPAef1WAl/7nVaM26q6HXd1OM6mXJA9mw.
Are you sure you want to continue connecting (yes/no)? yes
Warning: Permanently added '192.168.7.2' (ECDSA) to the list of known hosts.
Debian GNU/Linux 7
BeagleBoard.org Debian Image 2015-03-01
Support/FAQ: http://elinux.org/Beagleboard:BeagleBoneBlack_Debian
default username:password is [debian:temppwd]
debian@192.168.7.2's password:
debian@beaglebone:~$
檢視網路介面,並沒有WIFI:
debian@beaglebone:~$ ip -4 a
1: lo: <LOOPBACK,UP,LOWER_UP> mtu 65536 qdisc noqueue state UNKNOWN
inet 127.0.0.1/8 scope host lo
3: usb0: <BROADCAST,MULTICAST,UP,LOWER_UP> mtu 1500 qdisc pfifo_fast state UP qlen 1000
inet 192.168.7.2/30 brd 192.168.7.3 scope global usb0
那需要編輯 /etc/network/interface 檔案, 如WIFI Example中寫的那樣,把前面的註釋去掉,填寫我家的WIFI SSID和密碼,Ctrl+O保持後Ctrl+X退出。
debian@beaglebone:~$ sudo nano /etc/network/interfaces
# WiFi Example
auto wlan0
iface wlan0 inet dhcp
wpa-ssid “242”
wpa-psk “pwdpwd”
然後重啟服務後再看一下,WIFI已經啟用了
debian@beaglebone:~$ sudo /etc/init.d/networking restart
[ ok ] Restarting networking (via systemctl): networking.service.
debian@beaglebone:~$ ip -4 a
1: lo: <LOOPBACK,UP,LOWER_UP> mtu 65536 qdisc noqueue state UNKNOWN
inet 127.0.0.1/8 scope host lo
3: usb0: <BROADCAST,MULTICAST,UP,LOWER_UP> mtu 1500 qdisc pfifo_fast state UP qlen 1000
inet 192.168.7.2/30 brd 192.168.7.3 scope global usb0
6: wlan0: <BROADCAST,MULTICAST,UP,LOWER_UP> mtu 1500 qdisc mq state UP qlen 1000
inet 192.168.0.17/24 brd 192.168.0.255 scope global wlan0
測試一下,看看baidu能不能通,哈哈,果然可以上網了 :)
debian@beaglebone:~$ wget http://www.baidu.com
2016-03-09 07:47:14 http://www.baidu.com/
Resolving www.baidu.com (www.baidu.com)… 14.215.177.38, 14.215.177.37
Connecting to www.baidu.com (www.baidu.com)|14.215.177.38|:80… connected.
HTTP request sent, awaiting response… 200 OK
Length: unspecified [text/html]
Saving to: `index.html'
[ <=> ] 98,181 1.67K/s in 11s
2016-03-09 07:47:26 (8.92 KB/s) - `index.html' saved [98181]
執行node.js 程式
下來可以在建立一個簡單的node.js 應用程式,讓它執行在BBB上。BBB上預設的node.js版本是0.10
debian@beaglebone:~$ node —version
v0.10.29
debian@beaglebone:~$ npm —version
1.4.21
下面先建立一個最簡單的node.js程式試試看:
debian@beaglebone:~$ mkdir helloBBB
debian@beaglebone:~$ cd helloBBB/
debian@beaglebone:~/helloBBB$ npm init
This utility will walk you through creating a package.json file.
It only covers the most common items, and tries to guess sane defaults.
See `npm help json` for definitive documentation on these fields
and exactly what they do.
Use `npm install <pkg> —save` afterwards to install a package and
save it as a dependency in the package.json file.
Press ^C at any time to quit.
name: (helloBBB)
version: (0.0.0)
description: simple node.js app
entry point: (index.js)
test command:
git repository:
keywords:
author: Daniel Du
license: (ISC) MIT
About to write to /home/debian/helloBBB/package.json:
{
“name”: “helloBBB”,
“version”: “0.0.0”,
“description”: “simple node.js app “,
“main”: “index.js”,
“dependencies”: {
“express”: “^4.13.4”
},
“devDependencies”: {},
“scripts”: {
“test”: “echo "Error: no test specified" && exit 1”
},
“author”: “Daniel Du”,
“license”: “MIT”
}
Is this ok? (yes)
debian@beaglebone:~/helloBBB$ ls
node_modules package.json
debian@beaglebone:~/helloBBB$ nano index.js
用nano 編輯器建立index.js, 檔案,建立一個最簡單的express web應用。為了防止衝突,我把埠改成了8000:
var express = require('express');
var app = express();

app.get('/', function (req, res) {
  res.send('Hello World! This node.js application running from Beagle Bone Black!');
});

app.listen(8000, function () {
  console.log('Example app listening on port 8000!');
});
然後執行它:
debian@beaglebone:~/helloBBB$ ls
index.js node_modules package.son
debian@beaglebone:~/helloBBB$ npm install
debian@beaglebone:~/helloBBB$ node index.js
回到Mac上,開啟瀏覽器,輸入 http://192.168.7.2:8000, 哈哈, 成功! 第一個簡單的node.js 程式就在BBB上跑起來了。
