【萬里征程——Windows App開發】動態磁貼
動態磁貼是什麼,相信大家用了這麼久的Windows 8/8.1/10早就非常瞭解了吧。
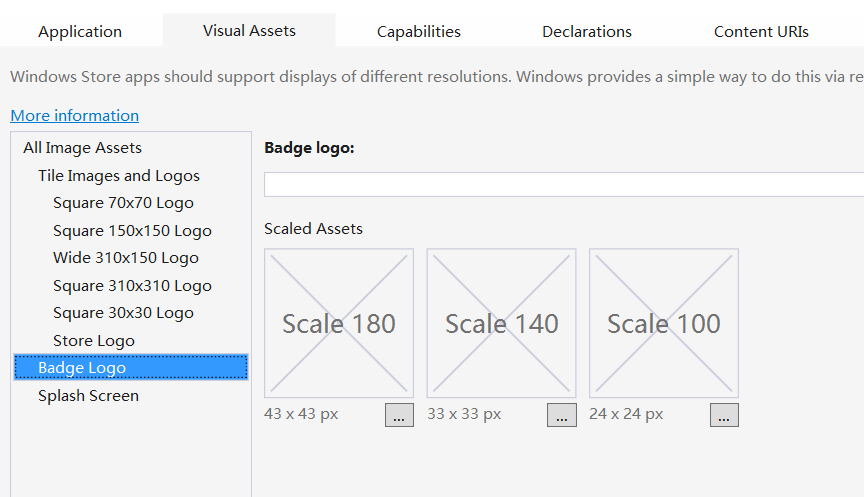
像什麼小磁貼、中磁貼、寬磁貼、大磁貼,還有這裡的應用商店Logo等,大家在下面根據不同的解析度選擇合適的圖片就好啦。
下面來做一個更新磁貼頁面的功能,這是頁面XML部分。
<StackPanel Margin="12">
      <StackPanel Orientation="Horizontal">
          <TextBlock FontSize="28" Text="選擇模板:" VerticalAlignment="Center"/>
          <ComboBox x:Name="comboBoxTile"  Width="400" SelectionChanged="comboBoxTile_SelectionChanged"/>
      </StackPanel>
      <TextBox x:Name="textBoxXML" TextWrapping="Wrap" FontSize="22" Header="XML文件" Width="420" Height="320" HorizontalAlignment="Left" Margin="12"/>
      <Button Name="btnTile"  Content="更新磁貼" Click="btnTile_Click" Style="{StaticResource StyleToastButton}"/>
</StackPanel>
在後臺程式碼的Main函式中,獲取TileTemplateType列舉並繫結到ComboBox上。
var itemsTile = Enum.GetNames(typeof(TileTemplateType));
this.comboBoxTile.ItemsSource = itemsTile;
下面的程式碼和前面的Toast真的非常類似,所以我才把這兩節連在一起來寫了。Button按鈕的Click事件中,和之前一樣建一個XML,然後載入到TileNotification類的例項中。最後就是TileUpdateManager類,也就是磁貼更新。
private void btnTile_Click(object sender, RoutedEventArgs e)
{
    if (this.textBoxXML.Text == "")
          return;
    XmlDocument xdoc = new XmlDocument();
    xdoc.LoadXml(this.textBoxXML.Text);
    TileNotification tileNotifi = new TileNotification(xdoc);
    TileUpdateManager.CreateTileUpdaterForApplication().Update(tileNotifi);
}

private void comboBoxTile_SelectionChanged(object sender, SelectionChangedEventArgs e)
{
    TileTemplateType tileTemplate = (TileTemplateType)Enum.Parse(typeof(TileTemplateType),
        this.comboBoxTile.SelectedItem as string);
    XmlDocument xdoc = TileUpdateManager.GetTemplateContent(tileTemplate);
    this.textBoxXML.Text = xdoc.GetXml();
}
當然了,如果你的APP不滿足於一個磁貼,你也可以建立第二個磁貼喲!
依舊和Toast通知的XML類似,它也有好多屬性的……
Arguments:使用該字串引數在通過次要磁貼啟動應用程式時會傳遞給Application類的OnLaunched方法,這樣一來應用程式就可以根據傳入的引數來執行特定的操作。
BackgroundColor:設定磁貼的背景色。
DisplayName和ShortName:設定顯示在磁貼上的文字。
Logo等:設定磁貼的圖示,用Uri。
ForegroundText:磁貼上文字的顏色,可用的選項有深色、淺色等。
TileID:設定磁貼的唯一標識ID,建立新磁貼前用SecondaryTile.Exists判斷是否已經存在。
在新增第二磁貼的Button的Click事件中:
private async void btnCreateTile(object sender, RoutedEventArgs e)
{
    if(SecondaryTile.Exists(textTileID.Text))
    {
        textBlockMsg.Text="該ID磁貼已經存在";
        return ;
    }
    Uri uriImg=new Uri("ms-appx:///Assests/uriImg.png");
    ……
    ……
    // 建立第二磁貼
    SecondaryTile secTile=new SecondaryTile();
    this.Tag=secTile;
    secTile.DisplayName=textBlockDisplayName.Text;
    secTile.TileID=textBlockID.Text;
    secTile.Arguments="second"; // 在後面有用到
    // 設定圖示
    secTile.VisualElements.BackgroundColor=Windows.UI.Colors.Gold;
    ……
    ……
    bool r=await secTile.RequestCreateAsync();
    textBlockMsg.Text=r == true ?"磁貼建立成功啦.":"磁貼建立失敗了哎.";  // 返回測試結果
如果希望點選第二磁貼導航到特定的頁面,就需要重寫該頁面的OnNavigatedTo方法。
preteced async override void OnNavigatedTo(NavigationEventArgs e)
{
    if(e.Parameter is Windows.ApplicationModel.Activation.LaunchActivatedEventArgs)
    {
        var arg=e.Parameter as Windows.ApplicationModel.Activation.LaunchActivateEventArgs;
        ……
    }
}

if(rootFrame.Content==null)
{
    if(e.Arguments=="second")
        rootFrame.Navigate(typeof(OtherPage),e);
    else
        rootFrame.Navigate(typeof(MainPage));
}
這裡的引數”second”就是上面設定那個Arguments哦,它的作用就在於這裡呢。
感謝您的訪問,希望對您有所幫助。 歡迎大家關注、收藏以及評論。
為使本文得到斧正和提問,轉載請註明出處:
http://blog.csdn.net/nomasp
相關文章
- 【萬里征程——Windows App開發】如何使用貼上板WindowsAPP
- 【萬里征程——Windows App開發】動畫1WindowsAPP動畫
- 【萬里征程——Windows App開發】開發準備WindowsAPP
- 【萬里征程——Windows App開發】應用欄WindowsAPP
- 【萬里征程——Windows App開發】使用Toast通知WindowsAPPAST
- 【萬里征程——Windows App開發】繪製圖形WindowsAPP
- 【萬里征程——Windows App開發】畫筆和影象WindowsAPP
- 【萬里征程——Windows App開發】補充:JSONWindowsAPPJSON
- 【萬里征程——Windows App開發】使用華麗麗的字型WindowsAPP
- 【萬里征程——Windows App開發】DatePicker&TimepickerWindowsAPP
- 【萬里征程——Windows App開發】ListView&GridView之分組WindowsAPPView
- 【萬里征程——Windows App開發】SemanticZoom檢視切換WindowsAPPOOM
- 【萬里征程——Windows App開發】控制元件大集合1WindowsAPP控制元件
- 【萬里征程——Windows App開發】控制元件大集合2WindowsAPP控制元件
- 【萬里征程——Windows App開發】在應用中整合搜尋WindowsAPP
- 【萬里征程——Windows App開發】DatePickerFlyout、TimePickerFlyout的使用WindowsAPP
- 【萬里征程——Windows App開發】頁面佈局和基本導航WindowsAPP
- 【萬里征程——Windows App開發】編輯文字及鍵盤輸入WindowsAPP
- 【萬里征程——Windows App開發】ListView&GridView之新增資料WindowsAPPView
- 【萬里征程——Windows App開發】應用設定和應用幫助WindowsAPP
- 【萬里征程——Windows App開發】用浮出控制元件做預覽效果WindowsAPP控制元件
- 【萬里征程——Windows App開發】檔案&資料——檔案選取器WindowsAPP
- 【萬里征程——Windows App開發】檔案&資料——寫入與讀取WindowsAPP
- 【萬里征程——Windows App開發】設定共享(共享源和共享目標)WindowsAPP
- 【萬里征程——Windows App開發】檔案&資料——獲取檔案屬性WindowsAPP
- 【萬里征程——Windows App開發】如何儲存、讀取、刪除應用資料WindowsAPP
- 【萬里征程——Windows App開發】檔案&資料——讀取檔案/資料夾名WindowsAPP
- 【萬里征程——Windows App開發】資料繫結——簡單示例、更改通知、資料轉換WindowsAPP
- 【萬里征程——Windows App開發】如何在多個頁面間讀取/儲存檔案【草稿】WindowsAPP
- win10動態磁貼如何設定_win10設定動態磁貼的步驟Win10
- 動態磁貼 與 觸控應用
- windows10系統下動態磁貼不更新的解決方法Windows
- Windows10系統開始選單不顯示動態磁貼資訊的設定方法Windows
- Win8動態磁貼圖片怎麼清除?
- Win10系統關閉動態磁貼後重新開啟動態顯示的方法Win10
- win10日曆磁貼不顯示動態瞭如何解決_win10日曆動態磁貼不動了怎麼辦Win10
- WIN10動態磁貼不顯示內容怎麼設定 WIN10設定動態磁貼不顯示內容方法Win10
- win10系統下怎麼設定動態磁貼透明Win10